Compaq ML350 Instructions for installing Microsoft Windows Small Business Serv - Page 5
Installation process for supported ProLiant ML300 series, servers - review
 |
UPC - 613326311370
View all Compaq ML350 manuals
Add to My Manuals
Save this manual to your list of manuals |
Page 5 highlights
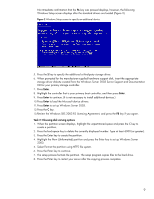
Installation process for supported ProLiant ML300 series servers Windows SBS 2003 R2 is installed onto a supported ProLiant ML300 series server using SmartStart. To install Windows SBS 2003 R2, complete the steps outlined in the following two sections: • Part 1-Installing the Window SBS 2003 R2 with the PSP • Part 2-Installing and configuring a modem. Part 1: Installing Windows SBS 2003 R2 with SmartStart This section guides you through the SmartStart Assisted Install Path to install Windows SBS 2003 or Windows SBS 2003 R2 onto a supported ProLiant ML300 series server. The following instructions are applicable for both Windows SBS 2003 base media and for Windows SBS 2003 R2 media. The OS installed is dependent upon the OS media inserted into the CD-ROM drive in Step 11. 1. Insert the SmartStart CD into the CD-ROM drive and power on the server. NOTE: SmartStart 7.50 does not support Assisted Installation of Windows SBS 2003 R2. Customers may use the SmartStart 7.50 Assisted Installation of Windows SBS 2003 R2; however, the existing Windows SBS 2003 SP1 OS selection must be chosen. A future release of SmartStart will provide an Assisted Installation path option for Windows SBS 2003 R2. NOTE: A SmartStart CD ships with ProLiant 300 series servers. A later version of the SmartStart CD image may be downloaded at: www.hp.com/servers/smartstart. 2. Select the language to use during the SmartStart process by clicking the appropriate radio button. Also, select the keyboard language to be used with this system by choosing the appropriate language from the drop-down menu. Then, click the Continue button. 3. Review the Licensing Agreement, and click the Agree button if you agree. 4. Click the Deploy Server button, and click the Continue button. 5. On the "Server Deployment - Hardware Configuration" screen, there are options available that allow for the configuration of additional hardware. For instance, if the server contains a logical drive, you may choose to launch the ACU to perform the configuration. To accept the default hardware configuration, click the Continue button. 6. Select the specific OS version by expanding the tree lists. Expand the Microsoft Windows 2003 list, click the Microsoft Windows 2003 Small Business Server entry to select it, and click the Continue button. 7. Select the Boot Partition size, and click the Continue button. 8. Enter the OS Configuration Information in the window boxes, and click the Continue button. 5
-
 1
1 -
 2
2 -
 3
3 -
 4
4 -
 5
5 -
 6
6 -
 7
7 -
 8
8 -
 9
9 -
 10
10 -
 11
11 -
12
-
13
-
14
-
15
 |
 |
