Craftsman 11218 Operation Manual - Page 9
OPERATION cont.
 |
View all Craftsman 11218 manuals
Add to My Manuals
Save this manual to your list of manuals |
Page 9 highlights
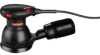
OPERATION cont. USING YOUR SANDER cont. ! CAUTION: To ensure proper brake operation after extended use, periodically check its operation by removing the sanding disc and running the sander without load (off the workpiece). The backing pad should not take longer than 6 seconds to stop. If it takes longer than 6 seconds to stop, then brake should be replaced. NOTE: The brake is available and can be purchased at the nearest Sears Parts and Repair Center. SANDING TIPS 1. DO NOT force the sander. The weight of the sander supplies adequate pressure on the workpiece. Let the sander and the sandpaper's grit do the work. • Applying additional pressure will only slow down the motor, wear the sandpaper out faster and reduce the sander's orbital speed. • Excessive pressure will overload the motor and cause possible damage to the sander from the motor overheating. • Excessive pressure will also result in a poor quality finish. 2. Any existing finish or resin on wood may soften from the heat of the friction and cause the sandpaper to load-up faster. 3. Inspect sandpaper frequently and change paper when grit is worn and not able to perform properly. 4. DO NOT sand in one spot for too long a time because the sander's rapid action may remove too much material and make the surface uneven. SELECTING THE RIGHT SANDPAPER Selecting the correct grit and type of sandpaper is an extremely important decision that will allow you to achieve the best quality sanding finish. 1. Aluminum oxide, silicon carbide and other synthetic abrasives are best for power sanding. 2. Natural abrasives such as flint and garnet are too soft for economical use in power sanding. 3. Coarse grit will remove the most material and finer grit will give you the best finish in all sanding operations. 4. The condition of the surface to be sanded will determine which grit will do the job. 5. If the surface is rough: • Start with a coarse grit and sand until the surface is uniform. • Then use medium to remove any scratches left by the coarse grit. • Then use a finer grit for finishing the surface. NOTE: ALWAYS continue sanding with each grit until the surface is uniform. NOTE: DO NOT use the sander without sandpaper. This will damage the cushion. ! WARNING: DO NOT wear loose clothing or jewelry when operating sander. They could get caught in moving parts, causing serious injury. Keep head away from sander and sanding area. Hair could be drawn into sander, causing serious injury. 18 OPERATION cont. ! WARNING: Empty dust bag before storage to help prevent possible fire hazard, especially when resin coating or linseed oil finishes have been sanded. NOTE: Empty dust bag frequently when sanding so dust collection system works properly. ORBITAL MOTION (see Fig. 9) As shown in Figure 9, the orbit of the sander is 1/16-in. in diameter so the sandpaper moves in tiny circles at very high speed, allowing the sander to move easily. This orbital action duplicates a "hand sanding" motion for more aggressive sanding as you push the sander forward. This powerful orbital action is ideal for heavy-duty sanding applications, such as: 1. Removing old finishes Fig. 9 2. Smoothing rough wood 3. Sanding stock down to required dimensions 4. Finishing surfaces that are to be painted. 1/16-in Orbital Diameter FLUSH SANDING (See Fig. 10) Flush sanding can be performed with the front edge of this sander. Upon completion of sanding operation, turn sander off and wait until sanding disc comes to a complete stop before removing from workpiece. Fig. 10 34 19 27675 2/11/08
-
 1
1 -
2
-
3
-
 4
4 -
 5
5 -
 6
6 -
 7
7 -
 8
8 -
 9
9 -
 10
10 -
 11
11 -
 12
12 -
 13
13
 |
 |
