Craftsman 21609 Operation Manual - Page 14
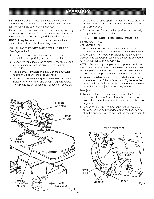
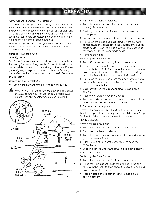
enough, thesawisbeingmounted, to,andthewashersandnuts., NOTE:Ht, maybenecessary, to countersink,
 |
View all Craftsman 21609 manuals
Add to My Manuals
Save this manual to your list of manuals |
Page 14 highlights
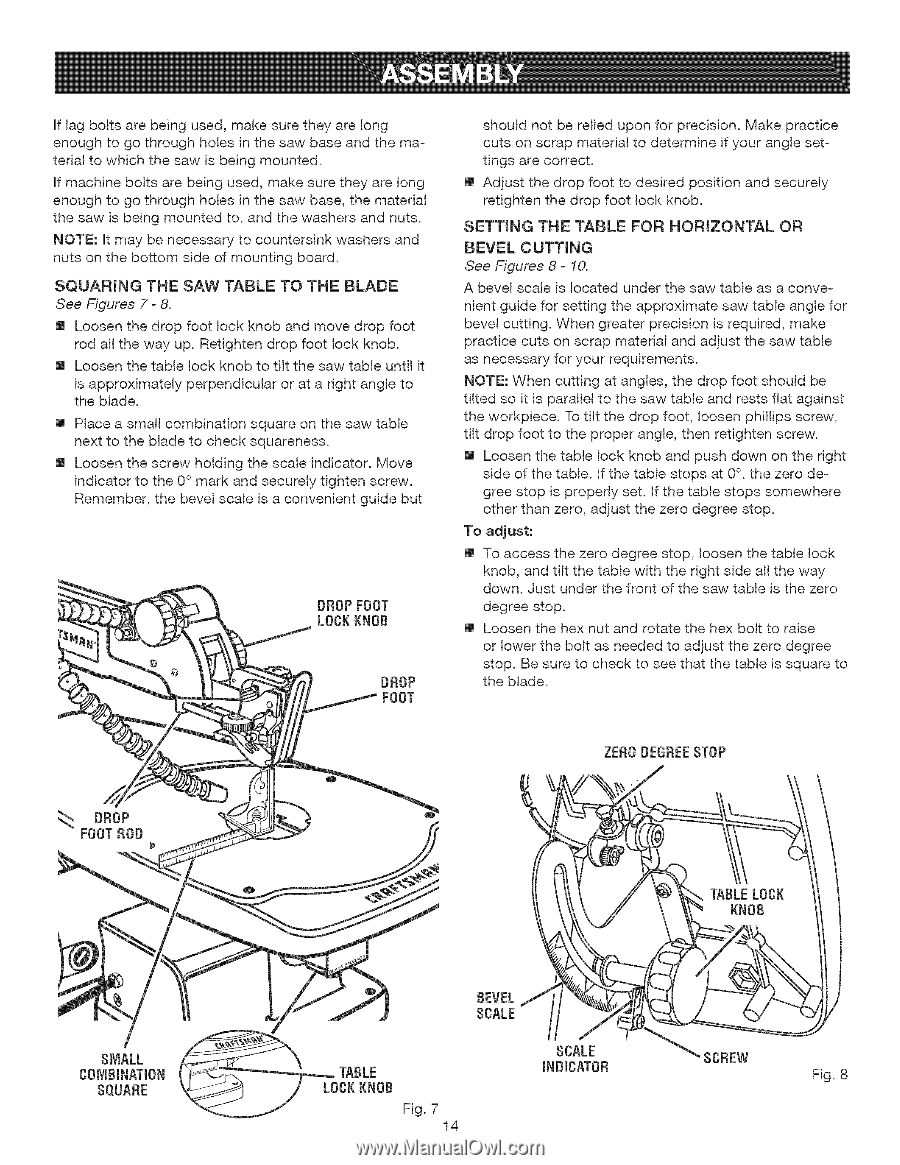
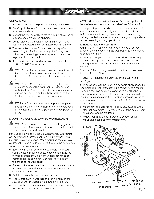
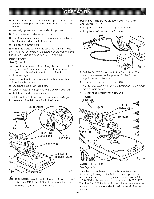
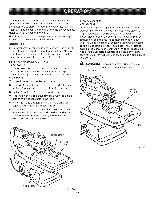
Htfagboltsarebeingused,makesuretheyarelong enoughto gothroughholesinthesawbaseandthematerialto whichthesawis beingmounted. Hmf achineboltsarebeingused,makesuretheyarelong enoughto gothroughholesinthesawbase,thematerial thesawis beingmountedto, andthe washersandnuts. NOTE:Hmt aybenecessartyo countersinwk ashersand nutsonthebottomsideof mountingboard. SQUARINGTHESAWTABLETO THE BLADE See Figures 7 - 8. [] Loosen the drop foot lock knob and move drop foot rod all the way up. Retighten drop foot lock knob. [] Loosen the table lock knob to tilt the saw table until it is approximately perpendicular or at a right angle to the blade. [] Place a small combination square on the saw table next to the blade to check squareness. [] Loosen the screw holding the scale indicator. Move indicator to the 0 ° mark and securely tighten screw. Remember, the bevel scale is a convenient guide but DROPFOOT LOCK KNOB DROP should not be relied upon for precision. Make practice cuts on scrap material to determine if your angle settings are correct. [] Adjust the drop foot to desired position and securely retighten the drop foot lock knob. SETTING THE TABLE FOR HORJZONYAL OR BEVEL CUTTING See Figures 8 - 10. A bevel scale is located under the saw table as a convenient guide for setting the approximate saw table angle for bevel cutting. When greater precision is required, make practice cuts on scrap material and adjust the saw table as necessary for your requirements. NOTE: When cutting at angles, the drop foot should be tilted so it is parallel to the saw table and rests flat against the workpiece. To tilt the drop foot, !oosen phillips screw, tilt drop foot to the proper angle, then retighten screw. [] Loosen the table lock knob and push down on the right side of the table, if the table stops at 0 °, the zero degree stop is properly set. if the table stops somewhere other than zero, adjust the zero degree stop. To adjust: [] To access the zero degree stop, loosen the table lock knob, and tilt the table with the right side all the way down. Just under the front of the saw table is the zero degree stop. [] Loosen the hex nut and rotate the hex bolt to raise or lower the bolt as needed to adjust the zero degree stop. Be sure to check to see that the table is square to the blade. ZERO DEGREESTOP DROP FOOTROD D BEVEL SCALE Fig. 7 14 SCREW Fig. 8
-
 1
1 -
2
-
3
-
4
-
5
-
6
-
7
-
8
-
 9
9 -
 10
10 -
 11
11 -
 12
12 -
 13
13 -
 14
14 -
 15
15 -
 16
16 -
 17
17 -
 18
18 -
 19
19 -
20
-
21
-
22
-
23
-
24
-
25
-
26
-
27
-
28
 |
 |