Craftsman 24BF570F299 Operation Manual - Page 8
Warning
 |
View all Craftsman 24BF570F299 manuals
Add to My Manuals
Save this manual to your list of manuals |
Page 8 highlights
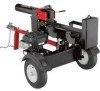
ASSEMBLY 2. Disconnect the dislodger from the beam weld bracket by removing the six hex screws. See Figure 4. 4. Lift and slide the cylinder up to the top of beam and into the weld brackets. See Figure 6. Figure 4 Figure 6 3. Disconnect the log cradle bracket on the control valve side of the beam. See Figure 5. 5. Attach the dislodger over the wedge assembly and secure it to the weld brackets with the previously removed hardware. See Figure 6. NOTE: Once the six hex screws are tightened, there may be a slight gap between the dislodger and the weld brackets. This gap is normal. 6. Reattach the log cradle to the side of the beam with the control valve, aligning the ends of the cradle with the beam flanges. 7. Roll the log splitter off the bottom of the crate. SET-UP Gas and Oil Fill-Up Service the engine with gasoline and oil as instructed below. Read the instructions carefully. WARNING Use extreme care when handling gasoline. Gasoline is extremely flammable and the vapors are explosive. Never fuel the machine indoors or while the engine is hot or running. Figure 5 NOTE: Your log splitter may be shipped with motor oil in the engine. You MUST check the oil level before operating. Be careful not to overfill. Gasoline can be added to the engine when the log splitter is in either the horizontal or vertical position. However, there are less obstructions when the splitter is in the vertical position. Oil 1. Remove oil fill dipstick. 2. Check the oil level making certain not to rub the dipstick along the inside walls of the oil fill tube. This would result in a false dipstick reading. Refill to the FULL mark on the dipstick, if necessary. Replace the dipstick and tighten. 8
-
 1
1 -
2
-
 3
3 -
 4
4 -
 5
5 -
 6
6 -
 7
7 -
 8
8 -
 9
9 -
 10
10 -
 11
11 -
 12
12 -
 13
13 -
14
-
15
-
16
-
17
-
18
-
19
-
20
-
21
-
22
-
23
-
24
-
25
-
26
-
27
-
28
-
29
-
30
-
31
-
32
-
33
-
34
-
35
-
36
-
37
-
38
-
39
-
40
-
41
-
42
-
43
-
44
-
45
-
46
-
47
-
48
-
49
-
50
-
51
-
52
 |
 |
