Cub Cadet Z-Force SX 60 Operation Manual - Page 22
Maintenance
 |
View all Cub Cadet Z-Force SX 60 manuals
Add to My Manuals
Save this manual to your list of manuals |
Page 22 highlights
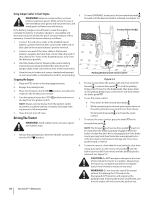
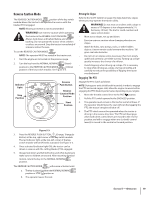
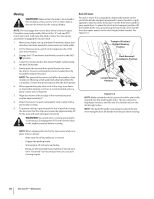
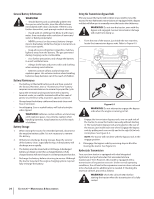
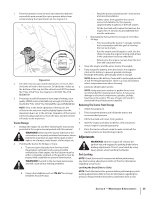
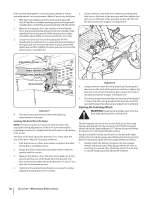
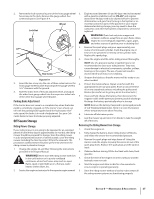
NOTE: This Operator's Manual covers several models. Tractor features may vary by model. Not all features in this manual are applicable to all tractor models and the tractor depicted may differ from yours. Maintenance WARNING! Before performing any maintenance or repairs, disengage the PTO, engage the parking brake, stop the engine and remove the key to prevent unintended starting. Engine Refer to the engine operator's manual for all engine maintenance procedures and instructions. NOTE: Maintenance, repair, or replacement of the emission control devices and systems which are being done at owner's expense may be performed by any engine repair establishment or individual. Warranty repairs must be performed by a Cub Cadet Dealer. Changing the Engine Oil WARNING! If the engine has been recently run, the engine, muffler and surrounding metal surfaces will be hot and can cause burns to the skin. Exercise caution to avoid burns. To complete an oil change, proceed as follows: 1. Run the engine for a short time to warm the engine oil. The oil will flow more freely and carry away more impurities. Use care to avoid burns from hot oil. 2. Locate the oil drain hose on the right side of the engine. See Figure 6-1. 4. While holding the free end of the oil drain hose over the oil collection container, unscrew the square head hose plug from the end of the hose. See Figure 6-1. Drain the engine oil into the collection container. 5. After draining the oil, wipe any residual oil from the oil drain hose. Thread the square head plug into the drain hose fitting and fully tighten the plug. 6. Replace the oil filter, and refill the engine with new oil as instructed in the engine operator's manual Cleaning the Spindle Pulleys Once a month remove the belt covers to remove any accumulation of grass clippings from around the spindle pulleys and V-belt. Clean more often when mowing tall, dry grass. Lubrication WARNING! Before lubricating, repairing, or inspecting, always disengage PTO, set parking brake, stop engine and remove key to prevent unintended starting. Pivot Points & Linkage Lubricate all the pivot points on the drive system, parking brake and lift linkage at least once a season with light oil. Front Wheels Each of the front wheel axles and rims is equipped with grease fittings. See Figure 6-2. Lubricate with a No. 2 multi-purpose grease applied with a grease gun after every 25 hours of tractor operation. Grease Fittings Oil Fill Cap/Dipstick Oil Filler Oil Drain Hose Oil Fill Tube Square-Head Hose Plug Figure 6-1 3. Route the free end of the oil drain hose toward an appropriate oil collection container with at least a 2.5 quart capacity, to collect the used oil. Remove the oil fill cap/ dipstick from the oil fill tube. 22 Section 6- Maintenance & Adjustments Figure 6-2
-
 1
1 -
2
-
3
-
4
-
5
-
6
-
7
-
8
-
9
-
10
-
11
-
12
-
13
-
14
-
15
-
16
-
 17
17 -
 18
18 -
 19
19 -
 20
20 -
 21
21 -
 22
22 -
 23
23 -
 24
24 -
 25
25 -
 26
26 -
 27
27 -
28
-
29
-
30
-
31
-
32
-
33
-
34
-
35
-
36
-
37
-
38
-
39
-
40
 |
 |
