Cub Cadet ZTX6 54 Operation Manual - Page 22
Deck Installation, Replacing the Belt
 |
View all Cub Cadet ZTX6 54 manuals
Add to My Manuals
Save this manual to your list of manuals |
Page 22 highlights
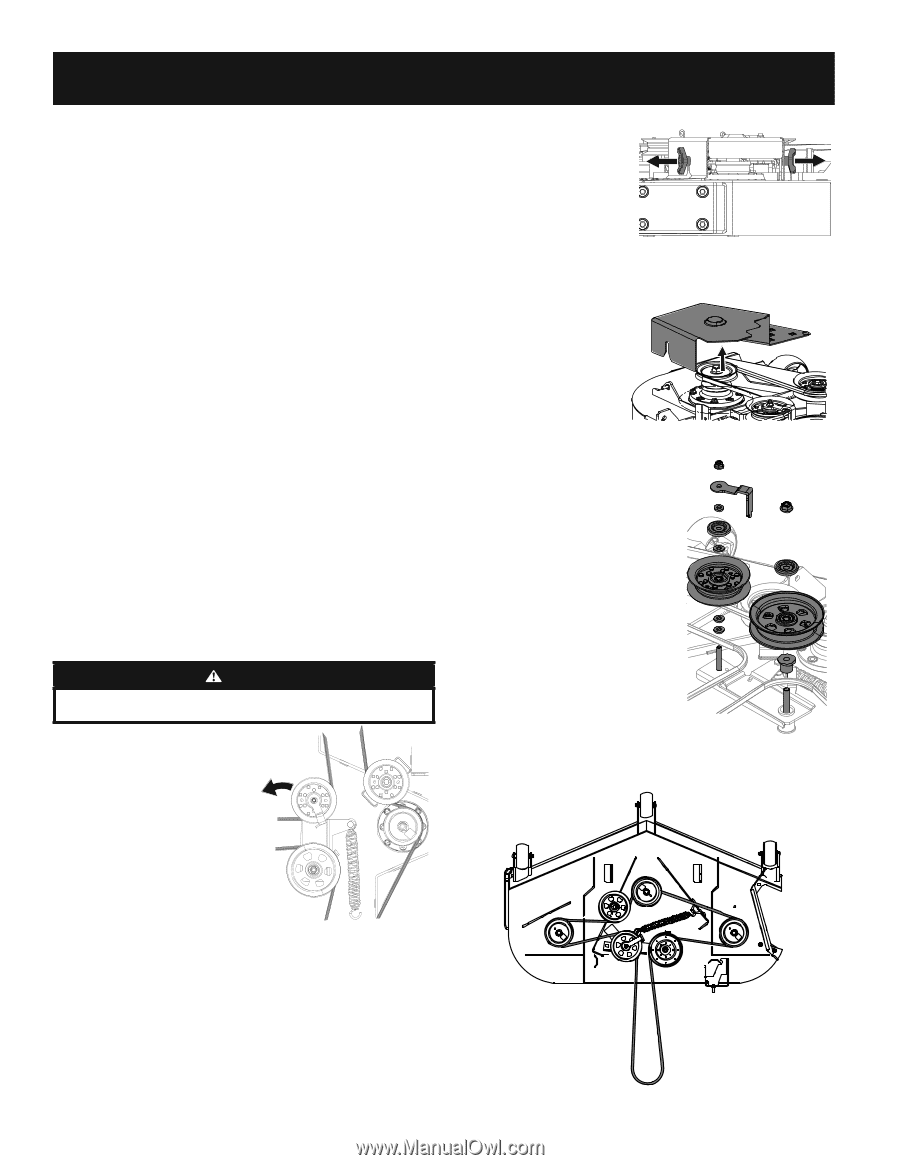
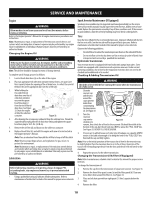
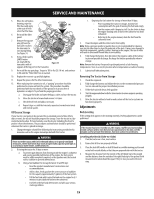
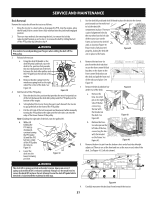
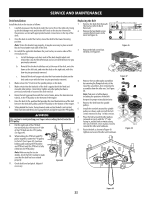
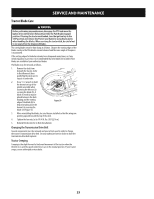
SERVICE AND MAINTENANCE Deck Installation Install the deck on the tractor as follows: 1. Carefully manuever the the deck under the tractor from the right side, lining up the deck hanger rods and the deck lift rods on the tractor removed in the previous section with appropriate bracket connections on the top of the deck. 2. Once the deck is under the tractor, move the deck to the lowest mowing position. Note: To line the brackets up properly, it may be necessary to place a small block of wood under each side of the deck. 3. Re-install the applicable hardware for your tractor, in reverse order of the removal process: a. Install the hanger rod clevis ends of the deck height adjust rods removed in step 8 of Deck Removal and secure with the bow-tie pins previously removed. b. Reinstall the the deck stabilizer rod, at the rear of the deck, onto the frame at the left side, and onto the deck on the right side, with the bow-tie pins previously removed. c. Reinstall the front hanger rods into the front center brackets on the deck and secure with the bow-tie pins previously removed. 4. Make certain the 'V' belt is in the spindle pulleys on the deck. 5. Make certain that the backside of the belt is against both the fixed and movable idler pulleys. Reinstall or tighten any idler pulley hardware previously removed or loosened for deck removal 6. Route the belt rearward beneath the tractor frame, above the transmission tube(s), to the PTO pulley on the bottom of the engine. 7. Raise the deck to the position that provides the most horizontal run of the belt between the deck idler pulleys and the PTO pulley on the bottom of the engine. 8. Sitting behind the tractor, facing forward, make certain the belt is not twisted; then reach beneath the tractor to grasp the belt and pull it toward the PTO pulley. WARNING Use caution to avoid pinching your fingers when rolling the belt onto the PTO pulley. 9. Pull the right side of the PTO belt rearward and place the narrow V-side of the PTO belt into the PTO pulley. See Figure 45. 10. While holding the PTO belt and PTO pulley together, rotate the PTO pulley to the left (See Figure 43). Continue holding and rotating the PTO pulley and PTO belt until the PTO belt is fully rolled into the PTO pulley. Note: Before using the tractor double-check the belt routing to make sure that the belt has been routed properly. 11. Check deck level and pitch. Adjust if necessary. Figure 45 Replacing the Belt 1. Remove the deck from beneath the tractor, (refer to Deck Removal). 2. Remove the hex thumb screws securing the belt covers to the deck. See Figure 46. 3. Remove the belt covers from the deck. See Figure 47. 4. Remove the two idler pulley assemblies by removing the flange lock nuts at the top of the assemblies, then removing the assemblies from the idler arm. See Figure 48 . Note: Take note of all hardware, including the positions of the belt keepers for proper reinstallation later. 5. Remove the belt from the spindle pulleys. 6. Install the new belt around the spindle pulleys as shown and reinstall the belt covers removed in Step 1 of this section. 7. Place the belt around the idler pulleys removed in step 4 with the "V" side facing in, and no kinks or twists along the run of the belt. Once in place, loosely reinstall the idler arm hardware. 8. Route the belt as shown in Figure 49. tighten and secure the idler arm hardware. Figure 46 Figure 47 Figure 48 Figure 49 22
-
 1
1 -
2
-
3
-
4
-
5
-
6
-
7
-
8
-
9
-
10
-
11
-
12
-
13
-
14
-
15
-
16
-
 17
17 -
 18
18 -
 19
19 -
 20
20 -
 21
21 -
 22
22 -
 23
23 -
 24
24 -
 25
25 -
 26
26 -
 27
27 -
28
-
29
-
30
-
31
-
32
-
33
-
34
-
35
-
36
-
37
-
38
-
39
-
40
-
41
-
42
-
43
-
44
-
45
-
46
-
47
-
48
 |
 |