D-Link 502G User Guide - Page 17
Hardware Installation - dsl driver
 |
View all D-Link 502G manuals
Add to My Manuals
Save this manual to your list of manuals |
Page 17 highlights
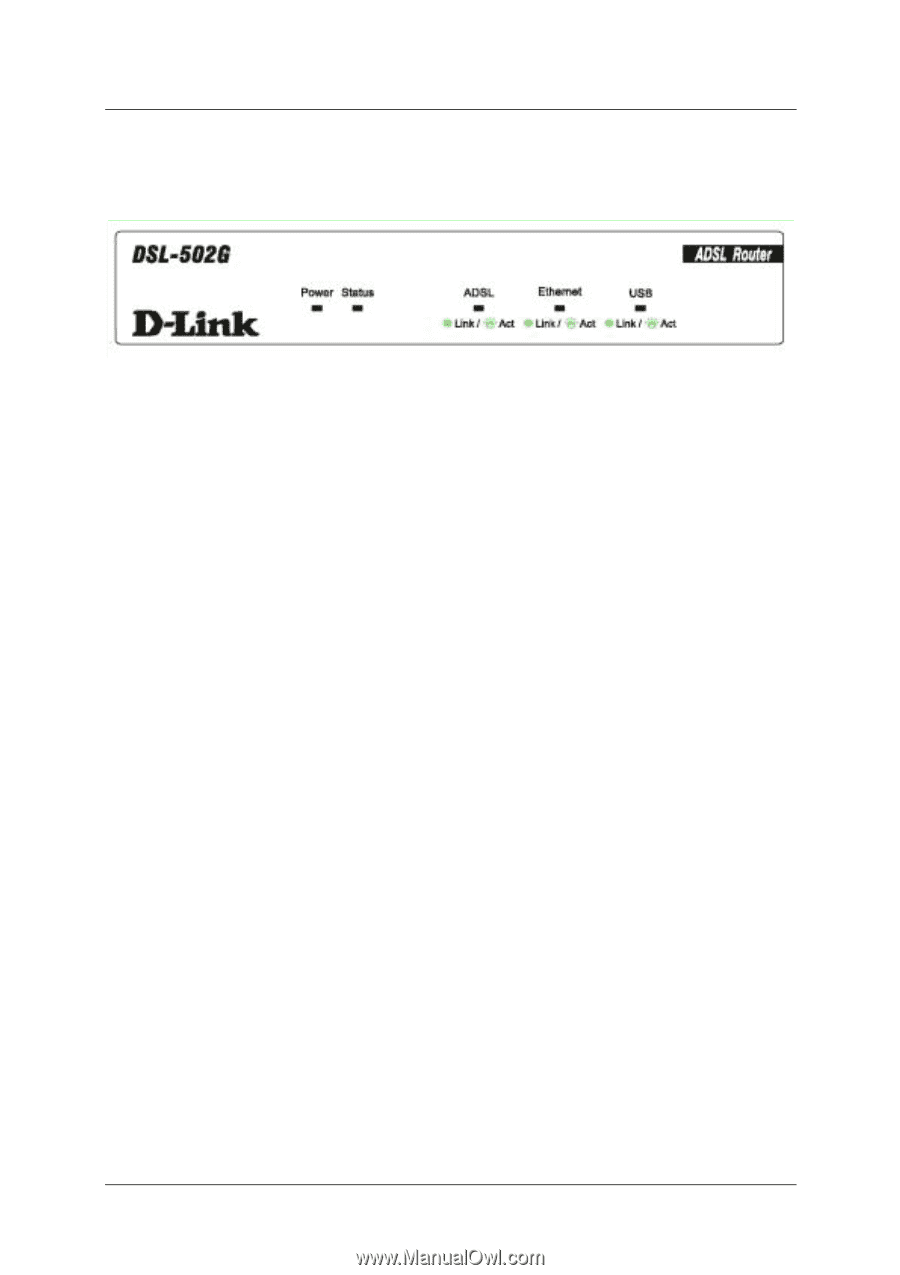
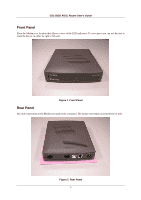
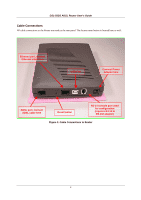
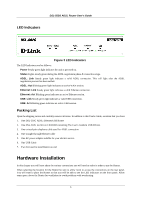
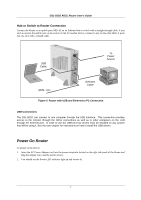
DSL-502G ADSL Router User's Guide LED Indicators Figure 3 LED Indicators The LED Indicators read as follows: Power Steady green light indicates the unit is powered on. Status Lights steady green during the ADSL negotiation phase & connection stage. ADSL: Link Steady green light indicates a valid ADSL connection. This will light after the ADSL negotiation process has been settled. ADSL: Act Blinking green light indicates an active WAN session. Ethernet: Link Steady green light indicates a valid Ethernet connection. Ethernet: Act Blinking green indicates an active Ethernet session. USB: Link Steady green light indicates a valid USB connection. USB: Act Blinking green indicates an active USB session. Packing List Open the shipping carton and carefully remove all items. In addition to this User's Guide, ascertain that you have: 1. One DSL-502G ADSL Ethernet/USB Router 2. One DSL-502G tool kit on CD-ROM containing The User's Guide & USB Drivers 3. One twisted-pair telephone cable used for ADSL connection 4. One straight-through Ethernet cable 5. One AC power adapter suitable for your electric service 6. One USB Cable 7. Two feet used to stand Router on end Hardware Installation In this chapter you will learn about the various connections you will need to make in order to use the Router. When selecting the location for the Router be sure to allow room to access the connections on the rear panel. You will want to place the Router so that you will be able to see the LED indicators on the front panel. Allow some space above the Router for ventilation to avoid problems with overheating. 5
-
 1
1 -
2
-
3
-
4
-
5
-
6
-
7
-
8
-
9
-
10
-
11
-
 12
12 -
 13
13 -
 14
14 -
 15
15 -
 16
16 -
 17
17 -
 18
18 -
 19
19 -
 20
20 -
 21
21 -
 22
22 -
23
-
24
-
25
-
26
-
27
-
28
-
29
-
30
-
31
-
32
-
33
-
34
-
35
-
36
-
37
-
38
-
39
-
40
-
41
-
42
-
43
-
44
-
45
-
46
-
47
-
48
-
49
-
50
-
51
-
52
-
53
-
54
-
55
-
56
-
57
-
58
-
59
-
60
-
61
-
62
-
63
-
64
-
65
-
66
-
67
-
68
-
69
-
70
-
71
-
72
-
73
-
74
-
75
-
76
-
77
-
78
-
79
-
80
-
81
-
82
-
83
-
84
-
85
-
86
 |
 |