D-Link DBG-2000 Quick Install Guide - Page 4
Initially Configure the Device
 |
View all D-Link DBG-2000 manuals
Add to My Manuals
Save this manual to your list of manuals |
Page 4 highlights
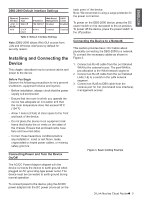
ENGLISH Initially Configure the Device The software is preinstalled on the DBG-2000 device. When the device is powered on, it is ready to be configured. While the device has a default factory configuration that allow you to initially connect to the device, you must perform further configuration for your specific network requirements. Using a Console Connection (RJ45-to-DB9 DCE) The DBG-2000 provides an serial port that enables a connection to a computer or terminal for monitoring and configuring the device. This port is a RJ-45 connector, implemented as a data communication terminal equipment (DCE) connection. Using the WebUI To use the WebUI, the workstation from which you are managing the device must initially be on the same subnetwork as the device. To access the device with the WebUI: 1. Connect your workstation on the port labeled LAN (1-4), which is pre-allocated to the LAN. 2. Ensure your workstation is DHCP Client enabled or configured with a static IP address in the 192.168.10.0/24 subnet. 3. Log on the device web interface the default log on information is: Username: admin Password: admin To use the console port connection, you need the following equipment: 1. A terminal or a computer with both a serial port and the ability to emulate a terminal. 2. A RJ45-to-DB9 RS-232 with female connector. (Already included in packing list) 3. If your Laptop or PC doesn't have RS-232 connector, a converter is required. Note: DBG-2000 does not come with RS-232 converter and these must be purchased separately. To establish a console connection: 1. Plug the RJ-45 connector of the supplied RJ45-to-DB9 cable directly to the console port on the device. 2. Connect the other end of the cable to a terminal or to the serial connector of a computer running terminal emulation software. Set the terminal emulation software as following: Figure 4. Authentication Message Baud rate: 115200 Data bits: 8 Parity: None Stop bits: 1 Flow control: None 3. When you have correctly set up the terminal, having previously followed the instructions in section "Connecting Power and Turn the Device On/Off" then switch on your device. The boot sequence appears in the terminal. 4. Once the boot sequence completes, the command prompt is displayed, the device is ready to be configured. 4 D-Link Nuclias Cloud Router Technical Support https://www.dlink.com/support
-
 1
1 -
 2
2 -
 3
3 -
 4
4 -
 5
5
 |
 |