D-Link DCH-S161 Quick Install Guide - Page 1
D-Link DCH-S161 Manual
 |
View all D-Link DCH-S161 manuals
Add to My Manuals
Save this manual to your list of manuals |
Page 1 highlights
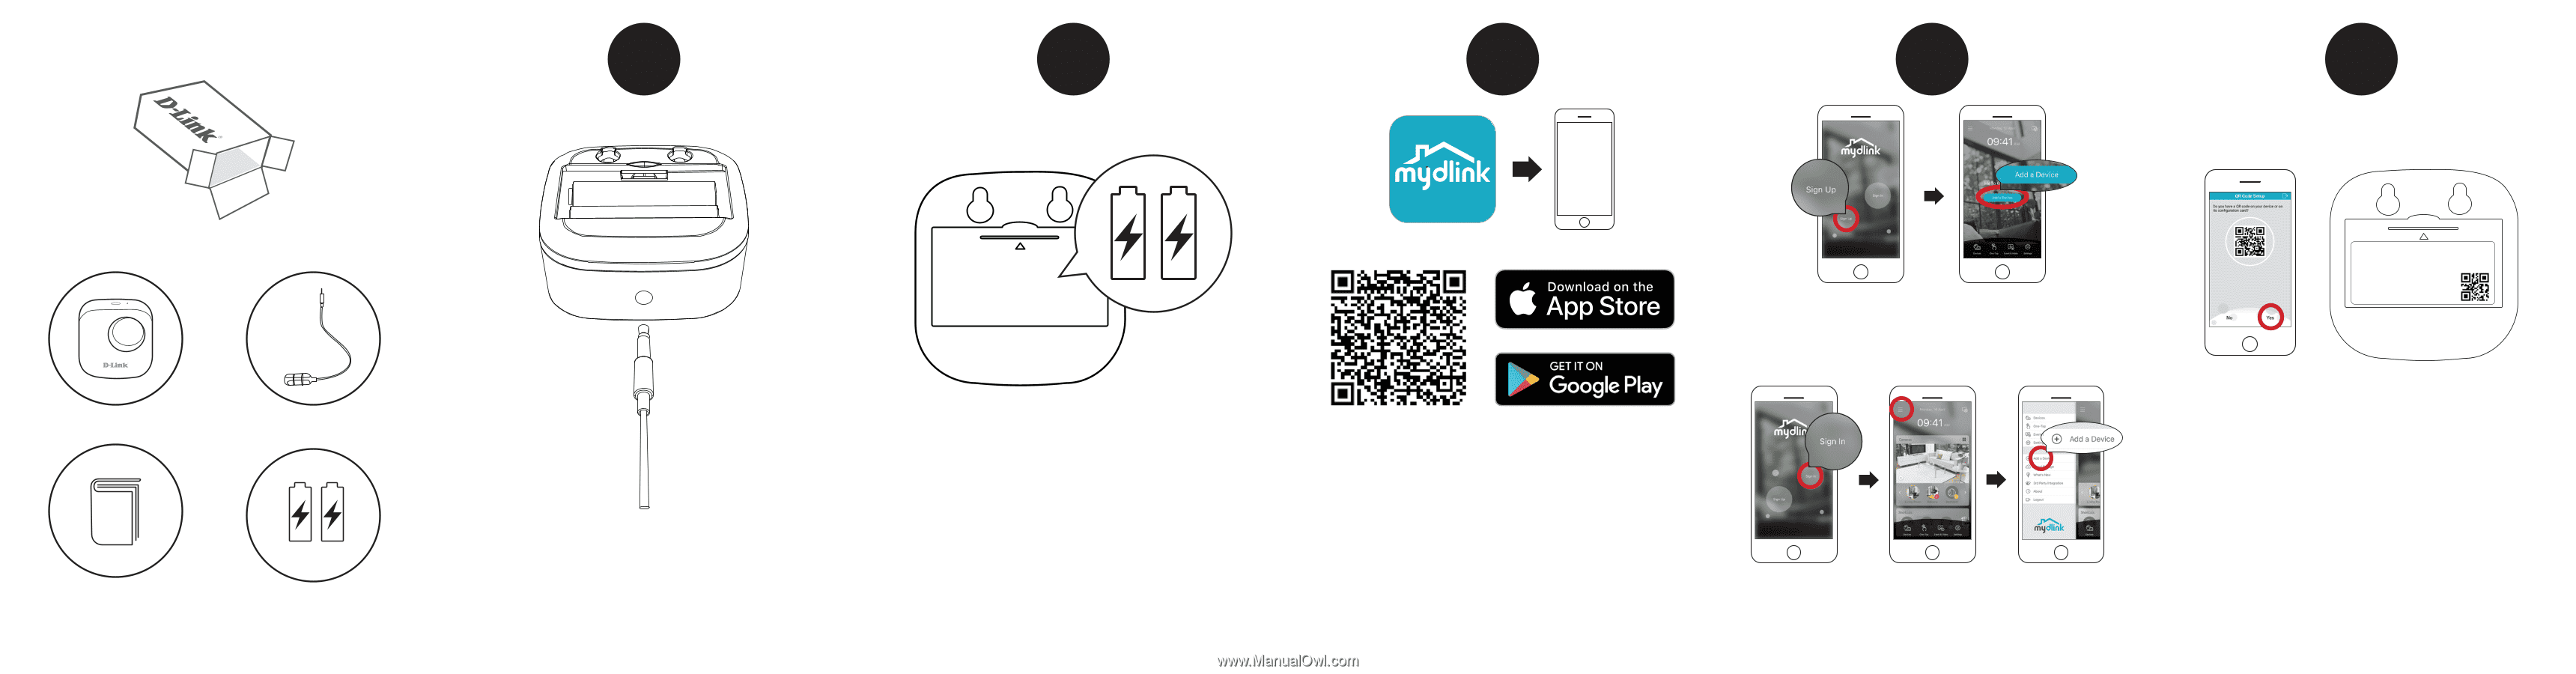
1 2 3 4 5 New Users: Tap Sign Up to register for a mydlink account, then tap Add a Device to install your water sensor. Continue to follow the onscreen instructions. OR Model: DCH-S161 SN: LLPP1XXXXX Wi-Fi Name(SSID): DCH-S161-XXXX Wi-Fi Password: XXXXXXX PIN Code: XXXXXX mydlink No.: XXXXXXX Scan the QR code above to download the mydlink app for your Android or iOS device. Tap Yes to scan the setup code on the back of the DCH-S161. Continue to follow the onscreen instructions to complete the setup process. Note: This product is NOT COMPATIBLE with mydlink Lite. Note: Please ensure that your mobile device is connected Connect the sensor cable to the bottom of the water sensor. Remove the battery cover by gently pressing down on the tab. x 2 Insert the two AA batteries and reattach battery cover. If you are a mydlink Lite user, sign in to the new app with the same to the same Wi-Fi network of the router that you plan on connecting the DCH-S161 to. username and password and your existing cameras will appear in the Existing Users: new app. Sign in using your mydlink account and tap the icon at the top left, then tap Add a Device to start the setup wizard. Continue to follow the onscreen instructions.
-
 1
1 -
 2
2
 |
 |