D-Link DFE-550TX Product Manual - Page 18
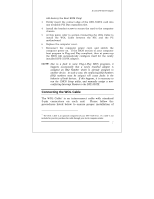
Connecting the WOL Cable
 |
UPC - 790069219528
View all D-Link DFE-550TX manuals
Add to My Manuals
Save this manual to your list of manuals |
Page 18 highlights
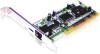
D-Link DFE-550TX Adapter will destroy the Boot ROM Chip! 3. Firmly insert the contact edge of the DFE-550TX card into any available PCI Bus expansion slot. 4. Install the bracket screw to secure the card to the computer chassis. 5. At this point, refer to section Connecting the WOL Cable to install the WOL Cable between the NIC and the PC motherboard. 6. Replace the computer cover. 7. Reconnect the computer power cord, and switch the computer power on. If the BIOS section of your computer boot program is Plug and Play compliant, then at power-up the BIOS will automatically configure itself for the newly installed DFE-550TX adapter. NOTE: Due to a fault in some Plug-n-Play BIOS programs, it happens occasionally that a newly installed adapter is assigned an IRQ Number which is already assigned to another device. In such a case, the conflicting IRQ Numbers (IRQ numbers must be unique) will cause faults in the behavior of both devices. If this happens, it is necessary to run the CMOS Setup utility, and manually assign a nonconflicting Interrupt Number to the DFE-550TX. Connecting the WOL Cable The WOL Cable† is an interconnect cable with standard 3-pin connectors on each end. Please follow the procedures listed below to ensure proper installation of † The WOL Cable is an optional component of your DFE-550TX kit. If a cable is not included in your kit, purchase the cable through your local computer retailer. 7
-
 1
1 -
2
-
3
-
4
-
5
-
6
-
7
-
8
-
9
-
10
-
11
-
12
-
 13
13 -
 14
14 -
 15
15 -
 16
16 -
 17
17 -
 18
18 -
 19
19 -
 20
20 -
 21
21 -
 22
22 -
 23
23 -
24
-
25
-
26
-
27
-
28
-
29
-
30
-
31
-
32
-
33
-
34
 |
 |
