D-Link DKVM-2K Quick Installation Guide - Page 3
Type - keyboard
 |
UPC - 790069254963
View all D-Link DKVM-2K manuals
Add to My Manuals
Save this manual to your list of manuals |
Page 3 highlights
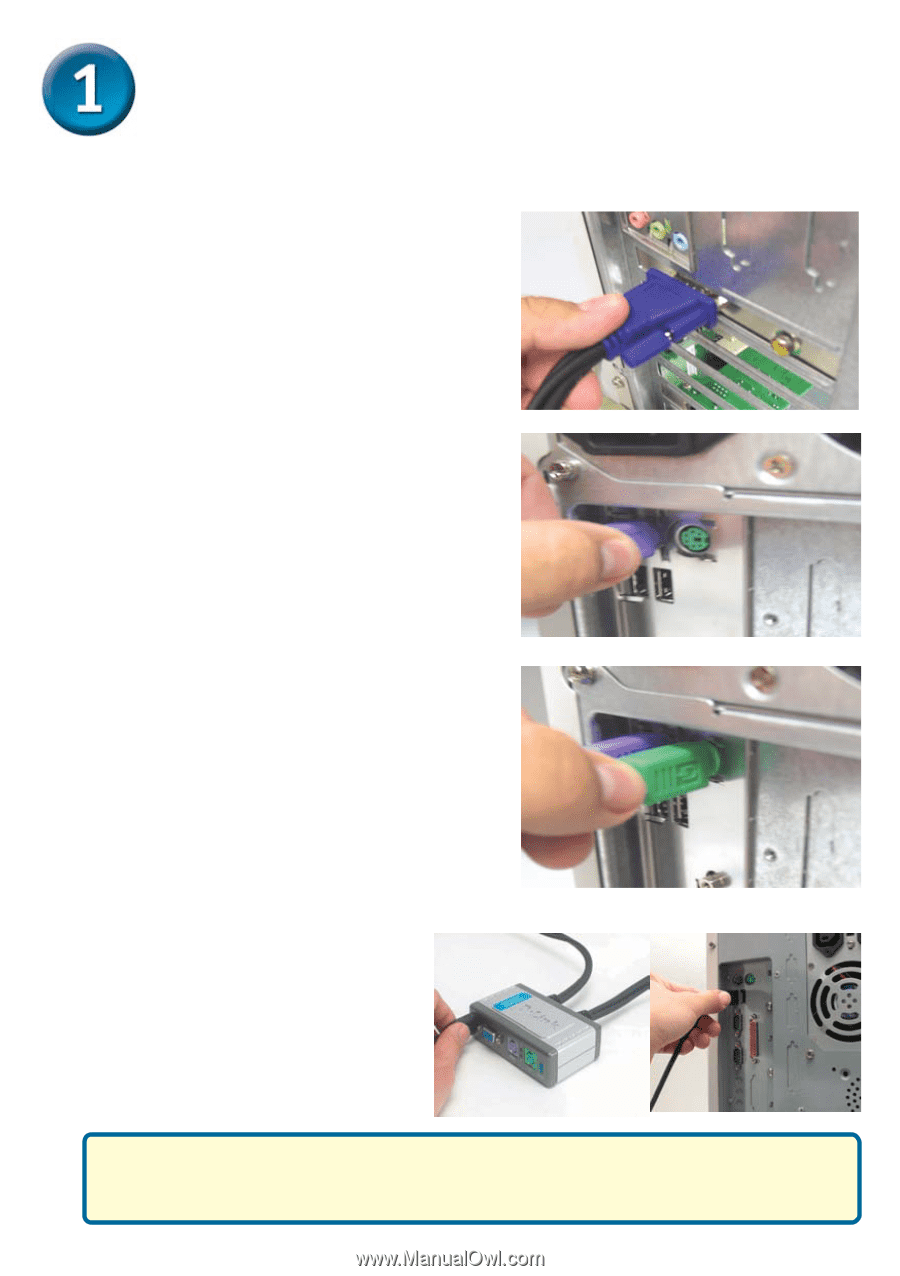
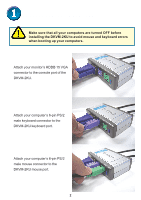
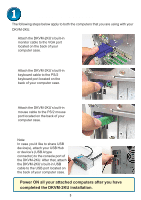
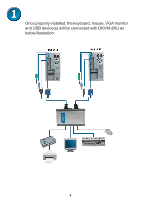
Installing the DKVM-2KU The following steps below apply to both the computers that you are using with your DKVM-2KU. Attach the DKVM-2KU's built-in monitor cable to the VGA port located on the back of your computer case. Attach the DKVM-2KU's built-in keyboard cable to the PS/2 keyboard port located on the back of your computer case. Attach the DKVM-2KU's built-in mouse cable to the PS/2 mouse port located on the back of your computer case. Note: In case you'd like to share USB device(s), attach your USB Hub or device's (USB A type connector) to the console port of the DKVM-2KU. After that, attach the DKVM-2KU's built-in USB cable to the USB port located on the back of your computer case. Power ON all your attached computers completed the DKVM-2KU installation. aTftyepr eyoAu have 3
-
 1
1 -
 2
2 -
 3
3 -
 4
4 -
 5
5 -
 6
6 -
 7
7 -
 8
8
 |
 |