D-Link DNR-326 Quick Installation Guide - Page 2
About This Guide, Unpacking the Product, Product Overview, Installation and Connection - power
 |
View all D-Link DNR-326 manuals
Add to My Manuals
Save this manual to your list of manuals |
Page 2 highlights
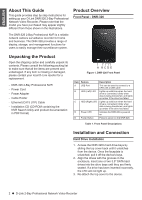
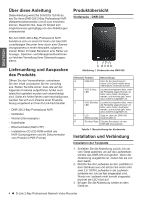
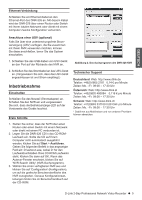
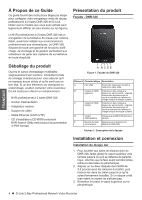
ENGLISH About This Guide This guide provides step by step instructions for setting up your D-Link DNR-326 2-Bay Professional Network Video Recorder. Please note that the model you have purchased may appear slightly different from those shown in the illustrations. The DNR-326 2-Bay Professional NVR is a reliable network camera surveillance recorder for home and business. The DNR-326 provides a range of display, storage, and management functions for users to easily manage their surveillance system. Product Overview Front Panel - DNR-326 Unpacking the Product Open the shipping carton and carefully unpack its contents. Please consult the following packing list to make sure that all the items are present and undamaged. If any item is missing or damaged, please contact your local D-Link reseller for a replacement. -- DNR-326 2-Bay Professional NVR -- Power Cord -- Power Adapter -- Cable Holder -- Ethernet (CAT5 UTP) Cable -- Installation CD (CD-ROM containing the NVR Search Utility and product documentation in PDF format) A BCDE Figure 1. DNR-326 Front Panel Item A B C D E Feature USB Port HDD (Left) LED HDD (Right) LED Power LED Power Button Description This can be used to connect to a UPS with a USB cable. Lights up solid blue when the hard drive is connected, blinks when data is being transferred, and lights up amber if the drive has failed. Lights up solid blue when the hard drive is connected, blinks when data is being transferred, and lights up amber if the drive has failed. Indicates the DNR-326 is powered on. Press to power on the DNR-326. Table 1. Front Panel Descriptions Installation and Connection Hard Drive Installation 1. Access the DNR-326's hard drive bays by sliding the top cover back until it unlatches from the device. Once the faceplate is unlatched, pull it off the device's bays. 2. Align the drives with the grooves in the enclosure, insert one or two 3.5" SATA hard drives into the drive bays until they are firmly seated. If a drive has been inserted incorrectly, the LED will not light up. 3. Re-attach the top cover to the device. 2 D-Link 2-Bay Professional Network Video Recorder
-
 1
1 -
 2
2 -
 3
3 -
 4
4 -
 5
5 -
 6
6 -
 7
7 -
 8
8 -
9
-
10
-
11
-
12
-
13
-
14
-
15
-
16
 |
 |
