D-Link DNR-326 Quick Installation Guide - Page 3
Operation - network video recorder
 |
View all D-Link DNR-326 manuals
Add to My Manuals
Save this manual to your list of manuals |
Page 3 highlights
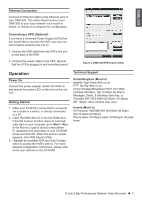
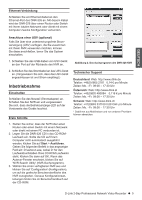
ENGLISH Ethernet Connection Connect an Ethernet cable to the Ethernet port of your DNR-326. This cable should connect your DNR-326 to your local network via a router or switch, or directly to a computer for configuration. Connecting a UPS (Optional) If you have a Universal Power Supply (UPS) that you would like to use with the NVR, you may connect it before powering the unit on. 1. Connect the USB cable from the UPS to the port on the back of the NVR. 2. Connect the power cable to the UPS. (Ensure that the UPS is plugged in and receiving power.) Figure 2. DNR-326 NVR Search Utility Operation Power On Connect the power adapter. Switch the NVR on and ensure the power LED on the front of the unit is lit. Getting Started 1. Make sure the NVR is connected to a network via a router or a switch, or directly connected to a PC. 2. Insert the DNR-326 CD in the CD-ROM drive. If the CD Autorun function does not automatically start on your computer, go to Start > Run. In the Run box, type D:\autorun.exe (where D: represents the drive letter of your CD-ROM drive) and click OK. When the autorun screen appears, click NVR Search Utility. 3. Highlight an available NVR and click Configuration to access the NVR's web UI. For more detailed configuration instructions, please refer to the user manual on the CD-ROM. Technical Support United Kingdom (Mon-Fri) website: http://www.dlink.co.uk FTP: ftp://ftp.dlink.co.uk Home Wireless/Broadband 0871 873 3000 (9.00am-06.00pm, Sat 10.00am-02.00pm) Managed, Smart, & Wireless Switches, or Firewalls 0871 873 0909 (09.00am- 05.30pm) (BT 10ppm, other carriers may vary.) Ireland (Mon-Fri) All Products 1890 886 899 (09.00am-06.00pm, Sat 10.00am-02.00pm) Phone rates: €0.05ppm peak, €0.045ppm off peak times D-Link 2-Bay Professional Network Video Recorder 3
-
 1
1 -
 2
2 -
 3
3 -
 4
4 -
 5
5 -
 6
6 -
 7
7 -
 8
8 -
 9
9 -
10
-
11
-
12
-
13
-
14
-
15
-
16
 |
 |
