D-Link DP-301 Product Manual - Page 10
Installing the DP-301
 |
UPC - 790069262579
View all D-Link DP-301 manuals
Add to My Manuals
Save this manual to your list of manuals |
Page 10 highlights
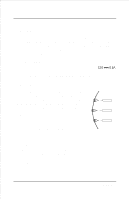
DP-301 Print Server Hardware Guide Installing the DP-301 Follow these steps for a trouble-free start of print-server operations with your DP-301. Please take particular notice of the warning in step 4: the network connection should be made before supplying power to the DP-301. 1. Confirm proper operation of the printer to be connected to the DP-301. 2. When you have confirmed proper operation of the printer, switch its power off. 3. Confirm that your network is operating normally. 4. Connect the DP-301 to the network (through the RJ-45 receptacle on the print server's rear panel). WARNING: Configuration problems may result if the DP-301 is powered up without first establishing its network connection. Follow this procedure to avoid complications at the configuration stage. 5. While the printer is power off, install a printer cable to connect its parallel port to the printer port of the DP-301. 6. Switch printer power on. 7. Plug the DC power adapter's output plug into the DC power input socket on the rear panel of the DP-301. 8. Plug the DC power adapter into an electric service outlet. This will supply power to the DP-301. (The DP-301 has no power switch.) The DP-301's self-test routines will proceed automatically. Unpacking and Installation 7
-
 1
1 -
2
-
3
-
4
-
 5
5 -
 6
6 -
 7
7 -
 8
8 -
 9
9 -
 10
10 -
 11
11 -
 12
12 -
 13
13 -
 14
14 -
 15
15 -
16
-
17
-
18
-
19
-
20
-
21
 |
 |