D-Link DSN-500 Software User's Guide for DSN-1100-10 - Page 127
Performing System Actions
 |
UPC - 790069324031
View all D-Link DSN-500 manuals
Add to My Manuals
Save this manual to your list of manuals |
Page 127 highlights
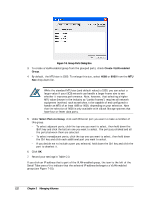
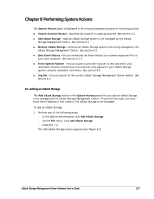
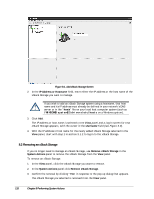
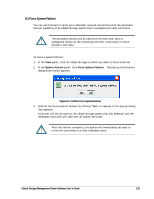
Chapter 8 Performing System Actions The System Actions panel is displayed in all views and always contains the following actions: Volume Creation Wizard - launches the wizard for creating volumes. See section 4.2. Add xStack Storage - adds an xStack Storage system to be managed by the xStack Storage Management Center. See section 8.1. Remove xStack Storage - removes an xStack Storage system from being managed by the xStack Storage Management Center. See section 8.2. Save Event History - lets you download the Event History as a comma-separated file to your local computer. See section 6.2.2. Force System Failover - lets you cause a controller failover to test and verify your redundant network connections; this selection only appears if your xStack Storage system contains redundant controllers. See section 8.3. Log Out - lets you log out of the current xStack Storage Management Center session. See section 3.5. 8.1 Adding an xStack Storage The Add xStack Storage action in the System Actions panel lets you add an xStack Storage to be managed by the xStack Storage Management Center. To perform this task, you must know the IP address or host name of the xStack Storage to be managed. To add an xStack Storage: 1. Perform one of the following steps: - In the System Actions panel click Add xStack Storage. - On the File menu, click Add xStack Storage. - Press Ctrl + A. The Add xStack Storage screen appears (see Figure 8-1). xStack Storage Management Center Software User's Guide 117
-
 1
1 -
2
-
3
-
4
-
5
-
6
-
7
-
8
-
9
-
10
-
11
-
12
-
13
-
14
-
15
-
16
-
17
-
18
-
19
-
20
-
21
-
22
-
23
-
24
-
25
-
26
-
27
-
28
-
29
-
30
-
31
-
32
-
33
-
34
-
35
-
36
-
37
-
38
-
39
-
40
-
41
-
42
-
43
-
44
-
45
-
46
-
47
-
48
-
49
-
50
-
51
-
52
-
53
-
54
-
55
-
56
-
57
-
58
-
59
-
60
-
61
-
62
-
63
-
64
-
65
-
66
-
67
-
68
-
69
-
70
-
71
-
72
-
73
-
74
-
75
-
76
-
77
-
78
-
79
-
80
-
81
-
82
-
83
-
84
-
85
-
86
-
87
-
88
-
89
-
90
-
91
-
92
-
93
-
94
-
95
-
96
-
97
-
98
-
99
-
100
-
101
-
102
-
103
-
104
-
105
-
106
-
107
-
108
-
109
-
110
-
111
-
112
-
113
-
114
-
115
-
116
-
117
-
118
-
119
-
120
-
121
-
 122
122 -
 123
123 -
 124
124 -
 125
125 -
 126
126 -
 127
127 -
 128
128 -
 129
129 -
 130
130 -
 131
131 -
 132
132 -
133
-
134
-
135
-
136
-
137
-
138
-
139
-
140
-
141
-
142
-
143
-
144
-
145
-
146
-
147
-
148
-
149
-
150
-
151
-
152
-
153
-
154
-
155
-
156
-
157
-
158
 |
 |
