D-Link DSS-100E-9P Quick Install Guide 1 - Page 3
Grounding the Switch, Powering On the Switch
 |
View all D-Link DSS-100E-9P manuals
Add to My Manuals
Save this manual to your list of manuals |
Page 3 highlights
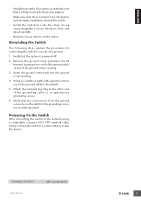
ENGLISH • Visually inspect the DC power jack and make sure that it is fully secured to the power adapter. • Make sure that there is proper heat dissipation and adequate ventilation around the switch. • Install the switch in a site free from strong electromagnetic sources, vibration, dust, and direct sunlight. • Not place heavy objects on the switch. Grounding the Switch The following steps explain the procedure for connecting the switch to a protective ground: 1. Verify that the system is powered off. 2. Remove the ground screw and place the #8 terminal lug ring at one end of the ground cable on top of the ground screw opening. 3. Insert the ground screw back into the ground screw opening. 4. Using a screwdriver, tighten the ground screw to secure the ground cable to the switch. 5. Attach the terminal lug ring at the other end of the grounding cable to an appropriate grounding source. 6. Verify that the connections from the ground connector on the switch to the grounding source are securely attached. Powering On the Switch After connecting the switch to the network using a compatible category 5/6/7 UTP network cable, simply connect the switch to a power outlet to power the device. TECHNICAL SUPPORT dlink.com/support DSS-100E-9P 3
-
 1
1 -
 2
2 -
 3
3 -
 4
4 -
 5
5 -
 6
6 -
 7
7 -
 8
8 -
 9
9 -
10
-
11
-
12
 |
 |