Danby DFF261 Product Manual - Page 3
Installation Instructions Cont'd
 |
View all Danby DFF261 manuals
Add to My Manuals
Save this manual to your list of manuals |
Page 3 highlights
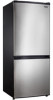
INSTALLATION INSTRUCTIONS (cont'd) DOOR REVERSAL INSTRUCTIONS To avoid personal injury to yourself and/or property, we recommend someone assists you during the door reversal process. 1) To access the lower hinge assembly, tilt back the refrigerator or lay the refrigerator on its back (Fig. 1). 2) Remove both leveling legs located at the front of the unit. 3) Remove the screws holding the lower hinge assembly to the refrigerator (Fig. 1). 4) Remove the main door assembly from the unit (open door and pull down). 5) Remove the screws from the middle hinge assembly. Then remove the hinge and refrigerator door (open door and pull down) (Fig. 2). 6) Loosen top hinge screws. Remove top hinge from current position and install with holes on other side of door. (Fig 3) 7) Remove the door plug and door bushing located on the top and bottom of each door assembly (Fig. 2). 8) Interchange positions (ie. door plug right side, door bushing left side). 9) Re-install refrigerator door assembly on unit. 10) Re-install the middle hinge assembly on the opposite side. 11) Make sure the door assembly is properly aligned on the unit before tightening the hinge screws. 12) Re-install the main door assembly on the unit. 13) Re-install the lower hinge assembly on the opposite side, making sure to change the bushing and screw on the opposite sides on the bottom of the unit. 14) Make sure the door assembly is properly aligned on the unit before tightening lower hinge screws. 15) Re-install both leveling legs. THE PROCESS IS NOW COMPLETE. Fig. 1 Fig. 2 Fig. 3 2
-
 1
1 -
 2
2 -
 3
3 -
 4
4 -
 5
5 -
 6
6 -
 7
7 -
 8
8 -
 9
9 -
10
-
11
-
12
-
13
-
14
-
15
-
16
-
17
-
18
-
19
-
20
 |
 |
