DeLonghi BG45 Owner Manual - Page 2
Before using the Skillet for the first time, USING YOUR SKILLET - skillet lid
 |
View all DeLonghi BG45 manuals
Add to My Manuals
Save this manual to your list of manuals |
Page 2 highlights
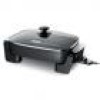
SHORT CORD INSTRUCTIONS A short power cord is provided to reduce the risk resulting from entanglement or tripping over a longer cord. Longer detachable power supply cords are available and may be used if care is exercised in their use. If a longer detachable power cord or extension cord is used the marked electrical rating of the extension cord should be at least as great as the electrical rating of the appliance, and the longer cord should be arranged so that it will not drape over the countertop or table top where it can be pulled on by children or tripped over unintentionally. If your product is equipped with a polarized alternating current line plug (a plug having one blade wider than the other), this plug will fit into the power outlet only one way. This is a safety feature. If you are unable to insert the plug fully into the outlet, try reversing the plug. If the plug should still fail to fit, contact your electrician to replace your obsolete outlet. Do not defeat the safety purpose of the polarized plug. Before using the Skillet for the first time Remove all labels and wash the pot and glass lid in hot soapy water, rinse thoroughly and dry. INSTALLATION • Before using, check that the appliance has not been damaged during transport. • Install the appliance on a dry flat surface, and out of the reach of children, as some parts of the appliance reach very high temperatures during operation. • Always place the glass lid in position during use unless the recipe advises differently. • Before inserting the plug in the outlet, check that: - the power of the outlet corresponds to the value indicated on the rating plate applied to the accessory plug. - the outlet has a minimum rating of 15 A. - the outlet is suitable for the plug, otherwise replace it. - the outlet is suitably grounded. - the manufacturer declines all liability if this instruction is not respected. USING YOUR SKILLET Before using for the first time, wash skillet and cover in dishwasher or in warm, sudsy water, rinse, and dry. Do not immerse the connector or let the thermostat come into contact with any liquid. "Season" the nonstick cooking surface by rubbing lightly with cooking oil. Remove excess oil with paper towel. 1. Place skillet on a dry, level, heat resistant surface. 2. Insert the connector probe into the skillet so the two electrical pins on the skillet are fully inserted into the connector. Connect cord to outlet. 3. Turn the thermostat to desired temperature (see page 7 for cooking temperature). Remove cover and preheat skillet. Pilot light goes off when selected temperature is reached (this takes approximately 5 to 10 minutes). 4. Prepare food for cooking. Because the skillet features a nonstick finish, food may be prepared with little or no oil. 5. Place food in skillet and cook according to temperature-timetable. Heat should be adjusted according to personal preference and particular food being cooked. During cooking, pilot light will go on and off indicating desired temperature is being maintained. 6. Turn the thermostat to "MIN" when cooking is completed. Unplug the connector from wall outlet then from appliance. 5
-
 1
1 -
 2
2 -
 3
3 -
 4
4 -
 5
5
 |
 |
