DeLonghi PAC160 Owner Manual - Page 8
set provided in order to extend the accessory
 |
View all DeLonghi PAC160 manuals
Add to My Manuals
Save this manual to your list of manuals |
Page 8 highlights
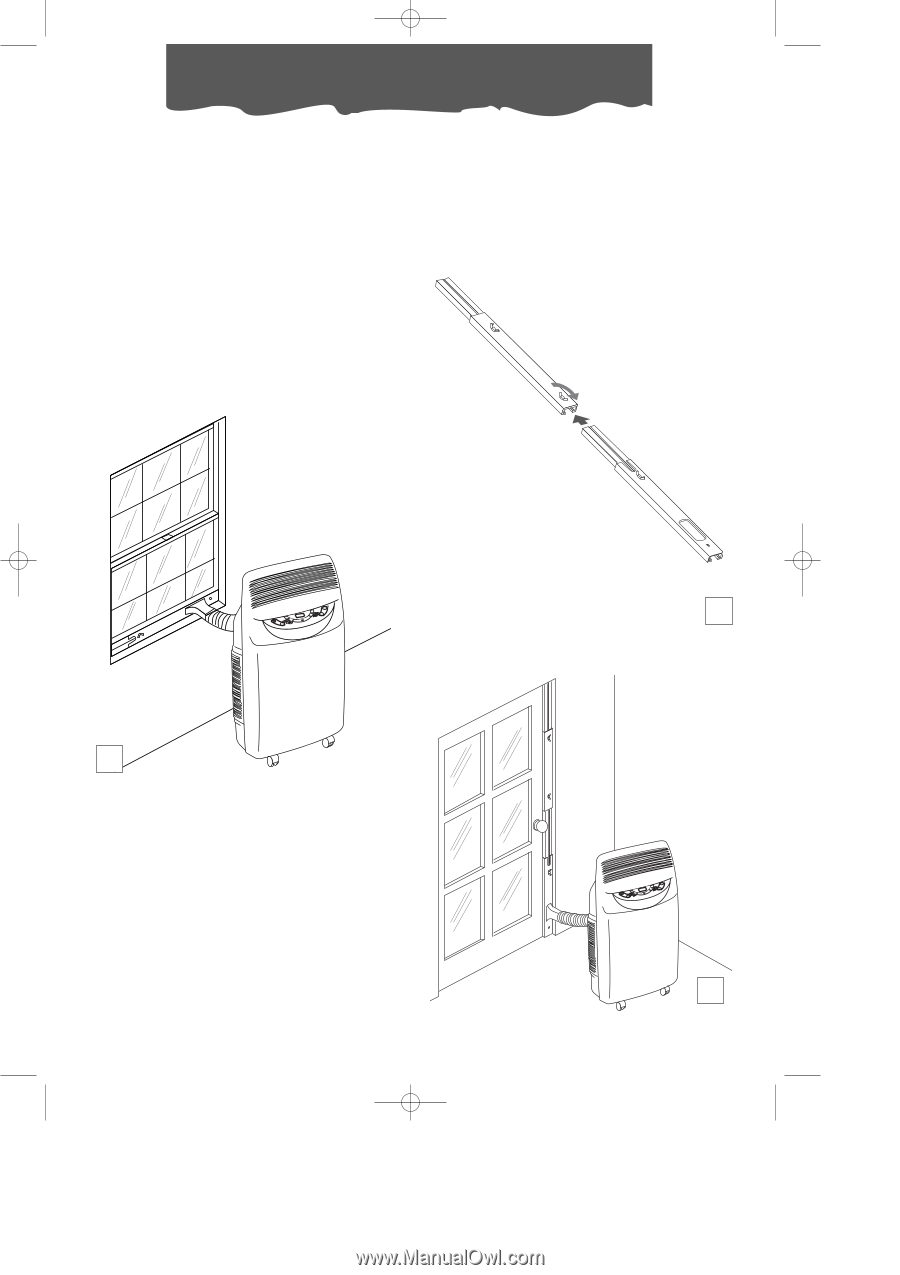
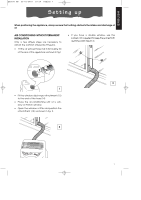
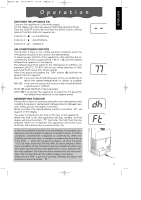
pac160 GB 25-01-2003 10:19 Pagina 8 Setting up Pinguino is equipped with an adjustable window bracket 18. If you have a sliding window, place the bracket on the window sill, extend the bracket fully within the window frame and lower the window onto the bracket. Insert the nozzle of the exhaust hose into the slot, then connect the hose to the air conditioner (Fig.4). Thanks to the wing nut, it's possible to use the window bracket also for sliding windows. Position the hole of the bracket to allow a correct installation of the exhaust hose (see the following instructions). If you have a sliding door, use the additional set provided in order to extend the accessory to the desired length; joining the two parts (fig. 5), adjust the total length according to your needs then, fit the bracket with the relevant nuts, close the door and connect the hose (fig. 6). 5 4 6 8
-
 1
1 -
2
-
 3
3 -
 4
4 -
 5
5 -
 6
6 -
 7
7 -
 8
8 -
 9
9 -
 10
10 -
 11
11 -
 12
12 -
 13
13 -
14
-
15
-
16
-
17
-
18
 |
 |