Dell 2355DN Service Manual
Dell 2355DN Manual
 |
View all Dell 2355DN manuals
Add to My Manuals
Save this manual to your list of manuals |
Dell 2355DN manual content summary:
- Dell 2355DN | Service Manual - Page 1
Dell 2355dn Service Manual 29 Jul 2010 - Dell 2355DN | Service Manual - Page 2
Inc. All rights reserved. Reproduction in any manner whatsoever without the written permission of Dell Inc.is strictly forbidden. Trademarks used in this text: Dell and the DELL logo are trademarks of Dell Inc. Other trademarks and trade names may be used in this document to refer to the entities - Dell 2355DN | Service Manual - Page 3
3-2 3.2.1 Cover 3-2 3.2.2 Fuser-Unit 3-3 3.2.3 Controller Board 3-4 3.2.4 Scanner ASS'Y and DADF Unit 3-5 3.2.5 OPE-Unit 3-6 3.2.6 Cover-Middle and Cover-Exit 3-7 3.2.7 LSU-Unit 3-8 3.2.8 Drive-Unit 3-8 3.2.9 Pick_Up Roller 3-9 3.2.10 SMPS 3-9 3.2.11 HVPS 3-10 3.2.12 Transfer Roller 3-10 - Dell 2355DN | Service Manual - Page 4
and Adjustments 4-1 4.1.1 Paper path 4-1 4.1.2 Clearing Paper Jams 4-2 4.1.3 Diagnostic Mode 4-17 4.1.4 Consumables and Replacement Parts 4-33 4.2 Troubleshooting 4-34 4.2.1 Procedure of Checking the Symptoms 4-34 4.2.2 Abnormal Image Printing and Defective Roller 4-35 4.2.3 Solution - Dell 2355DN | Service Manual - Page 5
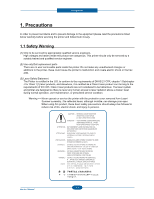
by appropriately qualified service engineers. High voltages and lasers inside this product are dangerous. This printer should only be serviced by a suitably trained and qualified service engineer. (2) Use only Dell replacement parts There are no user serviceable parts inside the printer. Do not make - Dell 2355DN | Service Manual - Page 6
(2) Please keep Drum cartridge and Toner Cartridge away from children. The toner powder contained in the Drum cartridge and Toner Cartridge may be harmful and if swallowed you should contact a doctor. 1.2.2 Electric Shock and Fire Safety Precautions Failure to follow the following instructions could - Dell 2355DN | Service Manual - Page 7
user settings. These will be erased if the mainboard or network card is replaced. (2) Ensure that power is disconnected before servicing or replacing any electrical parts. (3) Disconnect printer interface cables and power cables. (4) Only use approved spare parts. Ensure that part number, product - Dell 2355DN | Service Manual - Page 8
finger or hair into the rotating parts. When operating a printer, do not put hand or hair into the rotating parts (Paper feeding entrance, motor, fan, etc.). If do, you can get harm. (3) When you move the printer This printer weighs 17.7 kg including toner cartridge and cassette. Use safe lifting and - Dell 2355DN | Service Manual - Page 9
to replace the battery with the same or equivalent type recommended by the manufacturer. 3. Super capacitor or Lithium batteries contain toxic substances and should not be opened, crushed, or burned for disposal. 4. Dispose of used batteries according to the manufacture's instructions. 1-5 Service - Dell 2355DN | Service Manual - Page 10
Solution for Office Device (Fast, Durable, Versatile) Small Workgroup or Single User Feature ଖ General - 35 ppm Print/Copy Speed - 1200 dpi Print/Copy Resolution - 256MB System Memory - 50 sh DADF - 250 sh Input / 150 sh Output ଖGOption - 250 sh SCF - 802.11 b/g Wireless Lan 2-1 Service Manual - Dell 2355DN | Service Manual - Page 11
Copy Standby Warm Up Time from Sleep Status Machine Life Max. Monthly Volume (Duty Cycle) Print Scan DADF Average Monthly Print Volume Machine Life Periodic Replacing Parts Pickup Roller Pad Unit (Tray) Pad Unit (DADF) DELL Laser MFP 2355dn Fax, Copier, Print, Scan, DADF, N/W Print, Scan - Dell 2355DN | Service Manual - Page 12
Print Emulation Auto Emulation Sensing Font Type Number Power Save Resolution Normal RET Toner Save FPOT From Stand by From Sleep Status Duplex Print Printable Area Halftone(Gray Scale) DELL Laser MFP 2355dn 20~80% 10~90% Max 8,200ft Class B 256MB / 512MB(Std./Max) DDR2 DDR2 SDRAM - Dell 2355DN | Service Manual - Page 13
Scan Width Scan To Email Locations Scan Depth Copy Quality Selection or Original Image type selection Mode FCOT Color Mono Text Text/Photo Photo Stand by Copy Speed / Letter Origin Alignment From Sleep Status SDMC at all mode MDSC at Text, Text/Photo, Photo Platen DADF DELL Laser MFP 2355dn - Dell 2355DN | Service Manual - Page 14
Number of Copies Preset Contrast Levels Copy Mode(=Quality) Collation Copy Auto return to default mode DELL Laser MFP 2355dn 25% to 400% for Platen 25% to 100% for DADF 1~199 Yes 5 level Text, Text/Photo, Photo Yes Yes Changeable Default mode Special Copy N-up copy Collation Copy Auto Fit Copy - Dell 2355DN | Service Manual - Page 15
Resolution Std 203*98dpi Fine 203*196dpi S.Fine 300*300dpi Scan Std Speed(DADF) Fine/S.Fine 2.5 sec/ LTR 5 sec/ LTR Changeable Default mode Darkness, Original Type, Reduce/Enlarge, No. Of Copies Rx fax duplex print out Yes Multiple page scan speed 21 ppm/LTR, Std mode 203×98dpi, ITU - Dell 2355DN | Service Manual - Page 16
, SNMP, HTTP 1.1 Operating System MS Windows 2000/XP/2003/Vista/2008, MAC (English only, no status monitor, web download only) Linux: Red Hat 8.0~9.0, Fedora Core 1~3, Mandrake 9.0~10.2, SuSE 8.2~9.2. Netware 4.x Paper Handling Capacity ( 20lbs) Main Tray Bypass 250sheets 50 Sheets Optional - Dell 2355DN | Service Manual - Page 17
) Software 2nd Feeder Multi-Feed Rate Printing Skew DADF Cassette, 2nd Feeder DADF Top Side Copy Skew Top Side Compatibility WHQL DOS Win 3.x Win 95 Win 98 Win ME Win NT 4.0 Win 2000 Win 2003 Win XP Win Vista Win 2008 Mac Linux MFP 1/1000, Duplex(1/500) 1/2000, 1/1000 ±1.5/177.8mm (1st Tray - Dell 2355DN | Service Manual - Page 18
and feature Software (Continued) Item Driver Printer TWAIN WIA PSU PC-FAX Consumables Type How to install Toner Life Quality Target Toner Count MTBF MPBF MTTR UMR Level Sensor DELL Laser MFP 2355dn PCL6, PostScript Level3(Std.) Yes Yes Yes Yes One Piece Type Toner Cartridge Front door - Dell 2355DN | Service Manual - Page 19
figurations DELL LASER MFP 2355dn is made up of the Main Control part, Operation Panel part, Scanner part, Line Interface part and Power part. Each Part is a separate Module which focuses on common and standard design of different kind products. Main control part adopting Fax & LBP Printer exclusive - Dell 2355DN | Service Manual - Page 20
2.2.1.2 FAX Section 1) Modem Part BLOCK DIAGRAM Product spec and feature Implemented by based on Silab DAA (Data Access Arrangement) Solution, and is roughly controlled by SSD and satisfies each PSTN Requirements by modulating internal Configuration with connecting Tel Line. 2-11 Service Manual - Dell 2355DN | Service Manual - Page 21
to adjust output impedance of Clock SSD CLKP CLKN DIBP DIBN LSD Out Driver is inside SSD and CLKSHIGH Resistor to adjust duty of HLPWR Resistor and SSD, RSP is transferred and LSD recognizes RSP and change LSD to output Driver transfer Data to SSD. DIB Data form SSD to LSD by Transformer has - Dell 2355DN | Service Manual - Page 22
Fax Modes: 8) Fax Contrast: 9) Fax Memory: 10) TX/RX Journal : 11) Tel/ID List: 12) Confirmation Reports for Send: 13) Management Reports: 14) TTI/RTI: 15) Line Control Unit (LIU): 16) Header Transmission (Always On): PSTN (RJ-11) Half-Duplex resolution). User selectable Part This is Connection Part - Dell 2355DN | Service Manual - Page 23
Supported Operating Systems: 3) Compatibility: 4) Maximum Scan Width: 5) Effective Scan Width: 6) Optical Resolution: 7) Interpolated Resolution 8) Preview Scan: Color CCD (Charge Coupled Device) Module Windows 2000/2003/ XP/Vista/2008, MAC (English only, no status monitor, web download only) Mac - Dell 2355DN | Service Manual - Page 24
9) Scan Modes/Speeds: (USB 2.0, 300dpi, Letter Size, Pentium 4 2.xGHz, 128MB RAM) DADF Platen 10) DADF Capacity: 11) Image Compression: 12) PC Interface: (USB & Parallel are not simultaneously supported) 13) Minimum PC Specification: 14) Registration Position for Original: 15) Number of Copies - Dell 2355DN | Service Manual - Page 25
menu. Reverts the current setting to the default values. Start a job. Function Keys Press: To: Deletes characters in the edit area. Shows the jobs currently running. You can copy both sides of an ID Card, such as a driver's license, to a single side of paper. Gives detailed information about - Dell 2355DN | Service Manual - Page 26
redistributing the toner. • The toner cartridge is totally empty. Remove the old toner cartridge and install a new one. • A paper jam has occurred. • There is no paper in the tray. Load paper in the tray. • The machine has stopped due to a major error. Check the display message. 2-17 Service Manual - Dell 2355DN | Service Manual - Page 27
: (selectable from Print Driver) 7) Speed: 8) Input Paper Capacity: 9) Output Paper Capacity: 10) Feed Direction: 11) PC Interface: 12) Toner Cartridge: 13) Paper Sensing: Laser-based Electro-photography Windows 2000/2003/XP/Vista/2008/ MAC (English only, no status monitor, web download only) Linux - Dell 2355DN | Service Manual - Page 28
Supported Media Types: Plain, Label, Cardstock, Transparency 7) Copy Speed: (SDMP = Single Document, Multiple Printout, MDSP = Multiple Document, Single Printout) - Platen, SDMP : 35cpm (Letter) - DADF, SDMP : 35cpm (Letter) - DADF, MDSP : 21cpm/Ltr, 20cpm/A4 (Simplex) 7ipm/Ltr, 6ipm/A4 (Duplex - Dell 2355DN | Service Manual - Page 29
Dial (manual fax): 3) Last Number Redial part takes the 24V and outputs the high voltage for THV/MHV/BIAS, and the outputted high voltage is supplied to the toner, OPC cartridge, and transfer roller. ■ HVPS (High Voltage Power Supply) • Transfer High Voltage (THV+) - Input Voltage: 24 V DC +15% / -10 - Dell 2355DN | Service Manual - Page 30
circuit, so it turns the heater on/off with taking signal from engine control part. • Triac feature : 16A-LV model / 12A-HV model, 600V SWITCHING • Phototriac Coupler (PC501) - Turn On If Current : 15mA ~ 50mA(Design: 16mA) - High Repetive Peak Off State Voltage : Min 600V 2-21 Service Manual - Dell 2355DN | Service Manual - Page 31
will be affected. Whenever servicing the machine, you must perform as follows: 1. Check to verify that documents are not stored in memory. 2. Be sure to remove the toner cartridge before you disassemble parts. 3. Unplug the power cord. 4. Use a flat and clean surface. 5. Replace only with authorized - Dell 2355DN | Service Manual - Page 32
General Disassembly 3.2.1 Cover 1. 1. Take out the Cassette Unit from SET. 4. Remove the Duplex Guide from the rear side of SET. Cassette Unit Duplex Guide 2. Open the front cover. And take out the Toner Cartridge. Toner Cartridge 5. To remove the Cover-Rear, first remove CoverDIMM. Cover-DIMM - Dell 2355DN | Service Manual - Page 33
the 3 hook from the bottom. Cover-Side Right Cover-Side Left 3.2.2 Fuser-Unit 1.Open the Cover-Rear. And remove the 4 screws. 2. Take out the Fuser-Unit with holding the lever. ଖGIGf you want to repair the sub unit of Fuser, please consult the Fuser exploded view. Fuser-Unit 3-3 Service Manual - Dell 2355DN | Service Manual - Page 34
Disassembly and Reassembly 3.2.3 Controller Board 1. To remove the Controller board, first remove the Cover-Side Left. 3. Remove the all screws securing the Main shield. Separate the Main shield. Controller B'd 2. Unplug the all harness from the Controller board. Harness 3-4 Service Manual - Dell 2355DN | Service Manual - Page 35
3. Pull the Scan Assy in the direction of arrow and Lift up it. ଖ If you want to repair the sub unit of DADF-Unit, consult the Exploded view. DADF Scan ASS'Y 2. Remove the 2 screws from the rear side of SET. 4. Open the Cover-DADF and remove the DADF roller. DADF-Roller 3-5 Service Manual - Dell 2355DN | Service Manual - Page 36
. Unplug the connector and release the OPE-Unit. 2. Remove the 3 screws. Caution : Do not overpower to remove the hook. It is easy to break the hinge. 3-6 Service Manual - Dell 2355DN | Service Manual - Page 37
Disassembly and Reassembly 3.2.6 Cover-Middle and Cover-Exit - Before disassembling the Cover-Middle and Cover-Exit, Remove the Scan Assy, Cover-Rear, Cover-Side(L/R), and Main Shield. 1. Remove the 2 screws securing Cover-Exit. 3. Remove the 1 Screw from right side. Cover-Middle Cover-Exit 2. - Dell 2355DN | Service Manual - Page 38
Scan Assy, Cover-Rear, Cover-Side(L/R), Cover-Exit, Cover-Middle. 1. Remove the LSU unit after the 2 harness and 4 screws. LSU-Unit 3.2.8 Drive-Unit - Before disassembling the Drive unit, Remove the Cover-Side(L/R), Main shield. 1. Remove the Drive unit after remove the 5 screws. 3-8 Service Manual - Dell 2355DN | Service Manual - Page 39
, You must remove the Toner cartridge and Cassette Unit. 1. First turn upside down the SET. 2. Remove the Pick up roller rubber by pulling a hook. Hook Pick_Up Rubber 3.2.10 SMPS - Before disassembling the SMPS board, remove the Cover-Rear, Cover-Side(Right), Duplex Motor. 1. Remove the Cover - Dell 2355DN | Service Manual - Page 40
Toner cartridge, Cassette Unit, Pick-Up roller Assy, Duplex Motor. And turn upside down the SET Roller - Before disassembling the Transfer roller, remove the toner cartridge. 1. Remove the Transfer roller. Caution : Do not touch the surface of the Transfer Roller. Transfer Roller 3-10 Service Manual - Dell 2355DN | Service Manual - Page 41
, Jam removing method, and so on. It includes the contents of manual. 4.1.1 Paper path Scanner Part PAPER EMPTY SENSOR FEED SENSOR SCAN SENSOR Engine Part Roller-REGI Roller-MP OPC Roller-Transfer Roller-Feed Roller-Pickup Roller-Exit Roller-Heat Roller-Pressure Duplex 4-1 Service Manual - Dell 2355DN | Service Manual - Page 42
: Paper empty sensor ~ Feed sensor (2) JAM-1 : Feed sensor ~ Exit sensor (3) JAM-2 : Exit sensor ~ (4) Duplex Jam-1 : ~ Duplex sensor (5) Duplex Jam-0 : Duplex sensor ~ Feed sensor (3) EXIT SENSOR SCAN SENSOR FEED SENSOR (2) (5) DUPLEX SENSOR (4) (1) PAPER EMPTY SENSOR 4-2 Service Manual - Dell 2355DN | Service Manual - Page 43
Pull out toner cartridge certain time after registration 3. Remove jammed paper Jam 2 1. Open rear cover Trailing edge of media does not 2. Pull down jam lever on fuser leave Exit Sensor within a certain unit and open fuser cover) time after touching registration 3. Remove jammed paper from exit - Dell 2355DN | Service Manual - Page 44
Troubleshooting ■ Description of DADF JAM type PAPER EMPTY SENSOR FEED SENSOR SCAN SENSOR Type Case Document Jam All case of DADF Jam Jam Removal 1. Open DADF open cover 2. Remove jammed paper OR 1. Open DADF open cover and Lift up DADF middle cover 2. Remove jammed paper 4-4 Service Manual - Dell 2355DN | Service Manual - Page 45
for thick, thin or mixed documents. 1. Remove the remaining documents from the DADF. If the document is jammed in the paper feed area: a. Open the DADF cover. c. Close the DADF cover. Then reload the document into the DADF. b. Remove the document by gently pulling it out. 4-5 Service Manual - Dell 2355DN | Service Manual - Page 46
Alignment and Troubleshooting If the document is jammed in the paper exit area: a. Open the DADF cover. c. Remove the document by gently pulling it out. b. Open the document input tray upwards and pull the document gently out of the DADF. d. Close the DADF cover and the document input tray. Then - Dell 2355DN | Service Manual - Page 47
Alignment and Troubleshooting If the document is jammed in the duplex path: a. Open the DADF cover. c. Remove the document by gently pulling it out. b. Open the DADF inner cover. d. Close the DADF inner cover and the DADF cover. Then load the documents back into the DADF. 4-7 Service Manual - Dell 2355DN | Service Manual - Page 48
the duplex unit Open Rear Door Go to "Paper Feed Jam (tray 1)" or "Paper Feed Jam (optional tray 2)". "Fuser Area Jam". "Paper Exit Jam". "Duplex Jam 0". "Duplex Jam 1". To avoid tearing the paper, pull the jammed paper out gently and slowly. Follow the steps below to clear the jam. 4-8 Service - Dell 2355DN | Service Manual - Page 49
the next step. 2. Pull the paper tray open. If you cannot see the paper or the paper does not move when pulled, check the fuser area. For more information, see "Fuser Area Jam". 4. Insert the paper tray into the printer until it snaps into place. Printing automatically resumes. 4-9 Service Manual - Dell 2355DN | Service Manual - Page 50
1 half way out. 4. Pull the paper straight up and out. 2. Remove the jammed paper from the printer. If you cannot see the paper in this area or the paper does not move when pulled, go to the next step. 5. Insert the trays back into the printer. Printing automatically resumes. 4-10 Service Manual - Dell 2355DN | Service Manual - Page 51
printing. 4.1.2.4 Fuser Area Jam NOTICE: The fuser area is hot. Take care when removing paper from the printer. 1. Open the front cover and lightly pull the toner cartridge straight out. 2. Remove the paper by gently pulling it straight out. Service Manual 3. Replace the toner cartridge and - Dell 2355DN | Service Manual - Page 52
Alignment and Troubleshooting 4.1.2.5 Paper Exit Jam 1. Open and close the front cover. The jammed paper automatically exits the printer. 4. If you see the jammed paper, push the two blue pressure levers down and remove the paper. Skip to step 9. If the paper does not exit, go to the next step. - Dell 2355DN | Service Manual - Page 53
Alignment and Troubleshooting 6. Unfold the duplex guide fully. 8. Pull the jammed paper out. If the jammed paper does not move when you pull, push the two blue pressure levers up to loosen the paper, and then remove it. 7. While pushing the fuser lever to the right, open the fuser door. NOTICE: - Dell 2355DN | Service Manual - Page 54
and Troubleshooting 4.1.2.6 Duplex Jam Duplex Jam 0 1. Pull the duplex unit out of the printer. 2. Remove the jammed paper from the duplex unit. 3. Push the duplex unit to the printer. 4. Open and close the front cover. Printing automatically resumes. CAUTION: If you do not push the duplex unit - Dell 2355DN | Service Manual - Page 55
Alignment and Troubleshooting Duplex Jam 1 1. Open the rear door. 2. Unfold the duplex guide fully. 3. Pull the jammed paper out. 4. Return the duplex guide and close the rear door. 5. Open and close the front cover. Printing automatically resumes. 4-15 Service Manual - Dell 2355DN | Service Manual - Page 56
"Paper Specifications". • Ensure that the recommended print side of print materials is facing down in the paper tray and facing up in the MPF. • Ensure that the duplex unit is installed correctly. - Cleaning the DADF Pick-up Roller/ Feed Roller DADF Pick-up Roller Feed-Roller 4-16 Service Manual - Dell 2355DN | Service Manual - Page 57
password dialog box appears, enter "1934" and press the "OK" button. To exit the diagnostic mode, press the home button at the left upper corner of the display. When exit the diagnostic mode, a popup window shall display. Selecting "Yes" in "Reboot Copier "will reboot the set. 4-17 Service Manual - Dell 2355DN | Service Manual - Page 58
in below table. Depth1 Information Test Routine Depth2 General Software Version Report Copier Fax Other Service Tag Network IP Address Set Version Main Controller User Interface Network Controller Protocol Configuration Error Information Supplies Information NVM Read/Write Test Routine NVM Read - Dell 2355DN | Service Manual - Page 59
Troubleshooting 4.1.3.3 Information Information menu will have below items - General - Software Version - Report a) General When selecting General, OP displays Service Tag and Network IP Address. - Service Tag Service Tag will be string and maximum length will be 7 characters. Right side of Service - Dell 2355DN | Service Manual - Page 60
Alignment and Troubleshooting b) Software Version This menu displays all the version of the software installed in the system in detail. The following software version will be shown in the menu. - Set Version - Main Controller - User Interface - Network Controller C) Report This menu displays reports - Dell 2355DN | Service Manual - Page 61
Alignment and Troubleshooting 4.1.3.4 Test Routine Test Routine has items to check machine functionalities. This menu has below sub-items. - Copier - Fax - Other a) Copier This menu has below sub-items. - NVM Read/Write - Test Routine 4-21 Service Manual - Dell 2355DN | Service Manual - Page 62
& Link", "NVM Name" and Current Value. If user touches one item then 1. Selected item is not editable then notification message will be display on LCD for 2 seconds "Selected item is not editable." 2. Selected item is editable then it will move to NVM Edit window. 1 3 4 2 Service Manual 5 4-22 - Dell 2355DN | Service Manual - Page 63
) also. If user touches button then window will move to upper level and new value will be applied to the system. But new value is out of range, it will not move to upper level but display error pop-up window as below. When user closes pop-up, it will retain previous value. 4-23 Service Manual - Dell 2355DN | Service Manual - Page 64
and Troubleshooting - Engine/DADF Test Routines Test routine window consists of list of test items. Each item has Chain/Link and item name. User can select multiple items by touching on the list. Maximum number of selection will be 3. If user try to select more than 3 items, below error message - Dell 2355DN | Service Manual - Page 65
Troubleshooting On the test execution window, if user touches some item then test for touched item will start and background color will be changed to blue. If user items are on testing, then this button will be gray out. If user touch "Stop All" button then all items will stop testing. and button will - Dell 2355DN | Service Manual - Page 66
. - NVM Read/Write - Test Routine - Protocol Report - NVM Read/Write Chain & Link NVM Name Current Value Each item of fax NVM list is consist of "Chain & Link", "NVM Name" and Current Value. If user touch one item then it will move to edit window as below 1 3 4 2 5 4-26 Service Manual - Dell 2355DN | Service Manual - Page 67
) also. If user touches button then window will move to upper level and new value will be applied to the system. But new value is out of range, it will not move to upper level but display error pop-up window as below. When user closes pop-up, it will retain previous value. 4-27 Service Manual - Dell 2355DN | Service Manual - Page 68
- Fax Routines Alignment and Troubleshooting Test routine window consists of list of test items. Each item has Chain/Link and item name. User can select multiple items by touching on the list. But some items are exclusive and can't select at the same time. If user touch some items but it is confl - Dell 2355DN | Service Manual - Page 69
will be gray out. If user touch "Stop All" button then all items will stop testing. When user touches button, all testing item will be stopped and move to previous window. - Protocol Report If user touches "Protocol Report" then fax protocol dump report will be printed out. 4-29 Service Manual - Dell 2355DN | Service Manual - Page 70
Troubleshooting c) Other Other menu is consist of below sub items - Print Test Pattern - Shading Test - Memory Clear - Printer Setup - Print Test Pattern 1 2 3 User can select the one among 7 test patterns. By default, Test Pattern number shall be 1. User shall select paper source by selecting tray - Dell 2355DN | Service Manual - Page 71
and Troubleshooting - Shading Test User can the shading test to check quality of scanned images, especially defect in optical devices, including lens, mirror, lamp, and etc, are suspected. Press Start button beside "Share and Print report" to see if the current shading value is correct. Mono, red - Dell 2355DN | Service Manual - Page 72
Alignment and Troubleshooting - Printer Setup This menu has the Altitude Adjustment menu as sub menu. The print quality is affected by atmospheric pressure, which is determined by the height of the machine above sea level. The following information will guide you on how to set your machine to the - Dell 2355DN | Service Manual - Page 73
3 Supply Roller 44.9mm Horizontal density band 4 Develop Roller 35.2mm Horizontal density band 5 Transfer Roller 47.1mm Black side contamination/transfer fault 6 Heat Roller 77.8mm Black spot and fuser ghost 7 Pressure Roller 75.4mm Black side contamination 4-33 Service Manual - Dell 2355DN | Service Manual - Page 74
Alignment and Troubleshooting 4.2 Troubleshooting 4.2.1 Procedure of Checking the Symptoms Before attempting to repair the printer first obtain a detailed description of the problem from the customer. Power On OP Panel ON? - No Power - Power Module error - Main PBA error - LCD Panel error Ready - Dell 2355DN | Service Manual - Page 75
the location of the fuser door, see "Clearing Paper Jams". Fuser Error Fuser Not Installed Check Rear Door There is a problem in the fuser unit. Unplug the power cord and plug it back in. If the problem persists, refer to the troubleshooting for Fuser Error. Hub is not supported USB hub device - Dell 2355DN | Service Manual - Page 76
Fax Job is completed with The printer has a communication error : Line Error problem. Low Heat Error Power Cycle There is a problem in the fuser unit. LSU Hsync Error Power A problem has occurred in the Laser Cycle Scanning Email Job is completed with error : Mail excced server support Email - Dell 2355DN | Service Manual - Page 77
toner cartridge is not installed in the machine, install the toner cartridge. Over Heat Error Power Cycle There is a problem in the fuser unit. Unplug the power cord and plug it back in. If the problem persists, refer to the troubleshooting for Fuser Error. Paper Jam 0 Open Front Door Open Tray - Dell 2355DN | Service Manual - Page 78
in the tray. Replace the toner cartridge with a new one. Take out the toner cartridge and thoroughly shake it. By doing this, you can temporarily reestablish printing operations. OR Replace the toner cartridge with a new one for the best print quality. Please wait a few minutes. 4-38 Service Manual - Dell 2355DN | Service Manual - Page 79
troubleshooting. • Check the Scanner Motor and any mechanical disturbance. • Check the right position of the Scanner Motor, and check the any mechanical disturbance in the CCD carriaging part. • Check the Motor Driver in Driver PBA. • If any driver is defective, replace it. 4-39 Service Manual - Dell 2355DN | Service Manual - Page 80
Alignment and Troubleshooting 4.3.2.1(b) PC-Scan PROBLEM Scanning Error Defective image Quality Abnormal noise ITEMS TO BE CHECKED HOW TO SOLVE • Check the printer cable installed. • Check correct installation, and use standard USB cable. • Check how TWAIN driver is installed. • Remove any - Dell 2355DN | Service Manual - Page 81
insert it correctly into the connection jack called "line". b) Replace defective parts. • Replace defective parts. • Replace main PBA. • Replace defective parts. • Refer to 'TEL LINE CANNOT BE ENGAGED' above. • Replace main PBA, if abnormal. • Refer to 'Defective Transmission'. 4-41 Service Manual - Dell 2355DN | Service Manual - Page 82
and Troubleshooting No Image Digital Printer Digital Printer Digital Printer Digital Printer Digital Printer No image? NO YES Self test NO pattern prints? YES Check connection to computer or replace controller A on next page Self testing NO is possible ? YES Take out the cartridge and - Dell 2355DN | Service Manual - Page 83
the toner's guaranty life YES Replace the toner cartridge Transfer roller might be out of its location -> Locate the roller into its place This could occurs when he power of LSU is low or the density is low due to the obstacles on the window -> Replace LSU or clean the window 4-43 Service Manual - Dell 2355DN | Service Manual - Page 84
LSU for the shortage or open -> Repair or replace the boards Replace LSU Is charge voltage supplied NO from HVPS? YES Repair or replace HVPS Is the NO Hsync signal received in LSU? YES Charge part's contact is bad -> Repair or replace the drum cartridge Replace LSU 4-44 Service Manual - Dell 2355DN | Service Manual - Page 85
ribs in fuser or toner on the roller may invoke the image problem -> Replace the fuser cover or the defective part The image is originally black or the black part is far close to the top -> Use the pattern which has the image below bigger than 10mm from the top Dirt of dust stuck onto the window of - Dell 2355DN | Service Manual - Page 86
correctly after NO replaced LSU? YES The power of LSU is set high or internal problem -> Replace LSU or adjust volume END Repair or replace the defective component Toner over supply due to the adjustment fault of metering blade in toner cartridge -> Replace toner cartridge 4-46 Service Manual - Dell 2355DN | Service Manual - Page 87
replace step-up device /terminal after check Check Terminals or contacts and "transfer roller springs" are misplaced NO -> Repair or replace transfer roller etc. Work OK? YES Internal blade or supplying part of the toner cartridge is defective -> Replace the toner cartridge 4-47 Service Manual - Dell 2355DN | Service Manual - Page 88
Adjust the Bias voltage or replace HVPS Operating/storage NO temperature is too low or not recommended paper used? YES Use the machine with recommended paper and at condition There may be a problem in toner layer control in toner cartridge -> Replace the toner cartridge 4-48 Service Manual - Dell 2355DN | Service Manual - Page 89
The problem occured since the obstacles stuck to charge roller -> Clean the Charge Roller and then reprint. Toner leaks and much toner material dropped onto the paper -> Replace the toner cartridge Check toner is stuck onto the P/R or H/R in fuser -> Clean it or replace 4-49 Service Manual - Dell 2355DN | Service Manual - Page 90
's due to the charge roller is ruined (38.3mm) -> Repair/replace HVPS, drum cartridge The OPC is damaged due to the irregular transfer voltage of HVPS -> Repair/replace HVPS -> If the same problem persists, replace the drum cartridge Heat roller is ruined -> Replace the roller 4-50 Service Manual - Dell 2355DN | Service Manual - Page 91
irregular density persists? YES transfer/ charge/developing NO Defective agitator in the toner supplying part voltage drops while of the toner cartridge printing? ->Replace the toner cartridge Check if the 'guide deve YES spring' works OK and repair/repalce Check high voltage output - Dell 2355DN | Service Manual - Page 92
-> Adjust/replace HVPS Obstacles stuck on OPC's surface -> Clean the OPC and machine or replace toner cartridge When putting in/out the drum cartridge, scratch is made -> Replace the drum cartridge D/R in the toner cartridge unit has the defect -> Replace the toner cartridge 4-52 Service Manual - Dell 2355DN | Service Manual - Page 93
Troubleshooting Trembling at the End When OHP Printing Recommended NO OHP film used? YES Use the recommended film Inserted over NO than 10 OHP printng, less than 10 films are guranteed. (Reduce the number of films and re-insert after paper check LED if off) Other parts are touching the fan - Dell 2355DN | Service Manual - Page 94
and Troubleshooting After printing NO completed, any error related fuser? YES Replace the control component on Main PBA Check any contact problem in thermistor and repair The paper used is too thick or contains too much cotton in it -> Re-test with the recommended paper 4-54 Service Manual - Dell 2355DN | Service Manual - Page 95
drawn in because 1. Load recommended quantity of papers of the stack of papers in the Out tray. 2. Open the Cover Front and check whether roller or 2. Does it curl while coming out? spring, which are related to paper out, is not out of position. If so, re-locate or replace. 4-55 Service Manual - Dell 2355DN | Service Manual - Page 96
to return to the original state. Cassette : Adjust Guide to fit the paper width. Is the Guide adjust set to the paper width? Fit the paper width using the Guide adjust. 1. Took out the Stacker extender to support long papers? 2. Stacked too many papers more than Stacker can hold? 1. Use extender - Dell 2355DN | Service Manual - Page 97
Alignment and Troubleshooting No Power (LCD NO display LED Off) Toner cartridge NO Put in the is in the set? cartridge YES Remove the shortage or replace the board Detect failure due to the board which detects side cover open or switch error -> Replace the board or switch 4-57 Service Manual - Dell 2355DN | Service Manual - Page 98
inserted right ways? YES Re-assemble the connector. Check CN23 of the main board. NO Is the conector inserted right ways? Re-assemble the connector. Fuser Error eliminated? YES END Replace the main board. 4-58 Service Manual - Dell 2355DN | Service Manual - Page 99
Alignment and Troubleshooting Paper Jam (Mis-Feeding) Sounds the solenoid on when starts NO print? YES Does the NO paper move? YES Does the paper move more than NO 100mm? YES The Main PBA board defected -> Replace boards The solenoid defected -> Replace it The pick-up unit is assembled - Dell 2355DN | Service Manual - Page 100
Feeds NO multiple pages? YES Check the roller and ribs of fuser are in place, and remove burrs, if any -> Remove the factors of jam Remove the fuser, remove the paper and replace the pressure roller, if necessary Remove any factors Severe skew NO when feeding? YES Adjust the paper guides to fit - Dell 2355DN | Service Manual - Page 101
System Diagram 5. System Diagram 5.1 Block Diagram 5-1 Service Manual Dell 2355dn Block Diagram REAR COVER OPEN FLAT COVER OPEN SCAN MOTOR CCD 3P HVPS NIC P_EMPTY THV FEED_SENSOR CCD FAN 3P MAIN PBA 4P HYPER 2P SPEAKER 4P INNER TEMP 18P LSU 3P 5VS SW - Dell 2355DN | Service Manual - Page 102
System Diagram 5.2 Connection Diagram 5-2 Service Manual Dell 2355dn Engine Connection HVPS {o} to} kl} zœ——“ vwj mœšŒ™ nuk mœšŒ™ 24V 2 24V 1 24V 4 nSENS_DUPLEX0 3 DGND 6 DGND 5 24VS 8 24VS 7 24VS 10 5VS 9 nSENS_FEED 12 nSENS_P_REGI 11 nSENS_P_EMPTY 14 nSENS_P_EXIT 13 - Dell 2355DN | Service Manual - Page 103
nREADY_LSU 3 nLSU_MOT_EN 4 DGND 5 24VS 1 24VS 2 24VS 3 DGND 4 DGND 5 DGND 6 5V 7 EN 8 READY 9 CLK 10 DIR 4 24VS 3 REGI_CLUTCH 2 24VS 1 Pick-up Clutch BLDC Motor PICK-UP CLUTCH & REGI_CLUTCH 5 24VS 4 MP Clutch 3 TX 2 DGND 1 Sens_MP_Empty MP CLUTCH & MP EMPTY - Dell 2355DN | Service Manual - Page 104
System Diagram 5-4 Service Manual Dell 2355dn Scanner Connection Controller DADF CCD B_VIN 1 DGND 2 G_VIN 3 DGND 4 R_VIN 5 DGND 6 24V 7 Scanner_Control1 8 Scanner_Control2 9 PI_TG1 10 DOUT 1+ 11 DOUT 1ڈ 12 DOUT 2+ 13 DOUT 2ڈ 14 DOUT 3+ 15 DOUT 3ڈ 16 DOUT 4+ - Dell 2355DN | Service Manual - Page 105
System Diagram 5-5 Service Manual OPE DGND 1 SCAN_TEMP 2 3.3V 3 3.3V 4 NC 5 nRST_PANEL 6 Scanner_Home 7 DGND 8 HYPER 3.3V 4 1 RTC_VDD 1 DGND 2 1 MOT_OUT1_A 2 MOT_OUT2_A 3 MOT_OUT1_B 4 MOT_OUT2_B SCAN MOTOR 3 TX 2 DGND FLAT_COVER_OPEN 1 nF_COVER_OPEN 5 TX 4 DGND - Dell 2355DN | Service Manual - Page 106
This chapter contains the tools list, list of abbreviations used in this manual, and a guide to the location space required when installing the printer. A definition of test pages and Wireless Network information definition is also included. 6.1 Tool for Troubleshooting The following tools are - Dell 2355DN | Service Manual - Page 107
of this service manual are declared with abbreviations in many parts. Please refer to the table. AC ADF ASIC ASSY BIOS CCD CIS CMOS CN CON CPU db dbA dbM DC DCU DPI DRAM DVM ECP EEPROM EMI EP EPP F/W GDI GND HBP HDD HV HVPS I/F I/O Alternating Current Automatic Document Feeder Application Speci - Dell 2355DN | Service Manual - Page 108
Information 6.3 A4 ISO 19752 Standard Pattern The sample pattern shown in below is the standard pattern used in the factory. The life of the toner cartridge and the printing speed are measured using the pattern shown below. (The image is 70% of the actual A4 size). 6.3.1 A4 ISO 19752 Standard - Dell 2355DN | Service Manual - Page 109
- Dell 2355DN | Service Manual - Page 110
SSerevicrevMiacneual Manual ExplodedView and Parts List Contents 1. MAIN 7 2. COVER 9 2.1 COVER-MIDDLE 11 2.2 MEA-COVER_FRONT 13 2.3 MEA-COVER_REAR 15 3. ELA UNIT-MAIN DRIVE 17 4. DRIVE-DUPLEX 19 5. FRAME 21 5.1 FRAME MAIN 23 5.1.1 ELA HOU-FRAME EXIT 26 5.1.2 DRIVE-FUSER 28 - Dell 2355DN | Service Manual - Page 111
Parts CatalogPa-rtsDCeatlallog2-D3ell52535d5dnn Thumbnail 1 SSerevicrevMiacneual Manual 1. MAIN 2. COVER 2.1 COVER-MIDDLE 2.2 MEA-COVER_FRONT 2.3 MEA-COVER_REAR 3. ELA UNIT-MAIN DRIVE 4. ELA UNIT-DUPLEX DRIVE 5. FRAME 5.1 ELA HOU-FRAME_ETC 5.1.1 ELA HOU-FRAME EXIT 5.1.2 ELA HOU-FUSER - Dell 2355DN | Service Manual - Page 112
Parts CatalogPa-rtsDCeatlallog2-D3ell52535d5dnn Thumbnail 2 SSerevicrevMiacneual Manual 5.2 FUSER 6. MEA UNIT-DUPLEX 7. SCANNER 7.1 OPE 7.2 PLATEN 7.2.1 MEA-SCAN UPPER 7.2.2 PLATEN-LOWER 7.3 ELA HOU-DADF 7.3.1 ELA HOU-COVER PLATEN 7.3.2 ELA HOU-DADF DRV 7.3.3 ELA HOU-DADF LOWER 7.3.4 ELA - Dell 2355DN | Service Manual - Page 113
Parts CatalogP-arDts Cealtallo2g -3De5ll 523d55ndn Thumbnail 3 8. CASSETTE 9. ELA HOU-SCF 6 SeSrviecrevMiacnueal Manual - Dell 2355DN | Service Manual - Page 114
Parts CatalogPa-rtsDCeatlallog2-D3ell52535d5dnn 1. MAIN 12 14 15-2 15-1 22 15 3 19 2 11 20 6 10 16 23 13 1 18 17 9 7 8 21 4 7 0 5 SSerevicrevMiacneual Manual - Dell 2355DN | Service Manual - Page 115
CatalogPa-rtsDCeatlallog2-D3ell52535d5dnn SSerevicrevMiacneual Manual MAIN Parts List Drawing# Dell_ code 0 1 1 2 2 3 4 JM043 5 6 YU933 7 KW466 8 CR963 9 10 YF792 11 SEC_code Description SET JC93-00313A FRAME(110V) JC93-00313B FRAME(220V) JC97-03865A SCANNER(110V) JC97-03865B - Dell 2355DN | Service Manual - Page 116
Parts CatalogPa-rtsDCeatlallog2-D3ell52535d5dnn 2. COVER SSerevicrevMiacneual Manual 4-3 4-2 4-1 4-4 4 4 6 1 0 7 5 5-1 5-2 5-3 2-4 2 2 2-4 5 2-2 2-3 2-1 3 2-5 9 - Dell 2355DN | Service Manual - Page 117
-rtsDCeatlallog2-D3ell52535d5dnn SSerevicrevMiacneual Manual COVER Parts List Drawing# Dell_ code Service Remark 1 SNA 1 SNA 1 SNA 1 SNA 1 SNA 1 SNA 2 SNA 1 SNA 1 SA 1 SA SA : SERVICE AVAILABLE, SNA : SERVICE 01464B COVER-FRAME DUP Qty Service Remark 1 SA 1 SNA 1 SNA 1 SNA 1 SA 1 SNA 1 SNA - Dell 2355DN | Service Manual - Page 118
Parts CatalogPa-rtsDCeatlallog2-D3ell52535d5dnn SSerevicrevMiacneual Manual 2.1 COVER-MIDDLE 20 20 6 20 5 20 4 20 8 14 13 7 12 3 12 9 10 11 10 10 11 2 0 1 15 12 16 20 20 20 17 20 18 19 20 11 - Dell 2355DN | Service Manual - Page 119
Manual COVER-MIDDLE Parts List Drawing# Dell_ code 0 1 2 3 4 5 6 7 8 9 10 BRUSH GND JC63-00791A GROUND-P-SPRING SCAN JC63-01834A COVER-STACKER RX 0203-001159 TAPE-FILAMENT JC63-00938B COVER-M_REAR UPPER JC72-40981A PMO-ROLLER UPPER DP Qty Service Remark 1 SNA 1 SNA - Dell 2355DN | Service Manual - Page 120
Parts CatalogP-arDts Cealtallo2g -3De5ll 523d55ndn 2.2 MEA-COVER_FRONT 1 8 2 11 5 3 4 9 3 10 13 0 6 7 12 SeSrviecrevMiacnueal Manual - Dell 2355DN | Service Manual - Page 121
-ASF_FOLDER JC63-01812A COVER-FRONT JC63-01838A COVER-TRAY MP Qty Service Remark 1 SA 2 SNA 1 SNA 2 SNA 1 SNA 1 SNA 1 SNA SA : SERVICE AVAILABLE, SNA : SERVICE not AVAILABLE Drawing# Dell_ code 7 8 9 10 11 12 SEC_code Description JC63-01840A TRAY-ASF INPUT JC64-00398A LOCKER-FRONT COVER - Dell 2355DN | Service Manual - Page 122
Parts CatalogP-arDts Cealtallo2g -3De5ll 523d55ndn 2.3 MEA-COVER_REAR 9 5 2 8 36 15 7 16 13 11 10 15 4 0 1 12 14 SeSrviecrevMiacnueal Manual - Dell 2355DN | Service Manual - Page 123
JC63-01823A COVER-REAR JC67-00160A CAP-NETWORK JC68-01668D LABEL-INFORMATION JC68-01669B LABEL(R)-FUSER JC68-02149A LABEL-INFORMATION JC72-01403A SPONGE-GUIDE OUTPUT JC72-40981A PMO-ROLLER UPPER DP Qty Service Remark 1 SNA 1 SNA 1 SNA 1 SNA 1 SNA 6 SNA 2 SNA 1 SNA SSerevicrevMiacneual Manual 16 - Dell 2355DN | Service Manual - Page 124
Parts CatalogP-arDts Cealtallo2g -3De5ll 523d55ndn 3. ELA UNIT-MAIN DRIVE 3 5 1 9 12 7 4 4 5 10 11 11 8 17 0 2 6 SeSrviecrevMiacnueal Manual - Dell 2355DN | Service Manual - Page 125
-D3ell52535d5dnn ELA UNIT-MAIN DRIVE Parts List Drawing# Dell_ code 0 Service Remark 1 SA 3 SNA 4 SNA 4 SNA 2 SNA 0.4 SNA 1 SNA SA : SERVICE AVAILABLE, SNA : SERVICE not AVAILABLE Drawing# Dell_ code 7 8 9 10 Service Remark 1 SNA 1 SNA 1 SNA 1 SNA 2 SNA 1 SNA SSerevicrevMiacneual Manual 18 - Dell 2355DN | Service Manual - Page 126
Parts CatalogP-arDts Cealtallo2g -3De5ll 523d55ndn 4. DRIVE-DUPLEX 4 4 3 1 2 19 0 SeSrviecrevMiacnueal Manual - Dell 2355DN | Service Manual - Page 127
-D3ell52535d5dnn DRIVE-DUPLEX Parts List Drawing# Dell_ code 0 1 2 SEC_code Description JC93-00314A DRIVE-DUPLEX JC93-00316A DRIVE-MOTOR STEP JC61-01599A BRACKET-P-GEAR DUP Qty Service Remark 1 SA 1 SNA 1 SNA Drawing# Dell_ code 3 4 SA : SERVICE AVAILABLE, SNA : SERVICE not AVAILABLE - Dell 2355DN | Service Manual - Page 128
Parts CatalogP-arDts Cealtallo2g -3De5ll 523d55ndn 5. FRAME 6-4 6-1 4-2 4-1 4-3 6-5 6-6 6-2 6-3 4 6 3 4 1 6 21 2 0 5 SeSrviecrevMiacnueal Manual - Dell 2355DN | Service Manual - Page 129
-D3ell52535d5dnn SSerevicrevMiacneual Manual FRAME Parts List Drawing# Dell_ code 0 0 1 2 3 KW450 3 KW449 4 4-1 KW433 4-2 4-3 SEC_code Description JC93-00313A FRAME JC93-00313B FRAME 6003-000196 SCREW-TAPTITE JC44-00097B HARNESS-SMPS JC96-05064B FUSER JC96-05063B FUSER JC96-05152A - Dell 2355DN | Service Manual - Page 130
Parts CatalogPa-rtsDCeatlallog2-D3ell52535d5dnn 5.1 FRAME MAIN SSerevicrevMiacneual Manual 5 71 15 20 0 74 59 41 27 32 26 18 13 48 33 37 6 61 52 45 36 44 69 62 35 53 40 21 68 7 72 64 36 47 66 65 60 23 67 63 33 46 58 57 12 34 10 30 22 39 - Dell 2355DN | Service Manual - Page 131
Manual FRAME MAIN Parts List 6044-000001 RING-CS 9 6044-000125 RING-E 10 6107-001164 SPRING-TS 11 6107-001352 SPRING SOLENOID-MANUAL 17 JC33-00027B SOLENOID-FEED 18 JC39-00322A CBF HARNESS-SCAN GND 1 SNA JC63-00920A GROUND-P-FUSER 1 SNA JC63-00921A GROUND-P-GUIDE TR 1 SNA JC63-00922A - Dell 2355DN | Service Manual - Page 132
DRIVE-FUSER JC96-05479A ELA HOU-HVPS JC96-04880A ELA HOU-MPF JC96-05189A ELA HOU-FRAME EXIT JC97-01788A MEA UNIT-CLUTCH JC97-02394A MEA UNIT-BRACKET FEED JC96-05218B MEA UNIT-GEAR PICK UP Qty Service Remark 4 SNA 1 SA 1 SA 1 SA 1 SA 1 SNA 1 SNA 1 SNA 1 SNA SSerevicrevMiacneual Manual - Dell 2355DN | Service Manual - Page 133
Parts CatalogPa-rtsDCeatlallog2-D3ell52535d5dnn 5.1.1 ELA HOU-FRAME EXIT SSerevicrevMiacneual Manual 14-4 14-3 14-2 14-1 14 15-3 10 15-2 15-1 15 15 14 14 4 15 11 4 20 9 12 7 3 5 13 8 6 1 26 - Dell 2355DN | Service Manual - Page 134
Manual ELA HOU-FRAME EXIT Parts List Drawing# Dell_ code 0 1 2 3 4 5 6 7 8 9 10 01941A FRAME-EXIT JC61-02155A PLATE-LSU SUPPORT JC63-01322A GROUND-FUSER BRUSH JC65-00019A TERMINAL-CRUM JC66-01283A DAMPER-FRAME EXIT JC66-02038A ROLLER-EXIT F/DOWN Qty Service Remark 1 SNA 3 SNA 1 - Dell 2355DN | Service Manual - Page 135
Parts CatalogP-arDts Cealtallo2g -3De5ll 523d55ndn 5.1.2 DRIVE-FUSER 9 6 4 10 5 8 7 3 2 8 10 1 28 0 SeSrviecrevMiacnueal Manual - Dell 2355DN | Service Manual - Page 136
, SNA : SERVICE not AVAILABLE Drawing# Dell_ code 6 7 8 9 10 SEC_code Description JC66-01210A GEAR-FUSER IDLE FR JC66-01158A GEAR-EXIT RDCN 87/24 6003-000269 SCREW-TAPTYPE 6044-000125 RING-E JC66-00346A RING-E Qty Service Remark 1 SNA 1 SNA 2 SNA 1 SNA 2 SNA SSerevicrevMiacneual Manual 29 - Dell 2355DN | Service Manual - Page 137
Parts CatalogPa-rtsDCeatlallog2-D3ell52535d5dnn 5.1.3 ELA HOU-GUIDE_DUP F SSerevicrevMiacneual Manual 0 13 3 8 9 11 14 13 1 4 30 15 2 7 6 5 12 10 - Dell 2355DN | Service Manual - Page 138
10 11 12 13 14 15 UG594 SEC_code Description JC66-01171A SHAFT-PICK UP JC66-01173A ROLLER-FEED JC66-01187A LEVER-ACTUATOR EMPTY JC66-01581A CAM-SHAFT PICK UP JC67-00208A BRUSH-ANTISTATIC JC72-00382B PMO-BUSHING FEED JC72-41364A PMO-BUSHING_P/U,MP JC97-02441A MEA-ROLLER PICK UP Qty Service - Dell 2355DN | Service Manual - Page 139
Parts CatalogPa-rtsDCeatlallog2-D3ell52535d5dnn 5.1.4 ELA HOU-MPF SSerevicrevMiacneual Manual 15 13 10 1 28 0 24 23 7 27 2 6 8 25 14 26 21 9 20 17 4 11 5 19 22 16 3 18 12 32 - Dell 2355DN | Service Manual - Page 140
Manual ELA HOU-MPF Parts List Drawing# Dell_ code 0 1 2 3 4 5 6 7 8 9 10 11 12 13 14 SEC_code Description JC96-04880A ELA HOU-MPF 0604-001095 PHOTO-INTERRUPTER 6003-000196 SCREW-TAPTITE 6107-001167 SPRING-CS 6107-001237 SPRING-ES JC33-00028B SOLENOID-MP JC39-00873A HARNESS-MP - Dell 2355DN | Service Manual - Page 141
Parts CatalogP-arDts Cealtallo2g -3De5ll 523d55ndn 5.1.5 MEA_UNIT-BRACKET_FEED 1 6 5 2 4 0 3 34 SeSrviecrevMiacnueal Manual - Dell 2355DN | Service Manual - Page 142
MEA_UNIT-BRACKET_FEED Parts List Drawing# Dell_ code 0 1 2 3 SEC_code Description JC97-02394A MEA UNIT-BRACKET FEED 6044-000125 RING-E 6044-000231 RING-E JC61-01582A BRACKET-P-FEED Qty Service Remark 1 SNA 2 SNA 1 SNA 1 SNA SA : SERVICE AVAILABLE, SNA : SERVICE not AVAILABLE - Dell 2355DN | Service Manual - Page 143
Parts CatalogP-arDts Cealtallo2g -3De5ll 523d55ndn 5.1.6 MEA UNIT-CLUTCH 5 4 1 2 36 3 0 SeSrviecrevMiacnueal Manual - Dell 2355DN | Service Manual - Page 144
rtsDCeatlallog2-D3ell52535d5dnn MEA UNIT-CLUTCH Parts List Drawing# Dell_ code 0 1 2 SEC_code Description JC97-01788A MEA UNIT-CLUTCH 6107-001171 SPRING-TS JC66-00393A GEAR-FEED 1 Qty Service Remark 1 SNA 1 SNA 1 SNA SA : SERVICE AVAILABLE, SNA : SERVICE not AVAILABLE Drawing# Dell_ code - Dell 2355DN | Service Manual - Page 145
Parts CatalogPa-rtsDCeatlallog2-D3ell52535d5dnn 5.2 FUSER SSerevicrevMiacneual Manual 29 12 26 31 7 20 23 2 37 32 13 36 35 34 16 5 33 25 10 9 22 27 18 24 1 14 6 3 8 30 28 7 37 32 17 7 38 39 11 36 15 34 10 25 2 35 9 8 33 0 1-3 1 1-6 21 1-9 1-5 13 1-7 1-2 1-2 - Dell 2355DN | Service Manual - Page 146
JC66-01424A LEVER-LINK_JAM JC66-01153A GEAR-IDLE 23 FUSER JC66-01079A ROLLER-PRESSURE JC63-01961A GROUND-PR_FUSER JC63-01347A COVER-FUSER_UPPER JC61-02631A GUIDE-GROUND_PR JC61-02156A BRACKET-FUSER JC61-02154A GUIDE-CLAW JC61-01977A HOLDER-JAM JC61-01961A BUSH-PR_2ND JC61-01960A BUSH-PR_1ST JC61 - Dell 2355DN | Service Manual - Page 147
Parts CatalogPa-rtsDCeatlallog2-D3ell52535d5dnn 6. MEA UNIT-DUPLEX SSerevicrevMiacneual Manual 2 3 19 4 6 12 0 4 11 3 19 7 12 9 6 19 1 17 15 19 11 8 5 1 5 1 14 5 13 14 18 1 10 13 5 6 14 40 - Dell 2355DN | Service Manual - Page 148
CatalogPa-rtsDCeatlallog2-D3ell52535d5dnn SSerevicrevMiacneual Manual MEA UNIT-DUPLEX Parts List Drawing# Dell_ code 0 1 2 3 4 5 6 7 8 9 SEC_code Description JC97-02393B MEA UNIT-DUPLEX 0205-001003 GREASE-BEARING 6003-000196 SCREW-TAPTITE 6003-000196 SCREW-TAPTITE 6107-001156 SPRING - Dell 2355DN | Service Manual - Page 149
Parts CatalogP-arDts Cealtallo2g -3De5ll 523d55ndn 7. SCANNER 7 7 5 4 1 2 8 6 8 3 7 42 0 SeSrviecrevMiacnueal Manual - Dell 2355DN | Service Manual - Page 150
ELA HOU-DADF JC97-03846A PLATEN JC97-03848A OPE JC97-03848B OPE Qty Service Remark 1 SNA 1 SNA 1 SA 1 SNA 1 SA 1 SA SA : SERVICE AVAILABLE, SNA : SERVICE not AVAILABLE Drawing# Dell_ code 4 5 6 7 8 SEC_code Description JC63-02807A COVER-SCAN BAND F JC64-00440A BADGE-DELL JC68-01685B - Dell 2355DN | Service Manual - Page 151
Parts CatalogPa-rtsDCeatlallog2-D3ell52535d5dnn 7.1 OPE 29 29 29 28 26 23 29 30 27 24 25 22 21 1 0 5 2 3 4 6 14 15 18 13 19 7 20 10 8 11 12 9 17 16 13 14 20 44 SSerevicrevMiacneual Manual - Dell 2355DN | Service Manual - Page 152
CatalogPa-rtsDCeatlallog2-D3ell52535d5dnn SSerevicrevMiacneual Manual OPE Parts List Drawing# Dell_ code 0 0 1 2 3 4 5 6 7 8 9 10 11 12 13 14 14 15 15 16 SEC_code Description JC97-03848A OPE JC97-03848B OPE JC63-02809A COVER-OPE JC64-00396A KEY-NUMERICAL JC64- - Dell 2355DN | Service Manual - Page 153
Parts CatalogP-arDts Cealtallo2g -3De5ll 523d55ndn 7.2 PLATEN 3 6 7 7 2 0 4 46 5 7 1 SeSrviecrevMiacnueal Manual - Dell 2355DN | Service Manual - Page 154
-D3ell52535d5dnn PLATEN Parts List Drawing# Dell_ code 0 1 2 3 SEC_code Description JC97-03846A PLATEN JC97-03849A PLATEN-LOWER JC97-03283A MEA-SCAN UPPER JC63-01827A COVER-SCAN BAND L Qty Service Remark 1 SNA 1 SNA 1 SA 1 SNA SA : SERVICE AVAILABLE, SNA : SERVICE not AVAILABLE - Dell 2355DN | Service Manual - Page 155
Parts CatalogPa-rtsDCeatlallog2-D3ell52535d5dnn 7.2.1 MEA-SCAN UPPER 4 5 2 3 1 6 0 6-5 6-4 6-2 6 6-7 6-6 6-1 6-3 48 SSerevicrevMiacneual Manual - Dell 2355DN | Service Manual - Page 156
MEA-SCAN UPPER Parts List Drawing# Dell_ code 0 1 2 3 4 5 6 6-1 SEC_code Description JC97-03283A MEA-SCAN UPPER 0203-001267 TAPE-DOUBLE FACE 6003-000196 SCREW-TAPTITE JB70-00148A IPR-HOLDER GLASS JC01-00001A GLASS-SCAN JC63-01831A COVER-SCAN UPPER JC97-03281A MEA-SCAN DUMMY - Dell 2355DN | Service Manual - Page 157
Parts CatalogPa-rtsDCeatlallog2-D3ell52535d5dnn SSerevicrevMiacneual Manual 7.2.2 PLATEN-LOWER 25 27 17 17 16 15 13 20 14 21 7 6 9 5 8 4 3 18 30 19 23 24 12 11 10 31 28 32 29 33 34 1 26 35 2 22 18-2 18-5 18-8 0 18-7 18-4 18-1 18-1 18 18-6 18-3 50 - Dell 2355DN | Service Manual - Page 158
CatalogPa-rtsDCeatlallog2-D3ell52535d5dnn SSerevicrevMiacneual Manual PLATEN-LOWER Parts List Drawing# Dell_ code 0 1 2 3 4 5 6 7 8 9 10 11 12 13 14 15 16 17 18 18-1 18-2 18-3 SEC_code Description JC97-03849A PLATEN-LOWER JC63-01830A COVER-SCAN LOWER JC61-02535A HOLDER-CCD JC61 - Dell 2355DN | Service Manual - Page 159
Parts CatalogP-arDts Cealtallo2g -3De5ll 523d55ndn 7.3 ELA HOU-DADF 10 7 6 2 9 0 1 5 3 52 8 11 4 SeSrviecrevMiacnueal Manual - Dell 2355DN | Service Manual - Page 160
10 11 SEC_code Description JC96-05186A ELA HOU-DADF LOWER JC96-05187A ELA HOU-DADF UPPER JC97-02779B MEA UNIT-HINGE JC97-03038B MEA UNIT-HINGE DADF JC97-03279A MEA UNIT-COVER OPEN JC97-03421A MEA UNIT-STACKER TX Qty Service Remark 1 SNA 1 SNA 1 SNA 1 SNA 1 SNA 1 SNA SSerevicrevMiacneual Manual - Dell 2355DN | Service Manual - Page 161
Parts CatalogPa-rtsDCeatlallog2-D3ell52535d5dnn SSerevicrevMiacneual Manual 7.3.1 ELA HOU-COVER PLATEN 0 13 14 14 6 15 17 7 19 5 10 16 20 4 1 18 3 2 21 11 8 9 12 54 - Dell 2355DN | Service Manual - Page 162
Manual ELA HOU-COVER PLATEN Parts List Drawing# Dell_ code 0 1 2 3 4 5 6 7 8 9 10 SEC_code Description JC96-05183A ELA HOU-COVER PLATEN 6001-000130 SCREW-MACHINE 6003-000196 SCREW-TAPTITE JC33-00031A SOLENOID-LIFTING JC39-00892A HARNESS-DADF GND JC39-01008A HARNESS-DADF - Dell 2355DN | Service Manual - Page 163
Parts CatalogPa-rtsDCeatlallog2-D3ell52535d5dnn 7.3.2 ELA HOU-DADF DRV 0 19 21 16 15 16 2 3 1 17 17 5 6 7 14 14 4 14 8 14 20 3 17 9 6 10 11 12 13 56 SSerevicrevMiacneual Manual - Dell 2355DN | Service Manual - Page 164
-rtsDCeatlallog2-D3ell52535d5dnn SSerevicrevMiacneual Manual ELA HOU-DADF DRV Parts List Drawing# Dell_ code 0 1 2 3 4 5 6 7 8 9 10 SEC_code Description JC96-05185A ELA HOU-DADF DRV JC61-02386B BRACKET-DRIVE DADF JC31-00116A MOTOR STEP JC33-00030A SOLENOID-DADF JC66-01758A GEAR - Dell 2355DN | Service Manual - Page 165
Parts CatalogPa-rtsDCeatlallog2-D3ell52535d5dnn 7.3.3 ELA HOU-DADF LOWER SSerevicrevMiacneual Manual 9 4 17 18 24 5 16 13 17 14 25 3 12 23 22 8 21 19 0 2 20 15 6 10 7 11 58 - Dell 2355DN | Service Manual - Page 166
CatalogPa-rtsDCeatlallog2-D3ell52535d5dnn SSerevicrevMiacneual Manual ELA HOU-DADF LOWER Parts List Drawing# Dell_ code 0 1 2 3 4 5 6 7 8 9 10 11 SEC_code Description JC96-05186A ELA HOU-DADF LOWER 0205-001080 GREASE-BEARING 0604-001095 PHOTO-INTERRUPTER 6003-000196 SCREW-TAPTITE - Dell 2355DN | Service Manual - Page 167
Parts CatalogPa-rtsDCeatlallog2-D3ell52535d5dnn SSerevicrevMiacneual Manual 7.3.4 ELA HOU-DADF_UPPER 21 0 6 1 2 3 4 20 5 14 15 16 17 19 18 60 7 8 9 10 11 12 13 - Dell 2355DN | Service Manual - Page 168
CatalogPa-rtsDCeatlallog2-D3ell52535d5dnn SSerevicrevMiacneual Manual ELA HOU-DADF_UPPER Parts List Drawing# Dell_ code SEC_code Description 0 JC96-05187A ELA HOU-DADF UPPER 1 KW462 JC97-03069A MEA UNIT-DADF RUBBER 2 JC61-00387A SPRING ETC-PAD 3 JC66-00461A ROLLER-M-ADF IDLE 4 6003 - Dell 2355DN | Service Manual - Page 169
Parts CatalogP-arDts Cealtallo2g -3De5ll 523d55ndn 7.3.5 MEA UNIT-HINGE DADF 1 11 8 2 6 4 0 5 62 9 3 7 10 SeSrviecrevMiacnueal Manual - Dell 2355DN | Service Manual - Page 170
-D3ell52535d5dnn MEA UNIT-HINGE DADF Parts List Drawing# Dell_ code 0 1 2 3 4 5 SEC_code Description JC97-03038B MEA UNIT-HINGE_DADF JC61-02224B HINGE-PLATEN JC61-01432A HINGE-M_LINK L JC61-02223A HINGE-SLIDER JC61-02248B HINGE-SCAN JC61-02183A HOUSING-HINGE_SCAN Qty Service Remark 1 SNA - Dell 2355DN | Service Manual - Page 171
Parts CatalogP-arDts Cealtallo2g -3De5ll 523d55ndn 7.3.6 MEA UNIT-COVER OPEN 2 8 4 5 0 1 7 64 6 3 3 SeSrviecrevMiacnueal Manual - Dell 2355DN | Service Manual - Page 172
-D3ell52535d5dnn MEA UNIT-COVER OPEN Parts List Drawing# Dell_ code 0 1 2 3 4 SEC_code Description JC97-03279A MEA UNIT-COVER OPEN 6003-000196 SCREW-TAPTITE JB72-00819A PMO-BUSH JC61-00788A GUIDE-M_DOC SENSOR JC61-02489A SPRING ETC-PICKUP Qty Service Remark 1 SNA 2 SNA 1 SNA 2 SNA - Dell 2355DN | Service Manual - Page 173
Parts CatalogP-arDts Cealtallo2g -3De5ll 523d55ndn 7.3.7 MEA UNIT-STACKER TX 0 7 2 1 2 7 6 8 3 4 66 5 SeSrviecrevMiacnueal Manual - Dell 2355DN | Service Manual - Page 174
Drawing# Dell_ code 6 7 8 9 10 SEC_code Description JC63-01835A COVER-STACKER TX JC66-01786A SLIDER-DOCU GUIDE JG66-40003A GEAR-PINION JC66-02103A DAMPER-STACKER REAR JC66-02104A DAMPER-STACKER FRONT Qty Service Remark 1 SNA 2 SNA 1 SNA 1 SNA 1 SNA SSerevicrevMiacneual Manual 67 - Dell 2355DN | Service Manual - Page 175
Parts CatalogPa-rtsDCeatlallog2-D3ell52535d5dnn 8. CASSETTE 0 15 19-2 19 19-1 20 12 10 14 9 11 1 22 3 68 16 18 2 13 5 4 4 17 21 6 8 7 SSerevicrevMiacneual Manual - Dell 2355DN | Service Manual - Page 176
-D3ell52535d5dnn SSerevicrevMiacneual Manual CASSETTE Parts List Drawing# Dell_ code 0 1 2 3 4 5 6 7 8 9 10 11 12 -P-KNOCK_UP JC61-00876G FRAME-M_CASSETTE JC61-02740A GUIDE-EXTENSION L JC61-00960A GUIDE-M-EXTEND S_DELL JC61-01692A SUPPORT-HOLDER PAD JC61-70911A SPRING ETC-EXIT - Dell 2355DN | Service Manual - Page 177
Parts CatalogPa-rtsDCeatlallog2-D3ell52535d5dnn 9. ELA HOU-SCF 14 10 11 SSerevicrevMiacneual Manual 16 17 9 57 15 6 47 52 59 2446 37 22 26 23 21 34 43 8 3 35 6 20 31 54 57 38 39 19 25 1 12 - Dell 2355DN | Service Manual - Page 178
-D3ell52535d5dnn SSerevicrevMiacneual Manual ELA HOU-SCF Parts List Drawing# Dell_ code 0 HT234 1 2 3 4 5 6 7 8 9 10 11 12 -P-PICK_UP JC66-00598A ROLLER-FEED JC66-00720A SHAFT-P-CORE JC70-11028A IPR-GROUND TOP JC72-00382B PMO-BUSHING FEED JC72-00975A PMO-ACTUATOR EMPTY JC72-00979A PMO - Dell 2355DN | Service Manual - Page 179
HOU-SCF Parts List Drawing# Dell_ code 60 61 62 63 SEC_code Description JC61-00910A HOUSING-M-PICK UP2_R2 JC72-01231A SPONGE-ROLLER PICK_UP JC97-03278A MEA UNIT-CASSETTE SCF JC97-03280A MEA-COVER FRONT SCF Qty Service Remark 1 SNA 1 SNA 1 SNA 1 SNA SA : SERVICE AVAILABLE, SNA : SERVICE not - Dell 2355DN | Service Manual - Page 180
Assembly, 2335dn/2355dn DADF Rubber Pad, 2335dn/2355dn Platen Assembly, 2355dn Pickup Roller, 1815dn/2335dn/2355dn MPF Pickup Roller, 1815dn/2335dn/2355dn MPF Assembly, 2335dn/2355dn Duplex Drive, 2335dn/2355dn Duplex Unit, 1815dn/2335dn/2355dn Duplex Guide Housing, 2335dn/2355dn Laser Scanning Unit - Dell 2355DN | Service Manual - Page 181
) ELA HOU-HVPS C3FYG Modem Card, 2355dn 881P1 Power Supply, SMPS, 220V, 2355dn KM07H Power Supply, SMPS, 110V, 2355dn F028C Power Supply, HVPS, 2335dn/2355dn FRU FRU FRU FRU Notes CRU : Customer Replaceable Units - refers to parts that can easily be replaced by the customer without sending an
-
 1
1 -
 2
2 -
 3
3 -
 4
4 -
 5
5 -
 6
6 -
 7
7 -
8
-
9
-
10
-
11
-
12
-
13
-
14
-
15
-
16
-
17
-
18
-
19
-
20
-
21
-
22
-
23
-
24
-
25
-
26
-
27
-
28
-
29
-
30
-
31
-
32
-
33
-
34
-
35
-
36
-
37
-
38
-
39
-
40
-
41
-
42
-
43
-
44
-
45
-
46
-
47
-
48
-
49
-
50
-
51
-
52
-
53
-
54
-
55
-
56
-
57
-
58
-
59
-
60
-
61
-
62
-
63
-
64
-
65
-
66
-
67
-
68
-
69
-
70
-
71
-
72
-
73
-
74
-
75
-
76
-
77
-
78
-
79
-
80
-
81
-
82
-
83
-
84
-
85
-
86
-
87
-
88
-
89
-
90
-
91
-
92
-
93
-
94
-
95
-
96
-
97
-
98
-
99
-
100
-
101
-
102
-
103
-
104
-
105
-
106
-
107
-
108
-
109
-
110
-
111
-
112
-
113
-
114
-
115
-
116
-
117
-
118
-
119
-
120
-
121
-
122
-
123
-
124
-
125
-
126
-
127
-
128
-
129
-
130
-
131
-
132
-
133
-
134
-
135
-
136
-
137
-
138
-
139
-
140
-
141
-
142
-
143
-
144
-
145
-
146
-
147
-
148
-
149
-
150
-
151
-
152
-
153
-
154
-
155
-
156
-
157
-
158
-
159
-
160
-
161
-
162
-
163
-
164
-
165
-
166
-
167
-
168
-
169
-
170
-
171
-
172
-
173
-
174
-
175
-
176
-
177
-
178
-
179
-
180
-
181
 |
 |

Dell 2355dn
Service Manual
29 Jul 2010