Dell 2400MP User Guide - Page 25
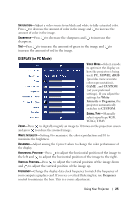
DISPLAY (in PC Mode), the left - projector manual
 |
UPC - 712345000019
View all Dell 2400MP manuals
Add to My Manuals
Save this manual to your list of manuals |
Page 25 highlights
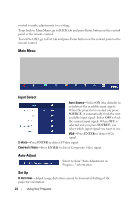
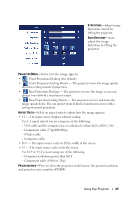
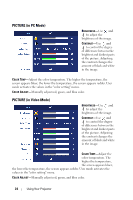
SATURATION-Adjust a video source from black and white to fully saturated color. Press to decrease the amount of color in the image and to increase the amount of color in the image. SHARPNESS-Press to decrease the sharpness and to increase the sharpness. TINT-Press to increase the amount of green in the image and to increase the amount of red in the image. DISPLAY (in PC Mode) VIDEO MODE-Select a mode to optimize the display on how the projector is being used: PC, MOVIE, sRGB (provides more accurate color representation), GAME , and CUSTOM (set your preferred settings). If you adjust the settings for White Intensity or Degamma, the projector automatically switches to CUSTOM. SIGNAL TYPE-Manually select signal type RGB, YCbCr, YPbPr. ZOOM-Press to digitally magnify an image to 10 times on the projection screen and press to reduce the zoomed image. WHITE INTENSITY-Setting 0 to maximize the color reproduction and 10 to maximize the brightness. DEGAMMA-Adjust among the 4 preset values to change the color performance of the display. HORIZONTAL POSITION-Press to adjust the horizontal position of the image to the left and to adjust the horizontal position of the image to the right. VERTICAL POSITION-Press to adjust the vertical position of the image down and to adjust the vertical position of the image up. FREQUENCY-Change the display data clock frequency to match the frequency of your computer graphics card. If you see a vertical flickering bar, use Frequency control to minimize the bars. This is a coarse adjustment. Using Your Projector 25
-
 1
1 -
2
-
3
-
4
-
5
-
6
-
7
-
8
-
9
-
10
-
11
-
12
-
13
-
14
-
15
-
16
-
17
-
18
-
19
-
 20
20 -
 21
21 -
 22
22 -
 23
23 -
 24
24 -
 25
25 -
 26
26 -
 27
27 -
 28
28 -
 29
29 -
 30
30 -
31
-
32
-
33
-
34
-
35
-
36
-
37
-
38
-
39
-
40
-
41
-
42
-
43
-
44
-
45
-
46
-
47
-
48
-
49
 |
 |
