Dell 948 All In One Printer User Guide - Page 100
Using the Operator Panel, Using Your Computer, Copy Mode, Programs, Dell Printers
 |
View all Dell 948 All In One Printer manuals
Add to My Manuals
Save this manual to your list of manuals |
Page 100 highlights
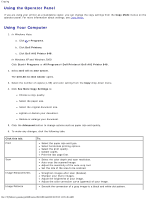
Copying Using the Operator Panel If you are using your printer as a standalone copier, you can change the copy settings from the Copy Mode menus on the operator panel. For more information about settings, see Copy Mode. Using Your Computer 1. In Windows Vista: a. Click ® Programs. b. Click Dell Printers. c. Click Dell AIO Printer 948. In Windows XP and Windows 2000: Click Start® Programs or All Programs® Dell Printers® Dell AIO Printer 948. 2. Select Dell All-In-One Center. The Dell All-In-One Center opens. 3. Select the number of copies (1-99) and color setting from the Copy drop-down menu. 4. Click See More Copy Settings to: Choose a copy quality. Select the paper size. Select the original document size. Lighten or darken your document. Reduce or enlarge your document. 5. Click the Advanced button to change options such as paper size and quality. 6. To make any changes, click the following tabs: Click this tab: Print Scan Image Enhancements Image Patterns To: Select the paper size and type. Select borderless printing options. Select the print quality. Collate copies. Print the last page first. Select the color depth and scan resolution. Auto-crop the scanned image. Adjust the sensitivity of the auto-crop tool. Set the size of the area to be scanned. Straighten images after scan (deskew). Sharpen your blurry images. Adjust the brightness of your image. Adjust the color correction curve (gamma) of your image. Smooth the conversion of a gray image to a black and white dot pattern. file:///T|/htdocs/systems/prn948/en/en/d0e5583.html[10/10/2012 11:05:46 AM]
-
 1
1 -
2
-
3
-
4
-
5
-
6
-
7
-
8
-
9
-
10
-
11
-
12
-
13
-
14
-
15
-
16
-
17
-
18
-
19
-
20
-
21
-
22
-
23
-
24
-
25
-
26
-
27
-
28
-
29
-
30
-
31
-
32
-
33
-
34
-
35
-
36
-
37
-
38
-
39
-
40
-
41
-
42
-
43
-
44
-
45
-
46
-
47
-
48
-
49
-
50
-
51
-
52
-
53
-
54
-
55
-
56
-
57
-
58
-
59
-
60
-
61
-
62
-
63
-
64
-
65
-
66
-
67
-
68
-
69
-
70
-
71
-
72
-
73
-
74
-
75
-
76
-
77
-
78
-
79
-
80
-
81
-
82
-
83
-
84
-
85
-
86
-
87
-
88
-
89
-
90
-
91
-
92
-
93
-
94
-
 95
95 -
 96
96 -
 97
97 -
 98
98 -
 99
99 -
 100
100 -
 101
101 -
 102
102 -
 103
103 -
 104
104 -
 105
105 -
106
-
107
-
108
-
109
-
110
-
111
-
112
-
113
-
114
-
115
-
116
-
117
-
118
-
119
-
120
-
121
-
122
-
123
-
124
-
125
-
126
-
127
-
128
-
129
-
130
-
131
-
132
-
133
-
134
-
135
-
136
-
137
-
138
-
139
-
140
-
141
-
142
-
143
-
144
 |
 |