Dell Alienware 15 R4 Setup and Specifications - Page 9
Alienware Graphics Amplifier
 |
View all Dell Alienware 15 R4 manuals
Add to My Manuals
Save this manual to your list of manuals |
Page 9 highlights
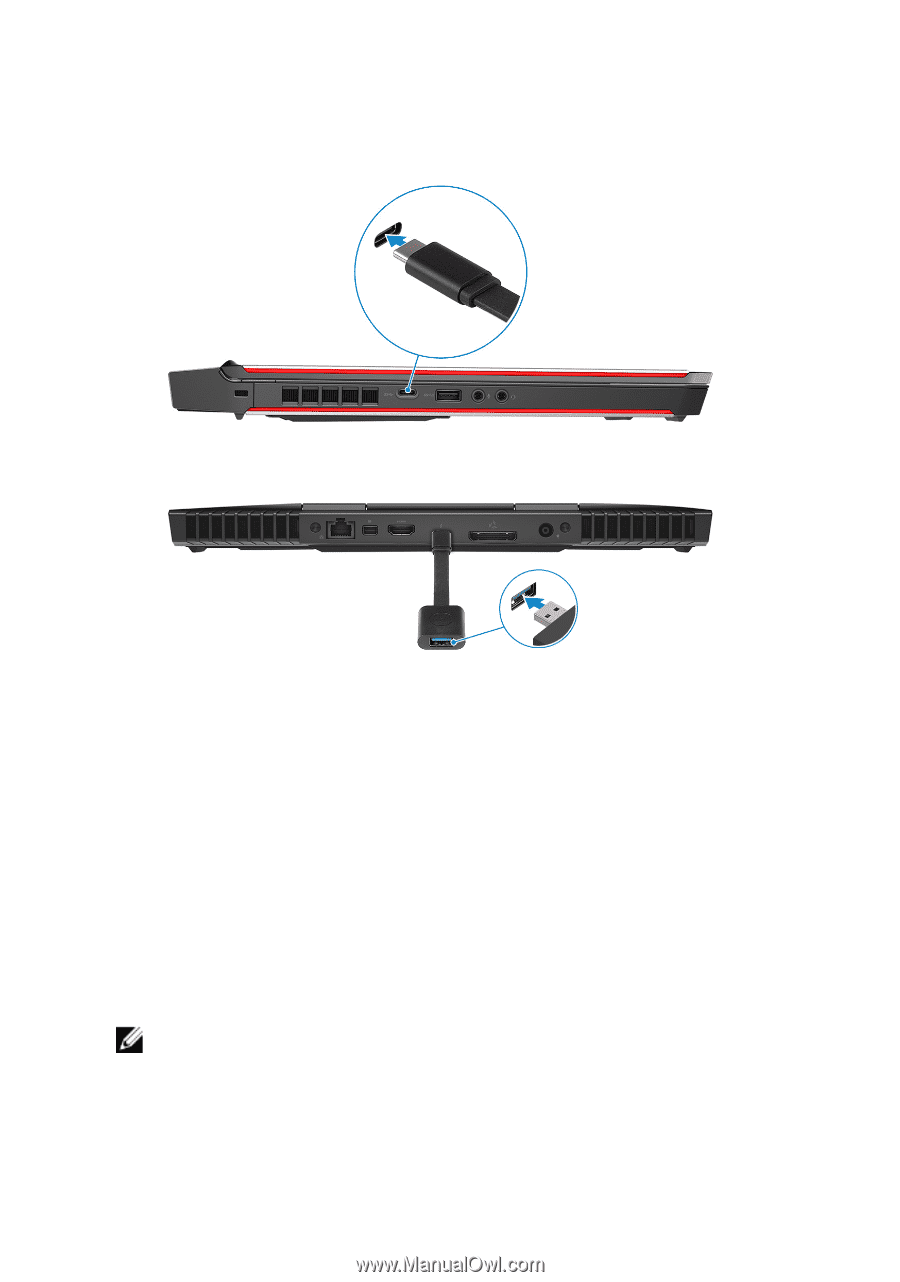
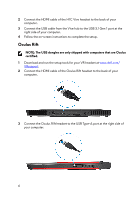
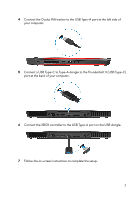
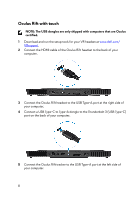
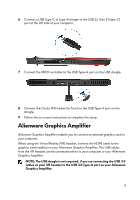
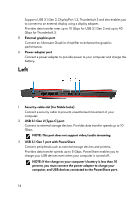
6 Connect a USB Type-C to Type-A dongle to the USB 3.1 Gen 2 (Type-C) port at the left side of your computer. 7 Connect the XBOX controller to the USB Type-A port on the USB dongle. 8 Connect the Oculus Rift tracker for Touch to the USB Type-A port on the dongle. 9 Follow the on-screen instructions to complete the setup. Alienware Graphics Amplifier Alienware Graphics Amplifier enables you to connect an external graphics card to your computer. When using the Virtual Reality (VR) headset, connect the HDMI cable to the graphics card installed on your Alienware Graphics Amplifier. The USB cables from the VR headset can be connected either to your computer or your Alienware Graphics Amplifier. NOTE: The USB dongle is not required, if you are connecting the USB 3.0 cables on your VR headset to the USB 3.0 Type-A port on your Alienware Graphics Amplifier. 9
-
 1
1 -
2
-
3
-
 4
4 -
 5
5 -
 6
6 -
 7
7 -
 8
8 -
 9
9 -
 10
10 -
 11
11 -
 12
12 -
 13
13 -
 14
14 -
15
-
16
-
17
-
18
-
19
-
20
-
21
-
22
-
23
-
24
-
25
-
26
-
27
 |
 |