Dell Alienware Aurora R7 Aurora R6/R7 U.2 Solid-State Drive Installation Guide - Page 14
Connecting the power cable, Replacing the left-side cover, left-side cover
 |
View all Dell Alienware Aurora R7 manuals
Add to My Manuals
Save this manual to your list of manuals |
Page 14 highlights
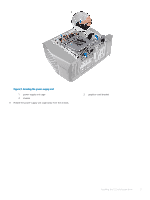
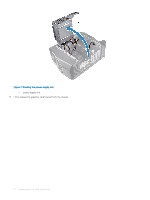
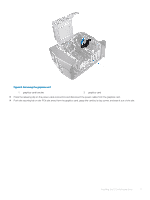
Figure 11. Connecting the power cable 1 chassis 26 Place the computer in an upright position. 27 Align the tabs on the left-side cover with the slots on the chassis. 28 Snap the left-side cover to lock it in place. 2 power cable Figure 12. Replacing the left-side cover 1 chassis 2 slots 3 tabs 4 left-side cover 29 Replace the screw (#6-32 X 1/2") that secures the side-panel release latch to the chassis. 14 Installing the U.2 solid-state drive
-
 1
1 -
2
-
3
-
4
-
5
-
6
-
7
-
8
-
 9
9 -
 10
10 -
 11
11 -
 12
12 -
 13
13 -
 14
14 -
 15
15 -
 16
16
 |
 |
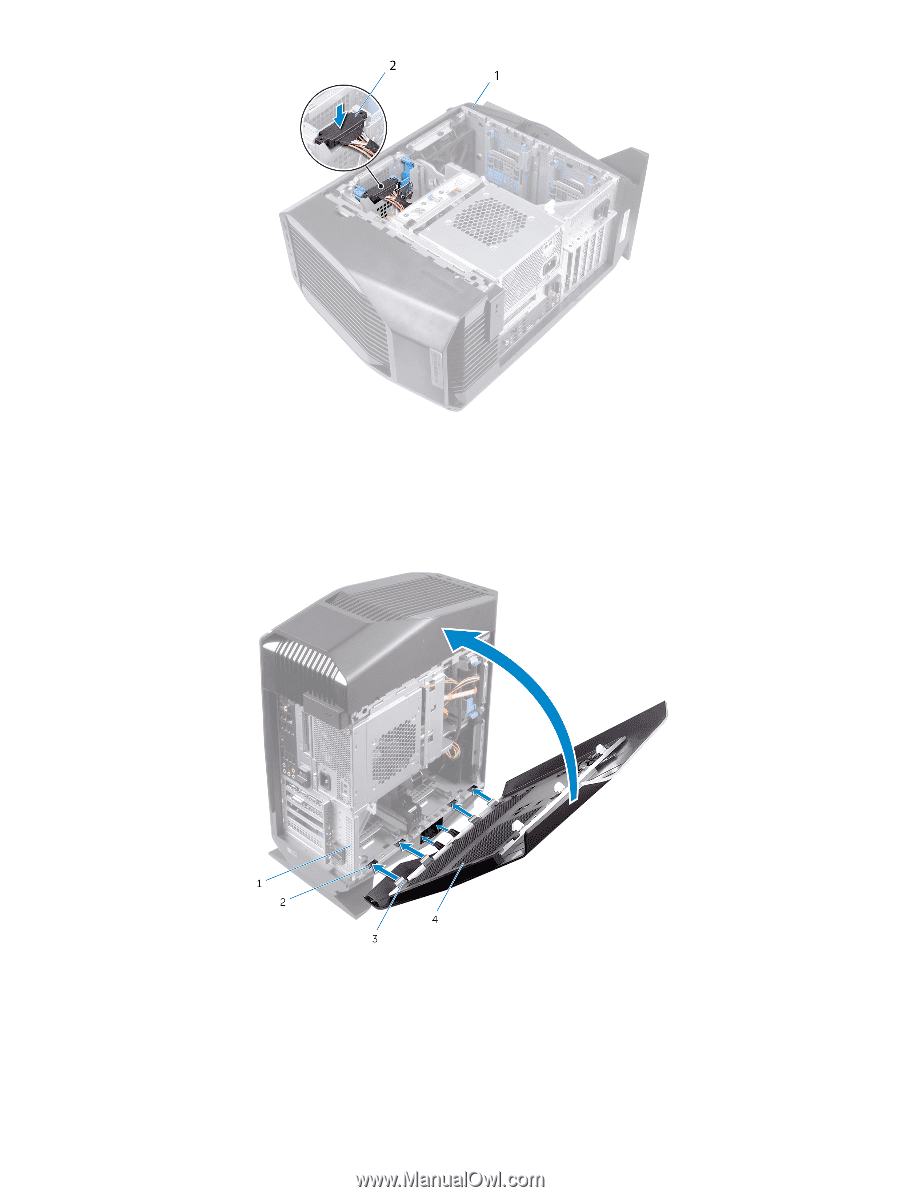
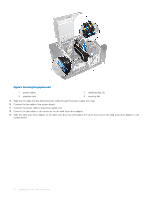
Figure 11. Connecting the power cable
1
chassis
2
power cable
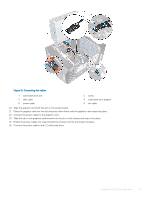
26
Place the computer in an upright position.
27
Align the tabs on the left-side cover with the slots on the chassis.
28
Snap the left-side cover to lock it in place.
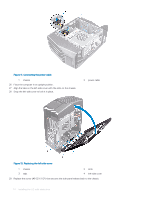
Figure 12. Replacing the left-side cover
1
chassis
2
slots
3
tabs
4
left-side cover
29
Replace the screw (#6-32 X 1/2") that secures the side-panel release latch to the chassis.
14
Installing the U.2 solid-state drive