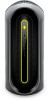
Dell Alienware Aurora Ryzen Edition R10 Alienware Aurora Ryzen Edition Service
Dell Alienware Aurora Ryzen Edition R10 Manual
 |
View all Dell Alienware Aurora Ryzen Edition R10 manuals
Add to My Manuals
Save this manual to your list of manuals |
Dell Alienware Aurora Ryzen Edition R10 manual content summary:
- Dell Alienware Aurora Ryzen Edition R10 | Alienware Aurora Ryzen Edition Service - Page 1
Alienware Aurora Ryzen Edition Service Manual Regulatory Model: D23M Regulatory Type: D23M004 - Dell Alienware Aurora Ryzen Edition R10 | Alienware Aurora Ryzen Edition Service - Page 2
use of your product. CAUTION: A CAUTION indicates either potential damage to hardware or loss of data and tells you how to avoid the problem. WARNING: A WARNING indicates a potential for property damage, personal injury, or death. © 2019 Dell Inc. or its subsidiaries. All rights reserved. Dell, EMC - Dell Alienware Aurora Ryzen Edition R10 | Alienware Aurora Ryzen Edition Service - Page 3
Contents 1 Working inside your computer...6 Safety instructions...6 Before working inside your computer...6 Before you begin ...6 Electrostatic discharge-ESD protection...6 ESD field service kit ...7 Transporting sensitive components...8 After working inside your computer...8 2 Removing and - Dell Alienware Aurora Ryzen Edition R10 | Alienware Aurora Ryzen Edition Service - Page 4
Installing the right tron-light board...35 Processor liquid-cooling assembly...36 Removing the processor liquid-cooling assembly...36 Installing the processor liquid-cooling assembly...38 Coin-cell battery...40 Removing the coin-cell battery...40 Installing the coin-cell battery...41 Memory modules - Dell Alienware Aurora Ryzen Edition R10 | Alienware Aurora Ryzen Edition Service - Page 5
86 Removing the system board...86 Installing the system board...88 Entering the Service Tag in the BIOS setup program 90 3 Device drivers...92 Operating 97 Clearing CMOS settings...99 Clearing forgotten password...100 5 Troubleshooting...101 Enhanced Pre-Boot System Assessment (ePSA) diagnostics - Dell Alienware Aurora Ryzen Edition R10 | Alienware Aurora Ryzen Edition Service - Page 6
with your computer. For more safety best practices, see the Regulatory Compliance home page troubleshooting and repairs as authorized or directed by the Dell technical assistance team. Damage due to servicing that is not authorized by Dell is not covered by your warranty. See the safety instructions - Dell Alienware Aurora Ryzen Edition R10 | Alienware Aurora Ryzen Edition Service - Page 7
problems etc. The more difficult type of damage to recognize and troubleshoot is the intermittent (also called latent or "walking wounded") failure a best practice to regularly test the strap prior to each service call, and at a minimum, test once per week. A wrist strap tester is the best method - Dell Alienware Aurora Ryzen Edition R10 | Alienware Aurora Ryzen Edition Service - Page 8
parts separate from all insulator parts while performing service and that they use anti-static bags for apart for a stable base, and point your toes out. 2. Tighten stomach muscles. Abdominal muscles support your spine when you lift, offsetting the force of the load. 3. Lift with your legs - Dell Alienware Aurora Ryzen Edition R10 | Alienware Aurora Ryzen Edition Service - Page 9
Removing and installing components Inside view of your computer 1. power-supply unit 3. 2.5-inch hard-drive cage 5. system board 7. processor fan and liquid cooling assembly 9. 3.5-inch hard-drive cage 2. 2.5-inch hard drive 4. graphics card 6. VR heat sink 8. top cover 9 - Dell Alienware Aurora Ryzen Edition R10 | Alienware Aurora Ryzen Edition Service - Page 10
System-board components 1. front-chassis fan connector (FRONT_FAN) 3. front-panel USB cable 2 (F_USB2) 5. SATA 6 Gbps drive connector (SATA1) 7. SATA 6 Gbps drive connector (SATA3) 9. solid-state drive slot (M.2 SSD) 11. CMOS reset jumper (CMOS_CLR) 13. LED controller connector (LED_CONTROLLER) 15. - Dell Alienware Aurora Ryzen Edition R10 | Alienware Aurora Ryzen Edition Service - Page 11
Screw list NOTE: When removing screws from a component, it is recommended to note the screw type, the quantity of screws, and then place them in a screw storage box. This is to ensure that the correct number of screws and correct screw type is restored when the component is replaced. NOTE: Some - Dell Alienware Aurora Ryzen Edition R10 | Alienware Aurora Ryzen Edition Service - Page 12
Component System board Secured to Chassis Screw type #6-32 Quantity 8 Screw image Left-side cover Removing the left-side cover Prerequisites 1. Follow the procedure in Before working inside your computer. About this task The following images indicate the location of the left-side cover and - Dell Alienware Aurora Ryzen Edition R10 | Alienware Aurora Ryzen Edition Service - Page 13
Steps 1. Locate the tabs on the left-side cover and slots on the chassis. 2. Rotate the left-side cover towards the chassis until it snaps into place. 3. Replace the screw (M3x4) that secures the side-cover release latch to the chassis. Next steps 1. Follow the procedure in After working inside your - Dell Alienware Aurora Ryzen Edition R10 | Alienware Aurora Ryzen Edition Service - Page 14
Steps Starting from the rear, pull up on the top cover to release it from the chassis. NOTE: Top cover is tightly secured to the chassis by clips and may requires force to remove it off the chassis. Installing the top cover Prerequisites If you are replacing a component, remove the existing - Dell Alienware Aurora Ryzen Edition R10 | Alienware Aurora Ryzen Edition Service - Page 15
Steps Align the tabs on the top cover with the slots on the chassis and snap the top cover into place. Next steps 1. Install the left-side cover. 2. Follow the procedure in After working inside your computer. Right-side cover Removing the right-side cover Prerequisites 1. Follow the procedure in - Dell Alienware Aurora Ryzen Edition R10 | Alienware Aurora Ryzen Edition Service - Page 16
Steps 1. Starting from the top-front tab, pull the right-side cover away from the chassis. 2. Remove the right-side cover from the chassis. Installing the right-side cover Prerequisites If you are replacing a component, remove the existing component before performing the installation procedure. - Dell Alienware Aurora Ryzen Edition R10 | Alienware Aurora Ryzen Edition Service - Page 17
17 - Dell Alienware Aurora Ryzen Edition R10 | Alienware Aurora Ryzen Edition Service - Page 18
Steps 1. Align the tabs on the right-side cover with the slots on the chassis 2. Rotate the right-side cover towards the chassis until it snaps into place. Next steps 1. Install the top cover. 2. Install the left-side cover. 3. Follow the procedure in After working inside your computer. 2.5-inch - Dell Alienware Aurora Ryzen Edition R10 | Alienware Aurora Ryzen Edition Service - Page 19
Steps 1. Disconnect the data and power cables from the hard drive. 2. Press the release tabs on the hard-drive carrier and slide the hard-drive assembly out of the hard-drive cage. 3. Pry the hard-drive carrier to release the tabs on the assembly from the slots on the hard drive. 4. Lift the hard - Dell Alienware Aurora Ryzen Edition R10 | Alienware Aurora Ryzen Edition Service - Page 20
NOTE: Note the orientation on the hard-drive carrier to replace it correctly. 20 - Dell Alienware Aurora Ryzen Edition R10 | Alienware Aurora Ryzen Edition Service - Page 21
Steps 1. Align the hard drive with the pins on the hard-drive carrier. 2. Using the tabs on the opposite side, flex open the carrier to insert the pins on the other side. 3. Slide the hard-drive assembly into the hard-drive cage until it snaps into place. 4. Connect the data cable and power cable to - Dell Alienware Aurora Ryzen Edition R10 | Alienware Aurora Ryzen Edition Service - Page 22
Steps 1. Disconnect the data and power cables from the hard drive. 2. Press the release tabs on the hard-drive carrier and slide the hard-drive carrier out of the hard-drive cage. 3. Pry the hard-drive carrier to release the tabs on the carrier from the slots on the hard drive. 4. Lift the hard - Dell Alienware Aurora Ryzen Edition R10 | Alienware Aurora Ryzen Edition Service - Page 23
NOTE: Note the orientation on the hard-drive carrier to replace it correctly. 23 - Dell Alienware Aurora Ryzen Edition R10 | Alienware Aurora Ryzen Edition Service - Page 24
Steps 1. Align the hard drive with the pins on the hard-drive carrier. 2. Using the tabs on the opposite side, flex open the carrier to insert the pins on the other side. 3. Slide the hard-drive assembly into the hard-drive cage until it snaps into place. 4. Connect the data and power cables to the - Dell Alienware Aurora Ryzen Edition R10 | Alienware Aurora Ryzen Edition Service - Page 25
Installing the 2.5-inch hard-drive cage Prerequisites If you are replacing a component, remove the existing component before performing the installation procedure. About this task The following images indicate the location of the 2.5-inch hard-drive cage and provides a visual representation of the - Dell Alienware Aurora Ryzen Edition R10 | Alienware Aurora Ryzen Edition Service - Page 26
About this task The following images indicate the location of the 3.5-inch and provides a visual representation of the removal procedure. Steps 1. Remove the two screws (#6-32) that secure the 3.5-inch hard-drive cage to the chassis. 2. Lift the 3.5-inch hard-drive cage off the chassis. Installing - Dell Alienware Aurora Ryzen Edition R10 | Alienware Aurora Ryzen Edition Service - Page 27
Steps 1. Insert the 3.5-inch hard-drive cage into its slot on the chassis. 2. Align the tabs on the cage with the tabs on the chassis. 3. Replace the two screws (#6-32) that secure the 3.5-inch hard-drive cage to the chassis. Next steps 1. Install the left-side cover. 2. Follow the procedure in - Dell Alienware Aurora Ryzen Edition R10 | Alienware Aurora Ryzen Edition Service - Page 28
28 - Dell Alienware Aurora Ryzen Edition R10 | Alienware Aurora Ryzen Edition Service - Page 29
Steps 1. Remove the two screws (#6-32) that secure the power-supply unit bracket to the power-supply unit cage. 2. Lift the power-supply unit bracket off the power-supply unit cage. 3. Lift the power-supply unit cage and rotate the power-supply unit cage away from the chassis. 4. Press the releasing - Dell Alienware Aurora Ryzen Edition R10 | Alienware Aurora Ryzen Edition Service - Page 30
WARNING: The cables and ports on the back of the power-supply unit are color-coded to indicate the different power wattage. Ensure that you plug in the cable to the correct port. Failure to do so may result in damaging the power-supply unit and/or system components. About this task The following - Dell Alienware Aurora Ryzen Edition R10 | Alienware Aurora Ryzen Edition Service - Page 31
Steps 1. Place the power supply on the chassis. 2. Align the screw holes on the power-supply unit with the screw holes on the chassis. 3. Replace the four screws (#6-32) that secure the power-supply unit to the chassis. 4. Lift and rotate the power-supply unit cage away from the chassis 5. Connect - Dell Alienware Aurora Ryzen Edition R10 | Alienware Aurora Ryzen Edition Service - Page 32
NOTE: Note the routing of all cables as you remove them so that you can route them correctly after you replace the powersupply unit. About this task The following images indicate the location of the power-supply unit and provides a visual representation of the removal procedure. Steps 1. Remove the - Dell Alienware Aurora Ryzen Edition R10 | Alienware Aurora Ryzen Edition Service - Page 33
WARNING: The cables and ports on the back of the power-supply unit are color-coded to indicate the different power wattage. Ensure that you plug in the cable to the correct port. Failure to do so may result in damaging the power-supply unit and/or system components. About this task The following - Dell Alienware Aurora Ryzen Edition R10 | Alienware Aurora Ryzen Edition Service - Page 34
Right tron-light board Removing the right tron-light board Prerequisites 1. Follow the procedure in Before working inside your computer. 2. Remove the left-side cover. 3. Remove the top-cover. 4. Remove the right-side cover. About this task The following images indicate the location of the right - Dell Alienware Aurora Ryzen Edition R10 | Alienware Aurora Ryzen Edition Service - Page 35
Installing the right tron-light board Prerequisites If you are replacing a component, remove the existing component before performing the installation procedure. About this task The following images indicate the location of the right tron-light board and provides a visual representation of the - Dell Alienware Aurora Ryzen Edition R10 | Alienware Aurora Ryzen Edition Service - Page 36
Processor liquid-cooling assembly Removing the processor liquid-cooling assembly Prerequisites 1. Follow the procedure in Before working inside your computer. WARNING: Despite having a plastic shield, the processor liquid-cooling assembly may be very hot during normal operation. Ensure that it had - Dell Alienware Aurora Ryzen Edition R10 | Alienware Aurora Ryzen Edition Service - Page 37
Steps 1. Lay the computer on the right side. 2. Slide the power-supply unit cage release latches to the unlock position. 3. Lift the power-supply unit cage. 4. Rotate the power-supply unit cage away from the chassis. 5. Loosen the four captive screws that secure the VR heat sink to the system board. - Dell Alienware Aurora Ryzen Edition R10 | Alienware Aurora Ryzen Edition Service - Page 38
Installing the processor liquid-cooling assembly Prerequisites If you are replacing a component, remove the existing component before performing the installation procedure. CAUTION: Incorrect alignment of the processor liquid-cooling assembly can damage the system board and processor. About this - Dell Alienware Aurora Ryzen Edition R10 | Alienware Aurora Ryzen Edition Service - Page 39
Steps 1. Slide the radiator and fan assembly into the radiator and fan cage. NOTE: Ensure that the hoses are facing the front of the system 2. Align the screw holes on the processor cooler with the screw holes on the system board. 3. Align the screw holes of the two VR heat sink with the screw holes - Dell Alienware Aurora Ryzen Edition R10 | Alienware Aurora Ryzen Edition Service - Page 40
and follow the steps in Before working inside your computer. After working inside your computer, follow the instructions in After working inside your computer. For more safety best practices, see the Regulatory Compliance home page at www.dell.com/regulatory_compliance. CAUTION: Removing the coin - Dell Alienware Aurora Ryzen Edition R10 | Alienware Aurora Ryzen Edition Service - Page 41
Steps 1. Lay the computer on the right side. 2. Slide the power-supply unit cage release latches to the unlock position. 3. Lift the power-supply unit cage and rotate the power-supply unit cage away from the chassis. 4. Press the battery-release lever away from the coin-cell battery until the coin- - Dell Alienware Aurora Ryzen Edition R10 | Alienware Aurora Ryzen Edition Service - Page 42
Steps 1. Insert a new coin-cell battery (CR2032) into the battery socket with the positive side facing up, and snap the battery into place. 42 - Dell Alienware Aurora Ryzen Edition R10 | Alienware Aurora Ryzen Edition Service - Page 43
2. Rotate the power-supply unit cage towards the chassis. 3. Slide the power-supply unit cage release latches towards the locked position. Next steps 1. Install the left-side cover. 2. Follow the procedure in After working inside your computer. Memory modules Removing the memory modules - Dell Alienware Aurora Ryzen Edition R10 | Alienware Aurora Ryzen Edition Service - Page 44
Steps 1. Lay the computer on the right side. 2. Slide the power-supply unit cage release latches to the unlock position. 3. Lift the power-supply unit cage and rotate the power-supply unit cage away from the chassis. 4. Push the securing clips away from the memory module. 5. Grasp the memory module - Dell Alienware Aurora Ryzen Edition R10 | Alienware Aurora Ryzen Edition Service - Page 45
Steps 1. Ensure that the securing clips are extended away from the memory-module slot. 45 - Dell Alienware Aurora Ryzen Edition R10 | Alienware Aurora Ryzen Edition Service - Page 46
2. Align the notch on the memory module with the tab on the memory-module slot. 3. Insert the memory module into the memory-module slot and press the memory module down until it snaps into position and the securing clips lock in place. CAUTION: To prevent damage to the memory module, hold the memory - Dell Alienware Aurora Ryzen Edition R10 | Alienware Aurora Ryzen Edition Service - Page 47
Steps 1. Remove the screw (M2x2.5) that secures the solid-state drive to the system board. 2. Slide and lift the solid-state drive off the system board. Installing the solid-state drive Prerequisites If you are replacing a component, remove the existing component before performing the installation - Dell Alienware Aurora Ryzen Edition R10 | Alienware Aurora Ryzen Edition Service - Page 48
Steps 1. Align the notch on the solid-state drive with the tab on the solid-state drive slot. 2. Insert the solid-state drive at a 45-degree angle into the system board. 3. Press the other end of the solid-state drive down and replace the screw (M2x2.5) that secure the solid-state drive to the - Dell Alienware Aurora Ryzen Edition R10 | Alienware Aurora Ryzen Edition Service - Page 49
49 - Dell Alienware Aurora Ryzen Edition R10 | Alienware Aurora Ryzen Edition Service - Page 50
Steps 1. Lay the computer on the right side. 2. Slide the power-supply unit cage release latches to the unlock position. 3. Lift the power-supply unit cage and rotate the power-supply unit cage away from the chassis. 4. Lift to release the graphics-card bracket from the chassis. 5. Press the - Dell Alienware Aurora Ryzen Edition R10 | Alienware Aurora Ryzen Edition Service - Page 51
51 - Dell Alienware Aurora Ryzen Edition R10 | Alienware Aurora Ryzen Edition Service - Page 52
Steps 1. Place the card into the X16 slot and press down firmly until the graphics card snaps into place. 2. Connect the power cables to the graphics card. 3. Slide the tab on the graphics-card bracket into the slot on the chassis and rotate it into place. 4. Rotate the power-supply unit cage - Dell Alienware Aurora Ryzen Edition R10 | Alienware Aurora Ryzen Edition Service - Page 53
53 - Dell Alienware Aurora Ryzen Edition R10 | Alienware Aurora Ryzen Edition Service - Page 54
Steps 1. Lay the computer on the right side. 2. Slide the power-supply unit cage release latches to the unlock position. 3. Lift the power-supply unit cage and rotate the power-supply unit cage away from the chassis. 4. Lift the graphics bridge that connects the graphics cards. 5. Lift to release - Dell Alienware Aurora Ryzen Edition R10 | Alienware Aurora Ryzen Edition Service - Page 55
Installing the dual-graphics card Prerequisites If you are replacing a component, remove the existing component before performing the installation procedure. About this task The following images indicate the location of the graphics card and provides a visual representation of the installation - Dell Alienware Aurora Ryzen Edition R10 | Alienware Aurora Ryzen Edition Service - Page 56
56 - Dell Alienware Aurora Ryzen Edition R10 | Alienware Aurora Ryzen Edition Service - Page 57
Steps 1. Align the graphics card with the slot on the system board. 2. Place the card into the x16/x8 slot and press down firmly until the graphics card snaps into place. 3. Place the card into the x8 slot and press down firmly until the graphics card snaps into place. 4. Connect the power cables to - Dell Alienware Aurora Ryzen Edition R10 | Alienware Aurora Ryzen Edition Service - Page 58
4. Remove the right-side cover. 5. Remove the single-graphics card or dual-graphics card, as applicable. About this task The following images indicate the location of the front bezel and provides a visual representation of the removal procedure. 58 - Dell Alienware Aurora Ryzen Edition R10 | Alienware Aurora Ryzen Edition Service - Page 59
59 - Dell Alienware Aurora Ryzen Edition R10 | Alienware Aurora Ryzen Edition Service - Page 60
from the chassis. 5. Disconnect the USB cables, LED controller cable and audio cable from the system board and remove the cables from the routing guides on the inside of the chassis. 6. Place the computer in an upright position. 7. Rotate the power-supply unit cage towards the chassis. 8. Rotate and - Dell Alienware Aurora Ryzen Edition R10 | Alienware Aurora Ryzen Edition Service - Page 61
About this task The following images indicate the location of the front bezel and provides a visual representation of the installation procedure. 61 - Dell Alienware Aurora Ryzen Edition R10 | Alienware Aurora Ryzen Edition Service - Page 62
62 - Dell Alienware Aurora Ryzen Edition R10 | Alienware Aurora Ryzen Edition Service - Page 63
63 - Dell Alienware Aurora Ryzen Edition R10 | Alienware Aurora Ryzen Edition Service - Page 64
cover to the chassis. 4. Connect the USB cables, LED controller cable and audio cable to the system board and route the cables through the routing guides on the inside of the chassis. 5. Place the computer in an upright position. 6. Rotate the power-supply unit cage towards the chassis. 7. Slide the - Dell Alienware Aurora Ryzen Edition R10 | Alienware Aurora Ryzen Edition Service - Page 65
Top bezel Removing the top bezel Prerequisites 1. Follow the procedure in Before working inside your computer. 2. Remove the left-side cover. 3. Remove the top cover. 4. Remove the right-side cover. 5. Remove the wireless card. 6. Remove the front bezel. About this task The following images indicate - Dell Alienware Aurora Ryzen Edition R10 | Alienware Aurora Ryzen Edition Service - Page 66
Installing the top bezel Prerequisites If you are replacing a component, remove the existing component before performing the installation procedure. About this task The following images indicate the location of the top bezel and provides a visual representation of the installation procedure. Steps - Dell Alienware Aurora Ryzen Edition R10 | Alienware Aurora Ryzen Edition Service - Page 67
6. Follow the procedure in After working inside your computer. Bottom cover Removing the bottom cover Prerequisites 1. Follow the procedure in Before working inside your computer. 2. Remove the left-side cover. 3. Remove the top cover. 4. Remove the right-side cover. 5. Remove the 2.5-inch hard- - Dell Alienware Aurora Ryzen Edition R10 | Alienware Aurora Ryzen Edition Service - Page 68
Installing the bottom cover Prerequisites If you are replacing a component, remove the existing component before performing the installation procedure. About this task The following images indicate the location of the bottom cover and provides a visual representation of the installation procedure. - Dell Alienware Aurora Ryzen Edition R10 | Alienware Aurora Ryzen Edition Service - Page 69
Processor fan and heat-sink assembly Removing the processor fan and heat-sink assembly Prerequisites 1. Follow the procedure in Before working inside your computer. NOTE: The heat sink may become hot during normal operation. Allow sufficient time for the heat sink to cool before you touch it. - Dell Alienware Aurora Ryzen Edition R10 | Alienware Aurora Ryzen Edition Service - Page 70
Steps 1. Lay the computer on the right side. 2. Slide the power-supply unit cage release latches to the unlock position. 3. Lift the power-supply unit cage and rotate the power-supply unit cage away from the chassis. 4. Disconnect the processor-fan cable from the system board. 5. In reverse - Dell Alienware Aurora Ryzen Edition R10 | Alienware Aurora Ryzen Edition Service - Page 71
Steps 1. Place the processor fan and heat-sink assembly on the processor. 71 - Dell Alienware Aurora Ryzen Edition R10 | Alienware Aurora Ryzen Edition Service - Page 72
2. Align the captive screws on the processor fan heat-sink assembly with the screw holes on the system board. 3. In sequential order, tighten the four captive screws that secure the processor fan and heat-sink assembly to the system board. 4. Connect the processor-fan cable to the system board. 5. - Dell Alienware Aurora Ryzen Edition R10 | Alienware Aurora Ryzen Edition Service - Page 73
Steps 1. Ensure that the release lever on the processor socket is fully extended and the processor cover is fully open. CAUTION: Position the processor correctly in the processor socket to avoid permanent damage to the processor. 2. Align the pin-1 corner on the processor with the pin-1 corner on - Dell Alienware Aurora Ryzen Edition R10 | Alienware Aurora Ryzen Edition Service - Page 74
Steps 1. Remove the screw (M2x4) that secures the wireless card to the system board. 2. Lift the wireless-card bracket off the wireless card. 3. Disconnect the antenna cables from the wireless card. 4. Slide and remove the wireless card from the wireless-card slot. Installing the wireless card - Dell Alienware Aurora Ryzen Edition R10 | Alienware Aurora Ryzen Edition Service - Page 75
Steps 1. Connect the antenna cables to the wireless card. The following table provides the antenna-cable color scheme for the wireless card supported by your computer. Table 3. Antenna-cable color scheme Connectors on the wireless card Antenna-cable color Main (white triangle) White Auxiliary - Dell Alienware Aurora Ryzen Edition R10 | Alienware Aurora Ryzen Edition Service - Page 76
procedure. Steps 1. Remove the four screws (M3x4t) that secures the antennas to the top bezel. 2. Remove the antenna cables from the routing guides on the top bezel. 3. Lift the antenna off the top bezel. Installing the antennas Prerequisites If you are replacing a component, remove the existing - Dell Alienware Aurora Ryzen Edition R10 | Alienware Aurora Ryzen Edition Service - Page 77
antenna to the chassis. 2. Replace the four screws (M3x4t) that secures the antennas to the chassis. 3. Route the antenna cables through the routing guides on the top bezel. Next steps 1. Install the top bezel. 2. Install the front bezel. 3. Install the wireless card. 4. Install the single-graphics - Dell Alienware Aurora Ryzen Edition R10 | Alienware Aurora Ryzen Edition Service - Page 78
Steps 1. Remove the four screws (M3x4) that secures the front I/O-panel to the front bezel. 2. Press the two clips and lift the front I/O-panel off the front bezel. Installing the front I/O-panel Prerequisites If you are replacing a component, remove the existing component before performing the - Dell Alienware Aurora Ryzen Edition R10 | Alienware Aurora Ryzen Edition Service - Page 79
Steps 1. Align the screw holes on the front I/O-panel with the screw holes on the front bezel and snap it into place. 2. Replace the four screws (M3x4) that secures the front I/O-panel to the front bezel. Next steps 1. Install the front bezel. 2. Install the right-side cover. 3. Install the left- - Dell Alienware Aurora Ryzen Edition R10 | Alienware Aurora Ryzen Edition Service - Page 80
Steps 1. Disconnect the front-chassis fan cable from the system board. 2. Push the tab to release the front-chassis fan from the chassis. 3. Slide and lift the front-chassis fan off the chassis. Installing the front-chassis fan Prerequisites If you are replacing a component, remove the existing - Dell Alienware Aurora Ryzen Edition R10 | Alienware Aurora Ryzen Edition Service - Page 81
Steps 1. Align the tabs on the front-chassis fan with the slots on the chassis and slide the fan until it snaps into position. 2. Connect the front-chassis fan cable to the system board. Next steps 1. Install the single-graphics card or dual-graphics card, as applicable. 2. Install the left-side - Dell Alienware Aurora Ryzen Edition R10 | Alienware Aurora Ryzen Edition Service - Page 82
Steps 1. Lay the computer on the right side. 82 - Dell Alienware Aurora Ryzen Edition R10 | Alienware Aurora Ryzen Edition Service - Page 83
top-chassis fan cable from the system board. 6. Remove the top-chassis fan from the chassis. 7. Remove the top-chassis fan cable from the routing guide on the top-chassis fan bracket. 8. Push the rubber grommets through the holes at each corner of the fan to release top-chassis fan from - Dell Alienware Aurora Ryzen Edition R10 | Alienware Aurora Ryzen Edition Service - Page 84
snap into place. 4. Replace the screw (#6-32) that secures the top-chassis fan to the chassis. 5. Route the top-chassis fan cable through the routing guide on the bracket. 6. Align the tabs on the top-chassis fan with the slots on the chassis and slide the fan until it snaps into - Dell Alienware Aurora Ryzen Edition R10 | Alienware Aurora Ryzen Edition Service - Page 85
Power-button board Removing the power-button board Prerequisites 1. Follow the procedure in Before working inside your computer. 2. Remove the left-side cover. 3. Remove the right-side cover. 4. Remove the top-cover. 5. Remove the front bezel. About this task The following images indicate the - Dell Alienware Aurora Ryzen Edition R10 | Alienware Aurora Ryzen Edition Service - Page 86
board Removing the system board Prerequisites 1. Follow the procedure in Before working inside your computer. NOTE: Your computer's Service Tag is stored in the system board. You must enter the Service Tag in the BIOS setup program after you replace the system board. NOTE: Replacing the system board - Dell Alienware Aurora Ryzen Edition R10 | Alienware Aurora Ryzen Edition Service - Page 87
8. Remove the processor. About this task The following images indicate the location of the system board and provides a visual representation of the removal procedure. 87 - Dell Alienware Aurora Ryzen Edition R10 | Alienware Aurora Ryzen Edition Service - Page 88
Steps 1. Disconnect all the cables connected to the system board. NOTE: Note the routing of all cables as you remove them so that you can route them correctly after you replace the system board. For information on system-board connectors, see "system-board components". 2. Remove the eight screws - Dell Alienware Aurora Ryzen Edition R10 | Alienware Aurora Ryzen Edition Service - Page 89
89 - Dell Alienware Aurora Ryzen Edition R10 | Alienware Aurora Ryzen Edition Service - Page 90
have made to the BIOS using the BIOS setup program. You must make the appropriate changes again after you replace the system board. Entering the Service Tag in the BIOS setup program Steps 1. Turn on or restart your computer. 2. Press F2 when the Dell logo is displayed to enter the BIOS - Dell Alienware Aurora Ryzen Edition R10 | Alienware Aurora Ryzen Edition Service - Page 91
Next steps NOTE: Service tag is the alphanumeric identifier located at the back side of your computer. 91 - Dell Alienware Aurora Ryzen Edition R10 | Alienware Aurora Ryzen Edition Service - Page 92
the installation summary to identify if manual installation is necessary. 13. For manual download and installation, click Category. 14 instructions on the screen to install the driver. Downloading the graphics driver Steps 1. Turn on your computer. 2. Go to www.dell.com/support. 3. Enter the Service - Dell Alienware Aurora Ryzen Edition R10 | Alienware Aurora Ryzen Edition Service - Page 93
the installation summary to identify if manual installation is necessary. 13. For manual download and installation, click Category. 14 instructions on the screen to install the driver. Downloading the USB driver Steps 1. Turn on your computer. 2. Go to www.dell.com/support. 3. Enter the Service - Dell Alienware Aurora Ryzen Edition R10 | Alienware Aurora Ryzen Edition Service - Page 94
the installation summary to identify if manual installation is necessary. 13. For manual download and installation, click Category. instructions on the screen to install the driver. Downloading the chipset driver Steps 1. Turn on your computer. 2. Go to www.dell.com/support. 3. Enter the Service - Dell Alienware Aurora Ryzen Edition R10 | Alienware Aurora Ryzen Edition Service - Page 95
the installation summary to identify if manual installation is necessary. 13. For manual download and installation, click Category. instructions on the screen to install the driver. Downloading the network driver Steps 1. Turn on your computer. 2. Go to www.dell.com/support. 3. Enter the Service - Dell Alienware Aurora Ryzen Edition R10 | Alienware Aurora Ryzen Edition Service - Page 96
System setup NOTE: Depending on the computer and its installed devices, the items listed in this section may or may not be displayed. System setup CAUTION: Unless you are an expert computer user, do not change the settings in the BIOS Setup program. Certain changes can make your computer work - Dell Alienware Aurora Ryzen Edition R10 | Alienware Aurora Ryzen Edition Service - Page 97
the BIOS version number. Displays the product name. Default: Alienware Aurora Ryzen Edition Displays the service tag of your computer. Displays the asset tag of your Wake Up by Integrated LAN AC Recovery Deep Sleep Control USB Wake Support (S3) Allows you to enable or disable AMD PowerNow! the USB - Dell Alienware Aurora Ryzen Edition R10 | Alienware Aurora Ryzen Edition Service - Page 98
Advanced USB PowerShare (S4/S5) USB PowerShare Wake Support (S4/S5) Auto Power On Auto Power On processor flex ratio and voltage in the Customization mode. Allows you to enable or disable the Computrace service using the Absolute software. Allows you to set the core ratio limit. Allows you to select - Dell Alienware Aurora Ryzen Edition R10 | Alienware Aurora Ryzen Edition Service - Page 99
Boot File Browser Del Boot Option Enable USB Boot Support Load Legacy OPROM Boot Option Priorities Boot Option #1 Boot Option #2 Boot Option #3 Table 8. System setup options-Exit menu Save & Exit Save Changes and Reset Discard - Dell Alienware Aurora Ryzen Edition R10 | Alienware Aurora Ryzen Edition Service - Page 100
Steps 1. Disconnect the system-board power cable from the system board. 2. Remove the jumper plug from pins 217 and replace it on pins 216 (P216). 3. Wait for 5 seconds. 4. Remove the jumper plug from pins 216 and replace it on pins 217. 5. Connect the system-board power cable to the system board. - Dell Alienware Aurora Ryzen Edition R10 | Alienware Aurora Ryzen Edition Service - Page 101
Troubleshooting Enhanced Pre-Boot System Assessment (ePSA) diagnostics About this task The ePSA inform you if tests are completed successfully • View error messages that inform you of problems encountered during testing NOTE: Some tests for specific devices require user interaction. Always ensure - Dell Alienware Aurora Ryzen Edition R10 | Alienware Aurora Ryzen Edition Service - Page 102
1. Turn on your computer. 2. Go to www.dell.com/support. 3. Click Product support, enter the Service Tag of your computer, and then click Submit. NOTE: If you do not have the Service Tag, use the auto-detect feature or manually browse for your computer model. 4. Click Drivers & downloads > Find - Dell Alienware Aurora Ryzen Edition R10 | Alienware Aurora Ryzen Edition Service - Page 103
NOTE: Some ISPs (Internet Service Providers) provide a modem/router combo device. Steps 1. Turn off your computer has been powered off and the battery has been removed. The following procedure provides the instructions on how to conduct flea power release: Steps 1. Turn off your computer. 2.
-
 1
1 -
 2
2 -
 3
3 -
 4
4 -
 5
5 -
 6
6 -
 7
7 -
8
-
9
-
10
-
11
-
12
-
13
-
14
-
15
-
16
-
17
-
18
-
19
-
20
-
21
-
22
-
23
-
24
-
25
-
26
-
27
-
28
-
29
-
30
-
31
-
32
-
33
-
34
-
35
-
36
-
37
-
38
-
39
-
40
-
41
-
42
-
43
-
44
-
45
-
46
-
47
-
48
-
49
-
50
-
51
-
52
-
53
-
54
-
55
-
56
-
57
-
58
-
59
-
60
-
61
-
62
-
63
-
64
-
65
-
66
-
67
-
68
-
69
-
70
-
71
-
72
-
73
-
74
-
75
-
76
-
77
-
78
-
79
-
80
-
81
-
82
-
83
-
84
-
85
-
86
-
87
-
88
-
89
-
90
-
91
-
92
-
93
-
94
-
95
-
96
-
97
-
98
-
99
-
100
-
101
-
102
-
103
 |
 |

Alienware Aurora Ryzen Edition
Service Manual
Regulatory Model: D23M
Regulatory Type: D23M004