Dell Alienware Steam Machine R2 Alienware Steam Machine R2 Service Manual - Page 87
Changing boot sequence for future boots, Clearing Forgotten Passwords, Prerequisites
 |
View all Dell Alienware Steam Machine R2 manuals
Add to My Manuals
Save this manual to your list of manuals |
Page 87 highlights
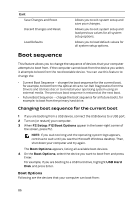
Hard Drive - The computer attempts to boot from the primary hard drive. If no operating system is on the drive, the computer generates an error message. USB Storage Device - Insert the memory device into a USB connector and restart the computer. When F12 Boot Options appear in the lower-right corner of the screen, press F12. The BIOS detects the device and adds the USB flash option to the boot menu. NOTE: To boot to a USB device, the device must be bootable. To ensure that your device is bootable, check the device documentation. Network - The computer attempts to boot from the network. If no operating system is found on the network, the computer generates an error message. Changing boot sequence for future boots 1 Enter system setup. See "Entering System Setup". 2 Use the arrow keys to highlight the Boot menu option and press Enter to access the menu. NOTE: Note your current boot sequence in case you want to restore it. 3 Navigate to Set Boot Priority to configure the boot priority. 4 Use the arrow keys to highlight the boot priority and press Enter to display the different devices. 5 Select the device and press Enter to set the boot priority. Clearing Forgotten Passwords WARNING: Before working inside your computer, read the safety information that shipped with your computer and follow the steps in Before working inside your computer. After working inside your computer, follow the instructions in After working inside your computer. For more safety best practices, see the Regulatory Compliance home page at www.dell.com/regulatory_compliance. Prerequisites 1 Remove the base cover. 2 Remove the top cover. 3 Remove the processor fan. 87
-
 1
1 -
2
-
3
-
4
-
5
-
6
-
7
-
8
-
9
-
10
-
11
-
12
-
13
-
14
-
15
-
16
-
17
-
18
-
19
-
20
-
21
-
22
-
23
-
24
-
25
-
26
-
27
-
28
-
29
-
30
-
31
-
32
-
33
-
34
-
35
-
36
-
37
-
38
-
39
-
40
-
41
-
42
-
43
-
44
-
45
-
46
-
47
-
48
-
49
-
50
-
51
-
52
-
53
-
54
-
55
-
56
-
57
-
58
-
59
-
60
-
61
-
62
-
63
-
64
-
65
-
66
-
67
-
68
-
69
-
70
-
71
-
72
-
73
-
74
-
75
-
76
-
77
-
78
-
79
-
80
-
81
-
 82
82 -
 83
83 -
 84
84 -
 85
85 -
 86
86 -
 87
87 -
 88
88 -
 89
89 -
 90
90 -
 91
91 -
 92
92
 |
 |