Dell Brocade 5100 Brocade 7.3.0 Fabric OS Troubleshooting and Diagnostics Guid - Page 100
Disabling POST, Switch status
 |
View all Dell Brocade 5100 manuals
Add to My Manuals
Save this manual to your list of manuals |
Page 100 highlights
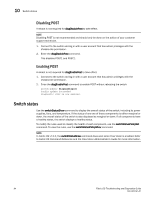
10 Switch status Disabling POST A reboot is not required for diagDisablePost to take effect. NOTE Disabling POST is not recommended and should only be done on the advice of your customer support technician. 1. Connect to the switch and log in with a user account that has admin privileges with the chassis-role permission. 2. Enter the diagDisablePost command. This disables POST1 and POST2. Enabling POST A reboot is not required for diagEnablePost to take effect. 1. Connect to the switch and log in with a user account that has admin privileges with the chassis-role permission. 2. Enter the diagEnablePost command to enable POST without rebooting the switch. switch:admin> diagenablepost Config update Succeeded Diagnostic POST is now enabled. Switch status Use the switchStatusShow command to display the overall status of the switch, including its power supplies, fans, and temperature. If the status of any one of these components is either marginal or down, the overall status of the switch is also displayed as marginal or down. If all components have a healthy status, the switch displays a healthy status. To modify the rules used to classify the health of each component, use the switchStatusPolicySet command. To view the rules, use the switchStatusPolicyShow command. NOTE In Fabric OS v7.2.0, the switchStatusShow command does work when Flow Vision is enabled. Refer to Fabric OS Command Reference and the Flow Vision Administrator's Guide for more information. 84 Fabric OS Troubleshooting and Diagnostics Guide 53-1003141-01
-
 1
1 -
2
-
3
-
4
-
5
-
6
-
7
-
8
-
9
-
10
-
11
-
12
-
13
-
14
-
15
-
16
-
17
-
18
-
19
-
20
-
21
-
22
-
23
-
24
-
25
-
26
-
27
-
28
-
29
-
30
-
31
-
32
-
33
-
34
-
35
-
36
-
37
-
38
-
39
-
40
-
41
-
42
-
43
-
44
-
45
-
46
-
47
-
48
-
49
-
50
-
51
-
52
-
53
-
54
-
55
-
56
-
57
-
58
-
59
-
60
-
61
-
62
-
63
-
64
-
65
-
66
-
67
-
68
-
69
-
70
-
71
-
72
-
73
-
74
-
75
-
76
-
77
-
78
-
79
-
80
-
81
-
82
-
83
-
84
-
85
-
86
-
87
-
88
-
89
-
90
-
91
-
92
-
93
-
94
-
 95
95 -
 96
96 -
 97
97 -
 98
98 -
 99
99 -
 100
100 -
 101
101 -
 102
102 -
 103
103 -
 104
104 -
 105
105 -
106
-
107
-
108
-
109
-
110
-
111
-
112
-
113
-
114
-
115
-
116
-
117
-
118
-
119
-
120
-
121
-
122
-
123
-
124
-
125
-
126
-
127
-
128
-
129
-
130
 |
 |