Dell Canvas 27 Users Guide
Dell Canvas 27 Manual
 |
View all Dell Canvas 27 manuals
Add to My Manuals
Save this manual to your list of manuals |
Dell Canvas 27 manual content summary:
- Dell Canvas 27 | Users Guide - Page 1
Dell Canvas 27 User's Guide Model: Dell Canvas 27 Regulatory model: Z01C - Dell Canvas 27 | Users Guide - Page 2
A CAUTION indicates potential damage to hardware or loss of data if instructions are not followed. WARNING: A WARNING indicates a potential for property damage . Copyright © 2017 Dell Inc. or its subsidiaries. All rights reserved. Dell, EMC, and other trademarks are trademarks of Dell Inc. or its - Dell Canvas 27 | Users Guide - Page 3
Optional 31 Operating the Dell Canvas 27 32 Turning on the Dell Canvas 27 32 Using the On Screen Display (OSD) button 32 Using the On-Screen Display (OSD) Menu 34 Display, Pen, and Touch Settings 47 Troubleshooting 49 Self-Test 49 Built-in Diagnostics 51 Common Problems 52 Product Specific - Dell Canvas 27 | Users Guide - Page 4
Safety Instructions 55 FCC Notices (U.S. only) and Other Regulatory Information 55 Contacting Dell 55 Setting Up Your Dell Canvas 27 56 Maintenance Guidelines 58 4 │ Contents - Dell Canvas 27 | Users Guide - Page 5
if something is missing. NOTE: Some items may be optional and may not ship with your Dell Canvas 27. Some features or media may not be available in certain countries. Dell Canvas 27 Power cable Power adapter mini HDMI to HDMI cable USB cable (Type-C to Type-C) USB cable (Type-C to Type-A) About Your - Dell Canvas 27 | Users Guide - Page 6
mini DP to DP cable mini DP to mini DP cable Canvas Pen Nib holder Dial totem Cleaning cloth • Quick Start Guide • Safety,Environmental,and Regulatory Information • Factory Calibration Report 6 │ About Your Dell Canvas 27 - Dell Canvas 27 | Users Guide - Page 7
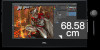
Product Features The Dell Canvas 27 features include: • Thin film transistor (TFT), liquid crystal display (LCD), and LED backlight. • 68.47 cm (27-inch) active area display (measured diagonally) 2560 x 1440 (16:9 aspect ratio) resolution, plus full-screen support for lower resolutions. • mini HDMI, - Dell Canvas 27 | Users Guide - Page 8
Controls Front view Label 1 Description Touchscreen button NOTE: The Touchscreen button is set to 'ON' by default. You can use the Touchscreen button to turn off the functionality. 2 OSD (On Screen Display) button (For more information, see Operating the Dell Canvas 27) 3 Power on/off button - Dell Canvas 27 | Users Guide - Page 9
it in a fixed position. Lists the regulatory approvals. Refer to this label if you need to contact Dell for technical support. To connect the Dell Canvas 27 power cable. When a mini HDMI cable is connected it can only be used as a monitor. When a mini DP cable is connected it can only be used as - Dell Canvas 27 | Users Guide - Page 10
hearing damage or loss. Can be used in these two examples: a. The downstream port USB connector supports USB and charging (BC 1.2) function. b. When using downstream port USB connector then must connect the USB that came with their device to make the connection. 10 │ About Your Dell Canvas 27 - Dell Canvas 27 | Users Guide - Page 11
(G to G) 1.07 Billion colors, 10 Bit AdobeRGB sRGB Rec709 DCI-P3 109% CIE1931 124% CIE1976 • 1 x USB Type-C upstream port (support DP Alt mode) • 1 x mDP • 1 x mini HDMI • 1 x Audio jack • 1 x USB 3.0 Type-C downstream port • 2 x USB 3.0 Type-A downstream port Yes About Your Dell Canvas 27 │ 11 - Dell Canvas 27 | Users Guide - Page 12
time Touch method Operating system Projected Capacitive System 27 inch 598.74 mm (23.57 inches) 337.66 mm (13.29 inches) 202170.5 mm2 (313.36 inches2) Dell Canvas pen, bare finger and totem 20 touch-points 35 ms Single and multi finger Windows 10 Creators Update 12 │ About Your Dell Canvas 27 - Dell Canvas 27 | Users Guide - Page 13
No Tech Support NOTE: Windows Hardware Quality Labs testing or WHQL Testing is Microsoft's testing process which involves running a series of tests on third-party hardware or software, and then submitting the log files from these tests to Microsoft for review. About Your Dell Canvas 27 │ 13 - Dell Canvas 27 | Users Guide - Page 14
-4.51 (dBi) Antenna Polarization Y Made In Country Taiwan The product contains BlueSlim board, National Telecommunications Administration approved code is 202789-17-02265. 14 │ About Your Dell Canvas 27 - Dell Canvas 27 | Users Guide - Page 15
2560 x 1440 Horizontal Frequency (kHz) 31.5 31.5 37.5 37.9 46.9 48.4 60.0 67.5 64.0 80.0 75.0 67.5 26.27 66.58 88.8 Vertical Frequency (Hz) 70.0 60.0 75.0 60.0 75.0 60.0 75.0 75.0 60.0 75.0 60.0 60.0 24 mode, resolution differences may result in some distortion. About Your Dell Canvas 27 │ 15 - Dell Canvas 27 | Users Guide - Page 16
Digital video signal for each differential line Per differential line at 100 ohm impedance mini HDMI/mini DP/USB Type-C signal input support 100-240V AC / 50 or 60 Hz ± 3 Hz / 1.8A (maximum) Output: 19.5V DC / 6.67 24.5 mm (0.96 inches) 13.8 kg (30.42 lb) 4~6 GU 16 │ About Your Dell Canvas 27 - Dell Canvas 27 | Users Guide - Page 17
) 5% to 90% (non-condensing) 5,000 m (16,404 ft) (maximum) 12,192 m (40,000 ft) (maximum) 168.9 BTU/hour (maximum) 163.8 BTU/hour (typical) About Your Dell Canvas 27 │ 17 - Dell Canvas 27 | Users Guide - Page 18
is referred to as power save mode*. If the computer detects input from the keyboard, mouse, or other input devices, the Dell Canvas 27 automatically resumes functioning. The following table shows the power consumption and signaling of this automatic power saving feature. VESA Modes Normal operation - Dell Canvas 27 | Users Guide - Page 19
cable GND Hot Plug Detect ML3 (n) CONFIG1 ML3 (p) CONFIG2 GND GND ML2 (n) ML0 (n) ML2 (p) ML0 (p) GND GND ML1 (n) AUX (p) ML1 (p) AUX (n) GND DP_PWR About Your Dell Canvas 27 │ 19 - Dell Canvas 27 | Users Guide - Page 20
0 Shield TMDS Data 0+ TMDS Data 0TMDS Clock Shield TMDS Clock+ TMDS ClockDDC/CEC Ground CEC SCL SDA Reserved +5 V Power Hot Plug Detect 20 │ About Your Dell Canvas 27 - Dell Canvas 27 | Users Guide - Page 21
D + B7 D - A7 D - B6 D + A8 SBU1 B5 VCONN A9 VBUS B4 VBUS A10 RX2- B3 TX2- A11 RX2+ B2 TX2+ A12 GND B1 GND About Your Dell Canvas 27 │ 21 - Dell Canvas 27 | Users Guide - Page 22
USB 3.0 Type-A downstream port Pin number Signal name 1 VBUS 2 D- 3 D+ 4 GND 5 StdA_SSRX- 6 StdA_SSRX+ 7 GND_DRAIN 8 StdA_SSTX- 9 StdA_SSTX+ Shell Shield 22 │ About Your Dell Canvas 27 - Dell Canvas 27 | Users Guide - Page 23
Plug-and-Play 1. Turn on the Dell Canvas 27 and wait for the Canvas screen to be displayed. 2. The Windows 10 screen appears. 3. The Canvas Connect Windows Store application downloads in the background. Please wait until the Canvas Connect application appears in the Recently Added list or search for - Dell Canvas 27 | Users Guide - Page 24
become fixed in an unchanging state which are hard to see and do not affect the display quality or usability. For more information on LCD Monitor Pixel Policy, see Dell support site at: http://www.dell.com/support/monitors. 24 │ About Your Dell Canvas 27 - Dell Canvas 27 | Users Guide - Page 25
Setting Up the Dell Canvas 27 Removing the IO cover CAUTION: Place Dell Canvas 27 on a flat, clean, and soft surface to avoid scratching the display panel. To remove the IO cover: • The mylar or the protective cover should not - Dell Canvas 27 | Users Guide - Page 26
: Before you begin any of the procedures in this section, follow the Safety Instructions. To connect your Dell Canvas 27 to the computer: 1. Turn off your computer. 2. Connect the USB Type-C cable from your Dell Canvas 27 to the host computer. 3. Connect the mini HDMI to HDMI or mini DP to mini - Dell Canvas 27 | Users Guide - Page 27
Connecting the USB Type-C to Type-C cable Connecting power to the Dell Canvas 27 Connecting power adapter to wall socket and powering on Setting Up the Dell Canvas 27 │ 27 - Dell Canvas 27 | Users Guide - Page 28
Organizing Your Cables After attaching all necessary cables to your Dell Canvas 27 and the host computer, (see Connecting Your Dell Canvas 27 for cable attachment) organize all cables as shown above. 28 │ Setting Up the Dell Canvas 27 - Dell Canvas 27 | Users Guide - Page 29
arrow and press the riser latch to open the stand. • Follow the arrow-printing indicator ( ) on the Dell Canvas 27 back cover to place the Dell Canvas 27 on the Stand. NOTE: Ensure to place the Dell Canvas 27 screen and the Stand in an angle slightly less than 90 degrees to avoid the system falling - Dell Canvas 27 | Users Guide - Page 30
• Plug in the cables into Dell Canvas 27. • Close the FlipStand. • Ensure the two screws are firmly fixed to the screw holes and that the stand and Canvas fit together. • Replace the Clearwater Display IO cover. • Slide the latch on either side of stand's back. 30 │ Setting Up the Dell Canvas 27 - Dell Canvas 27 | Users Guide - Page 31
wall mounting (Optional) NOTE: Use M4 x 8 mm screws to connect the monitor to the wall-mounting kit. Wall mount Dell Canvas 27 using VESA-compatible wall mount kit (75 x 75 mm / 100 x 100mm / 200 x 200 mm). Refer to the instructions that come with the VESA-compatible wall mounting kit. 1. Place the - Dell Canvas 27 | Users Guide - Page 32
Operating the Dell Canvas 27 Turning on the Dell Canvas 27 Press the power button to turn on the Dell Canvas 27. The white LED indicates the Dell Canvas 27 is On and fully functional. A glowing white LED indicates DPMS Power Save Mode. Using the On Screen Display (OSD) button Press the OSD button - Dell Canvas 27 | Users Guide - Page 33
display (OSD) and select the OSD menu. Menu See Accessing the Menu System. 4 Touch this icon to exit the OSD main menu. Exit Operating the Dell Canvas 27 │ 33 - Dell Canvas 27 | Users Guide - Page 34
to adjust items in the OSD menu. Use the Right (increase) and Left (decrease) keys to adjust items in the OSD menu. 34 │ Operating the Dell Canvas 27 - Dell Canvas 27 | Users Guide - Page 35
increase brightness. Touch the icon to decrease brightness. NOTE: Manual adjustment of Brightness is disabled when Dynamic Contrast is switched on on the Dell Canvas 27. Use the Input Source menu to select between different video inputs that are be connected to your Dell Canvas 27. USB Type - Dell Canvas 27 | Users Guide - Page 36
the mini HDMI input when you are using the mini-HDMI connector. Auto Select Select Auto Select, the Dell Canvas 27 scans for available input sources. Reset Input Resets your Dell Canvas 27's Input Source settings to the factory Source defaults. Color Use the Color menu to adjust the color - Dell Canvas 27 | Users Guide - Page 37
digital cinema color standard. NOTE: Accuracy of Adobe RGB, sRGB, REC709, DCI-P3, CAL1 and CAL2 are optimized for RGB input color format. Operating the Dell Canvas 27 │ 37 - Dell Canvas 27 | Users Guide - Page 38
Submenus Description • Custom Color: Allows you to manually adjust the color settings. Touch the and icons to it to adjust RGB black-level offset value (default value are 50) to control your Dell Canvas 27 base color. -- Hue: Select it to adjust RGBCMY hue value individually (default value are - Dell Canvas 27 | Users Guide - Page 39
video input mode to: • RGB: Select this option if your Dell Canvas 27 is connected to a computer (or DVD player) using the mini HDMI to HDMI, mini DP-mini DP or mini DP-DP cable. • YPbPr: Select this option if your DVD player supports only YPbPr output. Gamma Hue Saturation Reset Color Allows you - Dell Canvas 27 | Users Guide - Page 40
menu to adjust image. Aspect Ratio Adjust the image ratio to Wide 16:9, Auto Resize,4:3, or 1:1. Monitor Sleep Sleep After Timeout: Dell Canvas 27 goes into sleep after timeout. Sharpness Never: Dell Canvas 27 never goes into sleep. Makes the image look sharper or softer. Use or to adjust the - Dell Canvas 27 | Users Guide - Page 41
function - Only hard unlock (Press and hold OSD button located next to the power button 6 sec) Restore the menu settings to factory defaults. Operating the Dell Canvas 27 │ 41 - Dell Canvas 27 | Users Guide - Page 42
or Aspect Ratio and set as shortcut key. USB Reset Personalization Allows you to enable or disable USB downstream ports charger function during Dell Canvas 27 standby mode. NOTE: USB ON/OFF under standby mode is only available when the USB Type-C upstream cable is unplugged. This option will - Dell Canvas 27 | Users Guide - Page 43
/CI, LCD conditioning, and so on. Displays the Dell Canvas 27's current settings. Bluetooth Select Enable to turn on this feature. NOTE: Canvas Bluetooth cannot be used if the connected system has an active Bluetooth module (Only 1 Bluetooth device can be supported by the OS). Audio source DDC/CI - Dell Canvas 27 | Users Guide - Page 44
Restores other settings, such as DDC/CI, to factory defaults. Factory Reset Restores all OSD settings to the factory defaults. NOTE: Dell Canvas 27 has a built-in feature to automatically calibrate the brightness to compensate for LED aging. OSD Warning Messages When the Dynamic Contrast feature - Dell Canvas 27 | Users Guide - Page 45
When the Dell Canvas 27 does not support a particular resolution mode, you can see the following message: This means that the Dell Canvas 27 cannot synchronize with the signal that it is receiving from the computer. See Dell Canvas 27 Specifications for the Horizontal and Vertical frequency ranges - Dell Canvas 27 | Users Guide - Page 46
If either mini DP, mini HDMI, USB Type-C input is selected and the corresponding cable is not connected, a floating dialog box as shown below appears. or or See Troubleshooting for more information. 46 │ Operating the Dell Canvas 27 - Dell Canvas 27 | Users Guide - Page 47
the configuration screen shows on Dell Canvas. 6. Touch the Canvas screen with the pen or finger to associate the input to Dell Canvas. 7. Click OK on the Tablet PC Settings control panel. 8. Confirm that pen and touch input are correctly working on Dell Canvas. Operating the Dell Canvas 27 │ 47 - Dell Canvas 27 | Users Guide - Page 48
regardless of whether or not they have speakers. If you audio output was switched to Dell Canvas when you connect it, you can manually switch the audio output back to the device of your choice. 1. Type audio in the , click on the Set Default button. 5. Click OK. 48 │ Operating the Dell Canvas 27 - Dell Canvas 27 | Users Guide - Page 49
from the drivers and downloads page for Dell Canvas on dell.com. Self-Test Your Dell Canvas 27 provides a self-test feature that allows you to check whether your Dell Canvas 27 is functioning properly. If your Dell Canvas 27 and computer are properly connected but the Dell Canvas 27 screen remains - Dell Canvas 27 | Users Guide - Page 50
Canvas 27 and reconnect the video cable; then turn on both your computer and the Dell Canvas 27. If your Dell Canvas 27 screen remains blank after you use the previous procedure, check your video controller and computer, because your Dell Canvas 27 is functioning properly. 50 │ Troubleshooting - Dell Canvas 27 | Users Guide - Page 51
problem with your Dell Canvas 27, or with your computer and video card. NOTE: You can run the built-in diagnostics only when the video cable is unplugged and the Dell Canvas 27 -in diagnostic tool, the Dell Canvas 27 is functioning properly. Check the video card and computer. Troubleshooting │ 51 - Dell Canvas 27 | Users Guide - Page 52
://www.dell.com/support/monitors. Picture too dim or • Reset the Dell Canvas 27 to factory settings. too bright • Adjust brightness & contrast controls via OSD. Visible signs of • Do not perform any troubleshooting steps. smoke or sparks • Contact Dell immediately. Dell Canvas 27 malfunctions - Dell Canvas 27 | Users Guide - Page 53
off the Dell Canvas 27, unplug the Dell Canvas 27 power cable, plug it back, and then turn on the Dell Canvas 27. • Check whether the OSD menu is locked. If yes, press and hold the "OSD" button beside the power button for 6 seconds to unlock (for more information, see Lock). Troubleshooting │ 53 - Dell Canvas 27 | Users Guide - Page 54
monitor configuration on the computer. The picture • Due to different video formats (aspect ratio) cannot fill the of DVDs, the Dell Canvas 27 may display in full screen. height or width of • Run the built-in diagnostics. the screen Universal Serial Bus (USB) Specific Problems Troubleshooting - Dell Canvas 27 | Users Guide - Page 55
may not be available in your area. To get online Monitor support content: See www.dell.com/support/monitors. To contact Dell for sales, technical support, or customer service issues: 1. Go to www.dell.com/support. 2. Verify your country or region in the Choose A Country/Region drop-down menu - Dell Canvas 27 | Users Guide - Page 56
Setting Up Your Dell Canvas 27 Setting Display Resolution to 2560 x 1440 (maximum) For best follow the given steps. Dell computer 1. Go to www.dell.com/support, enter your service tag, and download the latest driver for your graphics card. 2. After installing the drivers for your graphics adapter, - Dell Canvas 27 | Users Guide - Page 57
the top of the window (e.g. NVIDIA, ATI, Intel etc.). 5. Refer to the graphic card provider website for updated driver (for example, http:// www.ATI.com or http://www.NVIDIA.com). 6. After installing the drivers for your graphics adapter, attempt to set the resolution to 2560 x 1440 again. NOTE: If - Dell Canvas 27 | Users Guide - Page 58
Guidelines Cleaning Your Dell Canvas 27 WARNING: Before cleaning the Dell Canvas 27, unplug the Dell Canvas 27 power cable from the electrical outlet. CAUTION: Read and follow the Safety Instructions before cleaning the Dell Canvas 27. For best practices, follow these instructions in the list
-
 1
1 -
 2
2 -
 3
3 -
 4
4 -
 5
5 -
 6
6 -
 7
7 -
8
-
9
-
10
-
11
-
12
-
13
-
14
-
15
-
16
-
17
-
18
-
19
-
20
-
21
-
22
-
23
-
24
-
25
-
26
-
27
-
28
-
29
-
30
-
31
-
32
-
33
-
34
-
35
-
36
-
37
-
38
-
39
-
40
-
41
-
42
-
43
-
44
-
45
-
46
-
47
-
48
-
49
-
50
-
51
-
52
-
53
-
54
-
55
-
56
-
57
-
58
 |
 |

Model: Dell Canvas 27
Regulatory model: Z01C
Dell Canvas 27
User’s Guide