Dell Chromebook 5190 Owners Manual - Page 35
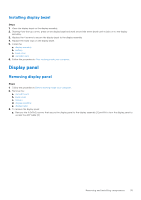
Installing display bezel, Display panel, Removing display panel
 |
View all Dell Chromebook 5190 manuals
Add to My Manuals
Save this manual to your list of manuals |
Page 35 highlights
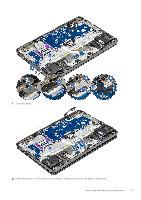
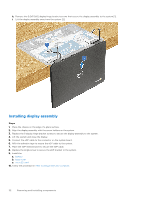
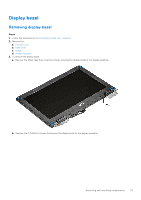
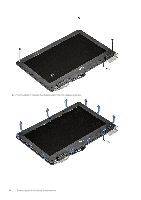
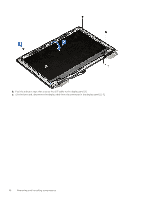
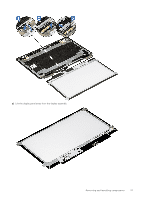
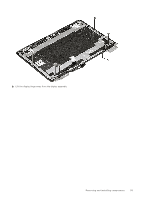
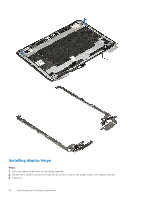
Installing display bezel Steps 1. Place the display bezel on the display assembly. 2. Starting from the top corner, press on the display bezel and work around the entire bezel until it clicks on to the display assembly. 3. Replace the 4 screws to secure the display bezel to the display assembly 4. Replace the mylar caps on the display bezel. 5. Install the: a. display assembly b. battery c. base cover d. microSD card 6. Follow the procedure in After working inside your computer. Display panel Removing display panel Steps 1. Follow the procedure in Before working inside your computer. 2. Remove the: a. microSD card b. base cover c. battery d. display assembly e. display bezel 3. To remove the display panel: a. Remove the 4 (M2x3) screws that secure the display panel to the display assembly [1] and lift to turn the display panel to access the eDP cable [2] Removing and installing components 35
-
 1
1 -
2
-
3
-
4
-
5
-
6
-
7
-
8
-
9
-
10
-
11
-
12
-
13
-
14
-
15
-
16
-
17
-
18
-
19
-
20
-
21
-
22
-
23
-
24
-
25
-
26
-
27
-
28
-
29
-
 30
30 -
 31
31 -
 32
32 -
 33
33 -
 34
34 -
 35
35 -
 36
36 -
 37
37 -
 38
38 -
 39
39 -
 40
40 -
41
-
42
-
43
-
44
-
45
-
46
-
47
-
48
-
49
-
50
-
51
-
52
-
53
-
54
-
55
-
56
-
57
-
58
-
59
-
60
-
61
-
62
-
63
-
64
-
65
-
66
-
67
-
68
-
69
-
70
-
71
-
72
-
73
-
74
-
75
-
76
-
77
-
78
-
79
-
80
-
81
-
82
-
83
 |
 |
