Dell DL1000 Appliance Owners Manual - Page 46
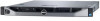
Installing the Dell PERC H310 card riser, System battery, Replacing the system battery
 |
View all Dell DL1000 manuals
Add to My Manuals
Save this manual to your list of manuals |
Page 46 highlights
Installing the Dell PERC H310 card riser CAUTION: Many repairs may only be done by a certified service technician. You should only perform troubleshooting and simple repairs as authorized in your product documentation, or as directed by the online or telephone service and support team. Damage due to servicing that is not authorized by Dell is not covered by your warranty. Read and follow the safety instructions that came with the product. 1. Align the PERC H310 card riser with the connector and the guide pins on the system board. 2. Lower the PERC H310 card riser into place until the PERC H310 card riser is fully seated in the connector. 3. If applicable, reinstall the PERC H310 card into the PERC H310 card riser. For more information, see installing a Dell perc h310. 4. Close the system. 5. Reconnect the system to the electrical outlet and turn the system on, including any attached peripherals. 6. Install any device drivers required for the card as described in the documentation for the card. System battery Replacing the system battery WARNING: There is a danger of a new battery exploding if it is incorrectly installed. Replace the battery only with the same or equivalent type recommended by the manufacturer. For more information, see the safety information that shipped with your system. CAUTION: Many repairs may only be done by a certified service technician. You should only perform troubleshooting and simple repairs as authorized in your product documentation, or as directed by the online or telephone service and support team. Damage due to servicing that is not authorized by Dell is not covered by your warranty. Read and follow the safety instructions that came with the product. 1. Turn off the system, including any attached peripherals, and disconnect the system from the electrical outlet and peripherals. 2. Open the system. 3. Locate the battery socket. CAUTION: To avoid damage to the battery connector, you must firmly support the connector while installing or removing a battery. 4. Pull the release pin back and lift the system battery out of the battery connector. 5. To install a new system battery, pull the release pin back and slide the system battery into the battery connector. 6. Close the system. 7. Reconnect the system to the electrical outlet and turn the system on, including any attached peripherals 8. Enter the System Setup to confirm that the battery is operating properly. 9. Enter the correct time and date in the System Setup Time and Date fields. 46
-
 1
1 -
2
-
3
-
4
-
5
-
6
-
7
-
8
-
9
-
10
-
11
-
12
-
13
-
14
-
15
-
16
-
17
-
18
-
19
-
20
-
21
-
22
-
23
-
24
-
25
-
26
-
27
-
28
-
29
-
30
-
31
-
32
-
33
-
34
-
35
-
36
-
37
-
38
-
39
-
40
-
 41
41 -
 42
42 -
 43
43 -
 44
44 -
 45
45 -
 46
46 -
 47
47 -
 48
48 -
 49
49 -
 50
50 -
 51
51 -
52
-
53
-
54
-
55
-
56
-
57
-
58
-
59
-
60
-
61
-
62
-
63
-
64
-
65
-
66
-
67
-
68
-
69
-
70
-
71
-
72
-
73
-
74
-
75
-
76
-
77
-
78
-
79
-
80
-
81
-
82
 |
 |
