Dell E2211H User's Guide - Page 28
Organizing the Cables, Removing the Stand - soundbar
 |
View all Dell E2211H manuals
Add to My Manuals
Save this manual to your list of manuals |
Page 28 highlights
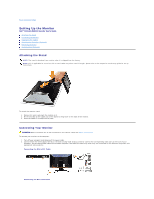
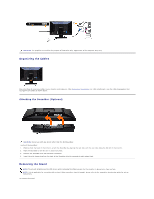
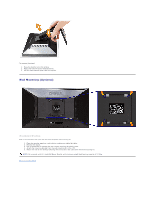
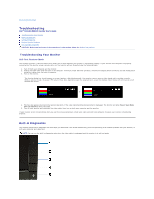
CAUTION: The graphics are used for the purpose of illustration only. Appearance of the computer may vary. Organizing the Cables After attaching all necessary cables to your monitor and computer, (See Connecting Your Monitor for cable attachment,) use the cable management slot to organize all cables as shown above. Attaching the Soundbar (Optional) CAUTION: Do not use with any device other than the Dell Soundbar. To attach the Soundbar: 1. Working from the back of the monitor, attach the Soundbar by aligning the two slots with the two tabs along the bottom of the monitor. 2. Slide the Soundbar to the left until it snaps into place. 3. Connect the Soundbar with the DC power connector. 4. Insert the mini stereo plug from the back of the Soundbar into the computer's audio output jack. Removing the Stand NOTE: To prevent scratches on the LCD screen while removing the stand, ensure that the monitor is placed on a clean surface. NOTE: This is applicable for a monitor with a stand. When any other stand is bought, please refer to the respective stand setup guide for set up instructions. To remove the stand:
-
 1
1 -
2
-
3
-
4
-
5
-
6
-
7
-
8
-
9
-
10
-
11
-
12
-
13
-
14
-
15
-
16
-
17
-
18
-
19
-
20
-
21
-
22
-
 23
23 -
 24
24 -
 25
25 -
 26
26 -
 27
27 -
 28
28 -
 29
29 -
 30
30 -
 31
31 -
 32
32 -
 33
33
 |
 |
