Dell E771p Setup Guide - Page 3
Microsoft( Windows( XP Operating System, Setting Display Resolution, Microsoft, Windows - driver
 |
View all Dell E771p manuals
Add to My Manuals
Save this manual to your list of manuals |
Page 3 highlights
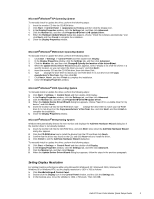
Microsoft Windows XP Operating System To manually install or update the driver, perform the following steps: 1. Insert the monitor CD into the CD-ROM drive. 2. Click Start−> Control Panel−> Appearance & Themes and then click the Display icon. 3. In the Display Properties window, click the Settings tab, and then click Advanced. 4. Click the Monitor tab, and then click Properties Driver tab Update Driver. 5. When the Hardware Update Wizard dialog box appears, choose "Install the software automatically," and click Next> and then Finish to complete the installation. 6. Close the Display Properties window. Microsoft Windows Millennium Operating System To manually install or update the driver, perform the following steps: 1. Click Start−> Settings−> Control Panel and then double-click Display. 2. In the Display Properties window, click the Settings tab, and then click Advanced. 3. Click the Monitor tab, and then click Change Specify the location of the driver Next. 4. When the Update Device Driver Wizard dialog box appears, select "Display a list of all the drivers in a specific location, so you can select the driver you want," and click Next>. 5. Insert the monitor CD into the CD-ROM drive, then click Have Disk... 6. Type d:\ (change the drive letter to match your CD-ROM drive if it is not drive D) in the Copy manufacturer's files from: box, then click OK. 7. Click Next>, Next>, and then Finish to complete the installation. 8. Close the Display Properties window. Microsoft Windows 2000 Operating System To manually install or update the driver, perform the following steps: 1. Click Start−> Settings−> Control Panel and then double-click Display. 2. In the Display Properties window, click the Settings tab, and then click Advanced. 3. Click the Monitor tab, and then click Properties Driver Update Driver. 4. When the Update Device Driver Wizard dialog box appears, choose "Search for a suitable driver for my device," and click Next>. 5. Insert the monitor CD into the CD-ROM drive, type d:\ (change the drive letter to match your CD-ROM drive if it is not drive D) in the Copy manufacturer's files from: box, and click Next> and then Finish to complete the installation. 6. Close the Display Properties window. Microsoft Windows 98 Operating System Windows 98 automatically detects the new monitor and displays the Add New Hardware Wizard dialog box if the monitor driver is not already installed. 1. Insert the monitor CD into the CD-ROM drive, and click Next> twice when the Add New Hardware Wizard dialog box appears. 2. Click the CD-ROM drive box to install the drivers from the CD and then click Next>. 3. Confirm that the driver was found on the CD, and click Next> twice to install the driver. 4. Click Finish to exit the Add New Hardware Wizard dialog box. To manually install or update the driver, perform the following steps: 5. Click Start−> Settings−> Control Panel and then double-click Display. 6. In the Display Properties window, click the Settings tab, and then click Advanced. 7. Click the Monitor tab, and then click Change. 8. When the Update Device Driver Wizard dialog box appears, follow the steps in the previous paragraph. Setting Display Resolution For optimal monitor performance while using Microsoft® Windows® XP, Windows® 2000, Windows 98, Windows 95 or Windows NT®, set the display resolution to 1024 x 768 as follows: 1. Click Start Settings Control Panel. 2. Double-click the Display icon in the Control Panel window, and the click the Settings tab. 3. In the Desktop area, move the slidebar to 1024 x 768 pixels. Then click OK. Dell E771mm Color Monitor Quick Setup Guide 3
-
 1
1 -
 2
2 -
 3
3 -
 4
4
 |
 |
