Dell Equallogic PS4110XV EqualLogic PS4110 Storage Arrays - Installation and S - Page 9
Mounting, Array
 |
View all Dell Equallogic PS4110XV manuals
Add to My Manuals
Save this manual to your list of manuals |
Page 9 highlights
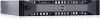
2 Rack Mounting the Array For proper operation, a PS Series storage array must be properly installed in a rack. This section contains general electrostatic, safety, network, and installation information for PS Series arrays. After installing the array in a rack, connect the power and network cables, as described in Chapter 3. Before You Begin Before installing the array: • Read the installation safety precautions. See Installation Safety Precautions on page 3. • Make sure the rack meets the rack requirements. See Rack Requirements on page 3. • Make sure the array and installation location meet the environmental requirements. See Environmental Requirements on page 4. • Unpack the rail kit (if ordered) and make sure you have all the necessary parts and tools. The rail kit is located in the array shipping box. You must supply your own tools. See Shipping Box Contents and Required Hardware on page 4. Installation Safety Precautions Follow these safety precautions: • Dell recommends that only individuals with rack mounting experience install an array in a rack. • Make sure the array is fully grounded at all times to prevent damage from electrostatic discharge. • When handling the array hardware, you must use the electrostatic wrist guard shipped with the array or a similar form of protection. • You need at least two people to lift the array chassis from the shipping box. Rack Requirements The rack and the array installation must meet the following requirements: • Use an industry standard, EIA-310-D compliant, four-post 19 inch rack with universal square hole or unthreaded round hole spacing. • The rack is rated for 540 kg (1200 pounds) static load or greater. • The minimum rack depth is 100 cm (40 inches) from the front of the rack to the rear of the rack. • For the ReadyRails™ II rail kits, the distance between the outside surfaces of the front and rear rack posts (the mounting surfaces) can range from 595 mm to 914 mm (23.4" to 36.0") for square-hole racks, 581 mm to 907 mm (22.9" to 35.7") for round-hole racks and 595 mm to 929 mm (23.4" to 36.6") for threaded-hole racks. • The rack is secured to the floor for added stability. • Load a rack with arrays from the bottom to the top. • There is at least 4.1 cm (1.6 inches) between the rack door and the front of the array to accommodate the array front bezel. • The rack (with installed arrays) meets the safety requirements of UL 60950-1 and IEC 60950-1, available at http://ulstandards. 3
-
 1
1 -
2
-
3
-
 4
4 -
 5
5 -
 6
6 -
 7
7 -
 8
8 -
 9
9 -
 10
10 -
 11
11 -
 12
12 -
 13
13 -
 14
14 -
15
-
16
-
17
-
18
-
19
-
20
-
21
-
22
-
23
-
24
-
25
-
26
-
27
-
28
-
29
-
30
-
31
-
32
-
33
-
34
-
35
-
36
-
37
-
38
-
39
-
40
 |
 |