Dell Inspiron XPS Gen 2 Owner's Manual - Page 85
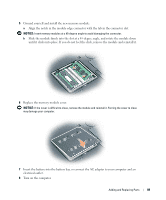
Hard Drive, Remove the optical drive, if installed, from the optical drive bay. See
 |
View all Dell Inspiron XPS Gen 2 manuals
Add to My Manuals
Save this manual to your list of manuals |
Page 85 highlights
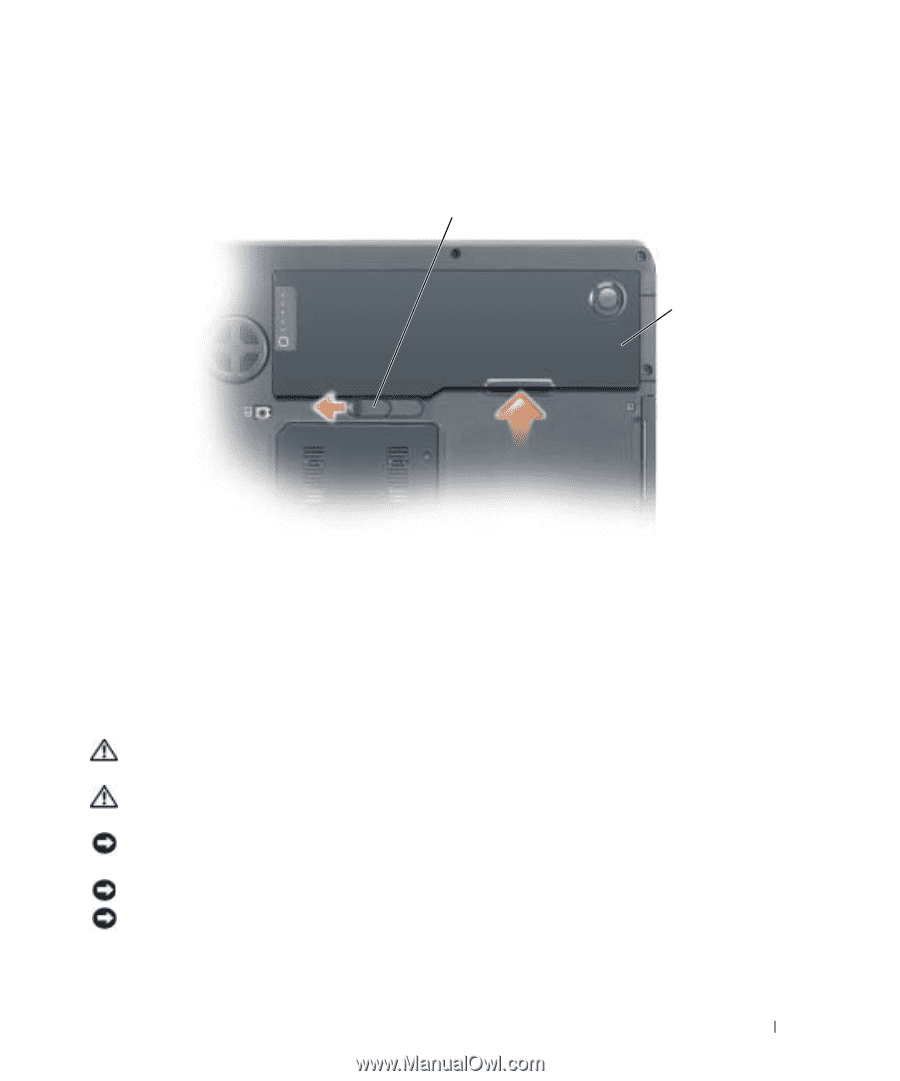
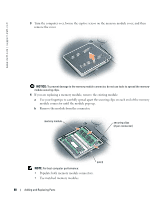
5 Disconnect your computer and all attached devices from their electrical outlets, slide and hold the battery-bay latch release on the bottom of the computer, and then remove the battery from the bay. battery-bay latch release battery 6 Remove the optical drive, if installed, from the optical drive bay. See page 99. 7 Press the power button to ground the system board. 8 Remove any installed PC Cards from the PC Card slot. 9 Close the display and turn the computer upside down on a flat work surface. 10 Remove the hard drive. See the following subsection, "Hard Drive." Hard Drive CAUTION: If you remove the hard drive from the computer when the drive is hot, do not touch the metal housing of the hard drive. CAUTION: Before you begin any of the procedures in the section, follow the safety instructions in the Product Information Guide. NOTICE: To prevent data loss, turn off your computer (see page 83) before removing the hard drive. Do not remove the hard drive while the computer is on, in standby mode, or in hibernate mode. NOTICE: Hard drives are extremely fragile; even a slight bump can damage the drive. NOTICE: To avoid electrostatic discharge, ground yourself by using a wrist grounding strap or by periodically touching an unpainted metal surface (such as a connector on the back of the computer). Adding and Replacing Parts 85
-
 1
1 -
2
-
3
-
4
-
5
-
6
-
7
-
8
-
9
-
10
-
11
-
12
-
13
-
14
-
15
-
16
-
17
-
18
-
19
-
20
-
21
-
22
-
23
-
24
-
25
-
26
-
27
-
28
-
29
-
30
-
31
-
32
-
33
-
34
-
35
-
36
-
37
-
38
-
39
-
40
-
41
-
42
-
43
-
44
-
45
-
46
-
47
-
48
-
49
-
50
-
51
-
52
-
53
-
54
-
55
-
56
-
57
-
58
-
59
-
60
-
61
-
62
-
63
-
64
-
65
-
66
-
67
-
68
-
69
-
70
-
71
-
72
-
73
-
74
-
75
-
76
-
77
-
78
-
79
-
 80
80 -
 81
81 -
 82
82 -
 83
83 -
 84
84 -
 85
85 -
 86
86 -
 87
87 -
 88
88 -
 89
89 -
 90
90 -
91
-
92
-
93
-
94
-
95
-
96
-
97
-
98
-
99
-
100
-
101
-
102
-
103
-
104
-
105
-
106
-
107
-
108
-
109
-
110
-
111
-
112
-
113
-
114
-
115
-
116
-
117
-
118
-
119
-
120
-
121
-
122
-
123
-
124
-
125
-
126
-
127
-
128
-
129
-
130
-
131
-
132
-
133
-
134
 |
 |