Dell Inspiron Zino HD Service Manual - Page 45
Flashing the BIOS - 400 desktop
 |
View all Dell Inspiron Zino HD manuals
Add to My Manuals
Save this manual to your list of manuals |
Page 45 highlights
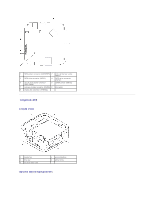
Inspiron 400 10. Replace the drive bay (see Replacing the Drive Bay). 11. Replace the optical drive (see Replacing the Optical Drive). 12. Replace the top bracket (see Replacing the Top Bracket). 13. Replace the top cover (see Replacing the Top Cover). CAUTION: Before turning on the computer, replace all screws and ensure that no stray screws remain inside the computer. Failure to do so may result in damage to the computer. 14. Connect your computer and devices to electrical outlets, and turn them on. Flashing the BIOS 1. Turn on the computer. 2. Go to the Dell Support website at support.dell.com. 3. Click Drivers & Downloads® Select Model. 4. Locate the BIOS update file for your computer: NOTE: The Service Tag for your computer is located at the bottom of the computer. If you have your computer's Service Tag: a. Click Enter a Service Tag. b. Enter your computer's Service Tag in the Enter a service tag: field, click Go, and proceed to step 5. If you do not have your computer's Service Tag: a. Select the type of product in the Select Your Product Family list. b. Select the product brand in the Select Your Product Line list. c. Select the product model number in the Select Your Product Model list. NOTE: If you have selected a different model and want to start over again, click Start Over on the top right of the menu. d. Click Confirm. 5. A list of results appear on the screen. Click BIOS. 6. Click Download Now to download the latest BIOS file. The File Download window appears. 7. Click Save to save the file on your desktop. The file downloads to your desktop.
-
 1
1 -
2
-
3
-
4
-
5
-
6
-
7
-
8
-
9
-
10
-
11
-
12
-
13
-
14
-
15
-
16
-
17
-
18
-
19
-
20
-
21
-
22
-
23
-
24
-
25
-
26
-
27
-
28
-
29
-
30
-
31
-
32
-
33
-
34
-
35
-
36
-
37
-
38
-
39
-
 40
40 -
 41
41 -
 42
42 -
 43
43 -
 44
44 -
 45
45 -
 46
46 -
 47
47 -
 48
48 -
 49
49 -
 50
50 -
51
-
52
-
53
 |
 |
