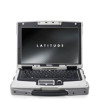
Dell Latitude D630 XFR Quick Reference Guide - Page 16
DirectVue, Touch Display Information
 |
View all Dell Latitude D630 XFR manuals
Add to My Manuals
Save this manual to your list of manuals |
Page 16 highlights
To remove the hard disk drive: 1. If the computer is connected to a docking device (docked), undock it. See the documentation that came with your docking device for instructions. 2. Ensure that the computer is turned off. 3. See "Bottom View" for the location of the hard disk drive compartment. If the 2 optional screws that secure the quarter-turn latches are installed, remove the 2 screws on the latches on the hard disk drive compartment using a #1 Philips screw driver. If the 2 security screws are not installed, proceed to step 4. 4. Lift each latch and turn each a quarter-turn, towards the 'unlock' icon, to release the latching mechanism. Remove the compartment cover from the computer. 5. Locate the tab on the hard disk drive and pull it back to disconnect the hard disk drive from the motherboard. 6. Continue to utilize the tab to assist in removing the hard disk drive from the compartment. To replace the hard disk drive, follow the removal procedure in the reverse order. For additional information regarding the hard disk drive, see the XFR630 with Touch Fully Rugged Notebook User's Guide. 4 DirectVue TM Touch Display Information The XFR630 provides an optional touch screen display for entering and selecting data using an approved pointing device such as your finger, a passive stylus or any non-abrasive smooth blunt object that will not damage the touch display. NOTICE: For more detailed instructions on the use, care and configuration of your touch display, please refer to the XFR630 with Touch User's Guide. CAUTION: The optional DirectVueTM Touch Display has been designed to accept finger touch as well as passive stylus input directly onto the screen. With the optional DirectVueTM Touch Display, a stylus is included with the XFR630 for use in selecting items on the touch screen. Other pointing devices can be used with the touch screen such as any non-abrasive, smooth or blunt object that will not damage the touch screen display. The touch screen surface can be damaged by ink pens, marker pens or other pointed or abrasive objects. The use of non-approved input devices that cause damage to the digitizer or LCD may not be covered by the limited warranty. The touch screen is pre-configured and pre-calibrated at the factory, but may require further calibration to improve accuracy for entering or selecting data on the touch display. Please refer to the 4 Points Calibration information provided below regarding calibrating your XFR630 Touch Display and using your stylus. 4.1.1 Touchkit Configuration Utility Touchkit is a software utility tool that allows you to configure various touch features. You can launch Touchkit by clicking Start -> Programs -> Touchkit -> Configure Utility. NOTE: The touch screen is pre-configured and pre-calibrated at the factory, but may require further calibration to improve accuracy for entering or selecting data on the touch display, or to further configure it to your specific application.
-
 1
1 -
2
-
3
-
4
-
5
-
6
-
7
-
8
-
9
-
10
-
 11
11 -
 12
12 -
 13
13 -
 14
14 -
 15
15 -
 16
16 -
 17
17 -
 18
18 -
 19
19 -
 20
20 -
 21
21 -
22
-
23
 |
 |
