Dell Latitude XPi CD Service Manual - Page 65
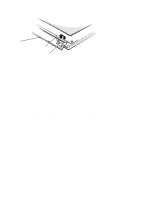
the cable from the bobbin., To reattach the display-assembly interface cable to the bobbin, align
 |
View all Dell Latitude XPi CD manuals
Add to My Manuals
Save this manual to your list of manuals |
Page 65 highlights
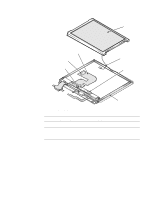
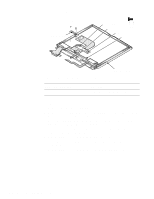
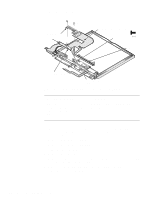
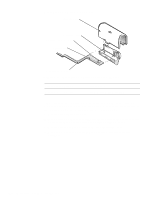
7. Lift the display-assembly interface cable and bobbin out of the display assembly. NOTE: Some computers have a display-assembly interface cable that detaches from the bobbin. If you have a cable with a permanently attached bobbin, stop here; otherwise, proceed to Step 8. 8. Look at the alignment marks on the display-assembly interface cable, and note the alignment of the cable to the bobbin. Then carefully detach the cable from the bobbin. A double-sided adhesive strip attaches the cable to the bobbin (see Figure 4-20). 9. To reattach the display-assembly interface cable to the bobbin, align the marks on the cable with the notch in the shoulder of the bobbin, and then wrap the cable around the bobbin. If you are installing a new cable, remove the protective cover from the adhesive strip on the new cable. Align the alignment marks on the cable with the notch in the shoulder of the bobbin, and then wrap the cable around the bobbin, making sure it stays between the shoulders of the bobbin. Place the cable and bobbin into the display assembly before attaching the EMI shield. Removing and Replacing Parts 4-27
-
 1
1 -
2
-
3
-
4
-
5
-
6
-
7
-
8
-
9
-
10
-
11
-
12
-
13
-
14
-
15
-
16
-
17
-
18
-
19
-
20
-
21
-
22
-
23
-
24
-
25
-
26
-
27
-
28
-
29
-
30
-
31
-
32
-
33
-
34
-
35
-
36
-
37
-
38
-
39
-
40
-
41
-
42
-
43
-
44
-
45
-
46
-
47
-
48
-
49
-
50
-
51
-
52
-
53
-
54
-
55
-
56
-
57
-
58
-
59
-
 60
60 -
 61
61 -
 62
62 -
 63
63 -
 64
64 -
 65
65 -
 66
66 -
 67
67 -
 68
68 -
 69
69 -
 70
70 -
71
-
72
-
73
-
74
-
75
-
76
-
77
-
78
-
79
-
80
-
81
-
82
-
83
-
84
-
85
-
86
-
87
-
88
-
89
-
90
-
91
-
92
-
93
-
94
-
95
-
96
-
97
-
98
-
99
-
100
-
101
-
102
-
103
-
104
-
105
-
106
-
107
-
108
-
109
-
110
-
111
-
112
-
113
-
114
-
115
-
116
-
117
-
118
-
119
-
120
-
121
-
122
 |
 |