Dell M6700 Owner's Manual - Page 49
Installing the Display Assembly, Removing the Display Hinges and Hinge Towers
 |
View all Dell M6700 manuals
Add to My Manuals
Save this manual to your list of manuals |
Page 49 highlights
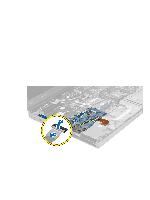
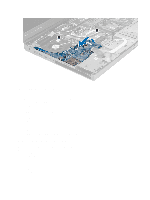
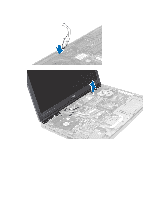
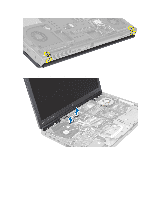
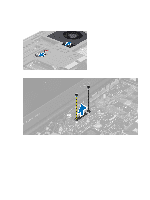
Installing the Display Assembly 1. Tighten the screws to secure the display assembly in place. 2. Connect the camera and LVDS cables to the correct connectors on the system board. NOTE: LVDS cable is available in M6700 only. 3. Place the LVDS cable bracket on the computer and tighten the screws to secure it to the computer (for M6700 only). 4. Route the cables through the routing channels. 5. Insert the wireless antenna cables through the routing hole on the chassis. 6. Tighten the screws at the bottom and back of the computer. 7. Route and connect the antenna cables to their connectors. 8. Install the: a) palmrest b) primary and secondary hard drive c) optical drive d) keyboard e) keyboard trim f) base cover g) battery 9. Follow the procedures in After Working Inside Your Computer. Removing the Display Hinges and Hinge Towers 1. Follow the procedures in After Working Inside Your Computer. 2. Remove the: 49
-
 1
1 -
2
-
3
-
4
-
5
-
6
-
7
-
8
-
9
-
10
-
11
-
12
-
13
-
14
-
15
-
16
-
17
-
18
-
19
-
20
-
21
-
22
-
23
-
24
-
25
-
26
-
27
-
28
-
29
-
30
-
31
-
32
-
33
-
34
-
35
-
36
-
37
-
38
-
39
-
40
-
41
-
42
-
43
-
 44
44 -
 45
45 -
 46
46 -
 47
47 -
 48
48 -
 49
49 -
 50
50 -
 51
51 -
 52
52 -
 53
53 -
 54
54 -
55
-
56
-
57
-
58
-
59
-
60
-
61
-
62
-
63
-
64
-
65
-
66
-
67
-
68
-
69
-
70
-
71
-
72
-
73
-
74
-
75
-
76
-
77
-
78
-
79
-
80
-
81
-
82
-
83
 |
 |
