Dell OptiPlex 390 Owners Manual - Page 51
Installing The Drive Cage - hard drive
 |
View all Dell OptiPlex 390 manuals
Add to My Manuals
Save this manual to your list of manuals |
Page 51 highlights
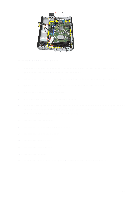
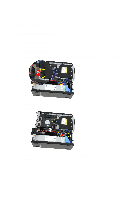
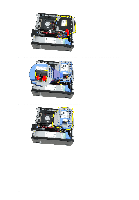
Installing The Drive Cage 1. Place the drive cage on the edge of the computer to allow access to the cable connectors on the hard drive. 2. Connect the data cable and power cable to the back of the hard drive. 3. Flip over the drive cage and insert it into the chassis. The drive cage tabs are secured by the slots in the chassis. 4. Slide the drive-cage handle toward the front of the computer into the locked position. 5. Connect the data cable and power cable to the back of the optical drive. 6. Install the front bezel. 7. Install the cover. 8. Follow the procedures in After Working Inside Your Computer. 51
-
 1
1 -
2
-
3
-
4
-
5
-
6
-
7
-
8
-
9
-
10
-
11
-
12
-
13
-
14
-
15
-
16
-
17
-
18
-
19
-
20
-
21
-
22
-
23
-
24
-
25
-
26
-
27
-
28
-
29
-
30
-
31
-
32
-
33
-
34
-
35
-
36
-
37
-
38
-
39
-
40
-
41
-
42
-
43
-
44
-
45
-
 46
46 -
 47
47 -
 48
48 -
 49
49 -
 50
50 -
 51
51 -
 52
52 -
 53
53 -
 54
54 -
 55
55 -
 56
56 -
57
-
58
-
59
-
60
-
61
-
62
-
63
-
64
-
65
-
66
-
67
-
68
-
69
-
70
-
71
-
72
-
73
-
74
-
75
-
76
-
77
-
78
-
79
-
80
-
81
-
82
-
83
-
84
-
85
-
86
-
87
-
88
-
89
-
90
 |
 |

Installing The Drive Cage
1.
Place the drive cage on the edge of the computer to allow access to the
cable connectors on the hard drive.
2.
Connect the data cable and power cable to the back of the hard drive.
3.
Flip over the drive cage and insert it into the chassis. The drive cage tabs
are secured by the slots in the chassis.
4.
Slide the drive-cage handle toward the front of the computer into the
locked position.
5.
Connect the data cable and power cable to the back of the optical drive.
6.
Install the
front bezel
.
7.
Install the
cover
.
8.
Follow the procedures in
After Working Inside Your Computer
.
51