Dell OptiPlex 780 Service Manual - Page 12
Dell OptiPlex 780 Service Manual--Diagnostics, Dell Diagnostics - drivers
 |
View all Dell OptiPlex 780 manuals
Add to My Manuals
Save this manual to your list of manuals |
Page 12 highlights
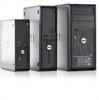
Back to Contents Page Diagnostics Dell™ OptiPlex™ 780 Service Manual Dell Diagnostics Power Button Light Codes Beep Codes Diagnostic Lights Dell Diagnostics When to Use the Dell Diagnostics It is recommended that you print these procedures before you begin. NOTE: The Dell Diagnostics software works only on Dell computers. NOTE: The Drivers and Utilities media is optional and may not ship with your computer. Enter system setup (see Entering System Setup), review your computer's configuration information, and ensure that the device you want to test displays in System Setup and is active. Start the Dell Diagnostics from either your hard drive or from the Drivers and Utilities media. Starting the Dell Diagnostics From Your Hard Drive 1. Turn on (or restart) your computer. 2. When the DELL logo appears, press immediately. NOTE: If you see a message stating that no diagnostics utility partition has been found, run the Dell Diagnostics from your Drivers and Utilities media. If you wait too long and the operating system logo appears, continue to wait until you see the Microsoft® Windows® desktop. Then shut down your computer and try again. 3. When the boot device list appears, highlight Boot to Utility Partition and press . 4. When the Dell Diagnostics Main Menu appears, select the test that you want to run. Starting the Dell Diagnostics From the Drivers and Utilities Disc 1. Insert the Drivers and Utilities disc. 2. Shut down and restart the computer. When the DELL logo appears, press immediately. If you wait too long and the Windows logo appears, continue to wait until you see the Windows desktop. Then shut down your computer and try again. NOTE: The next steps change the boot sequence for one time only. On the next startup, the computer boots according to the devices specified in the system setup program. 3. When the boot device list appears, highlight Onboard or USB CD-ROM Drive and press .
-
 1
1 -
2
-
3
-
4
-
5
-
6
-
 7
7 -
 8
8 -
 9
9 -
 10
10 -
 11
11 -
 12
12 -
 13
13 -
 14
14 -
 15
15 -
 16
16 -
 17
17 -
18
-
19
-
20
-
21
-
22
-
23
-
24
-
25
-
26
-
27
-
28
-
29
-
30
-
31
-
32
-
33
-
34
-
35
-
36
-
37
-
38
-
39
-
40
-
41
-
42
-
43
-
44
-
45
-
46
-
47
-
48
-
49
-
50
-
51
-
52
-
53
-
54
-
55
-
56
-
57
-
58
-
59
-
60
-
61
-
62
-
63
-
64
-
65
-
66
-
67
-
68
-
69
-
70
-
71
-
72
-
73
-
74
-
75
-
76
-
77
-
78
-
79
-
80
 |
 |
