Dell PowerConnect 2748 Getting Started Guide - Page 10
not supplied.
 |
View all Dell PowerConnect 2748 manuals
Add to My Manuals
Save this manual to your list of manuals |
Page 10 highlights
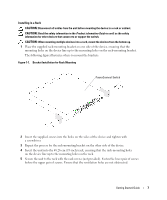
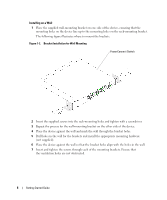
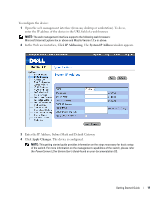
Installing on a Wall 1 Place the supplied wall-mounting bracket on one side of the device, ensuring that the mounting holes on the device line up to the mounting holes on the rack-mounting bracket. The following figure illustrates where to mount the brackets. Figure 1-2. Bracket Installation for Wall Mounting PowerConnect Switch 2 Insert the supplied screws into the rack-mounting holes and tighten with a screwdriver. 3 Repeat the process for the wall-mounting bracket on the other side of the device. 4 Place the device against the wall and mark the wall through the bracket holes. 5 Drill holes in the wall for the brackets and install the appropriate mounting hardware (not supplied). 6 Place the device against the wall so that the bracket holes align with the holes in the wall. 7 Insert and tighten the screws through each of the mounting brackets. Ensure that the ventilation holes are not obstructed. 8 Getting Started Guide
-
 1
1 -
2
-
3
-
4
-
 5
5 -
 6
6 -
 7
7 -
 8
8 -
 9
9 -
 10
10 -
 11
11 -
 12
12 -
 13
13 -
 14
14 -
 15
15 -
16
-
17
-
18
-
19
-
20
-
21
-
22
-
23
-
24
-
25
-
26
-
27
-
28
-
29
-
30
-
31
-
32
-
33
-
34
-
35
-
36
-
37
-
38
-
39
-
40
-
41
-
42
-
43
-
44
-
45
-
46
-
47
-
48
-
49
-
50
-
51
 |
 |
