Dell PowerConnect B-RX4 Getting Started Guide - Page 20
Installing power supplies
 |
View all Dell PowerConnect B-RX4 manuals
Add to My Manuals
Save this manual to your list of manuals |
Page 20 highlights
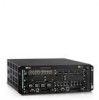
Installing power supplies The PowerConnect B-RX Series accommodates multiple power supplies (AC or DC). Following are specifications for the different models: • Four-slot chassis - Accommodates three power supplies (AC or DC), with one required and two redundant. It is shipped with one power supply. You must purchase one or two additional power supplies if you want your four-slot chassis equipped for redundancy. • Eight-slot chassis - Accommodates four power supplies (AC or DC), with two required and two redundant. Because power is supplied over a common power bus, any power supply purchased in addition to the two required will provide backup for any supply that fails. Equipping the chassis with two additional power supplies provides full redundancy for both of the required power supplies. • 16-slot chassis - Accommodates eight power supplies (AC or DC), with four required and four redundant. Because power is supplied over a common power bus, any power supply purchased in addition to the four required will provide backup for any supply that fails. Equipping a 16-slot chassis with four additional power supplies provides full redundancy for all of the required power supplies. Follow the steps given below to install a power supply in the PowerConnect B-RX Series chassis. You need a small Phillips or flat-head screwdriver to perform this task. 1. Remove the blank power supply faceplate, and expose the empty power supply slot. 2. Remove the power supply from its packaging. 3. Insert the power supply into the empty power supply slot, using the guides provided on either side of the slot. NOTE Empty power supply slots should be covered with slot blanks. CAUTION Carefully follow the mechanical guides on each side of the power supply slot and make sure the power supply is properly inserted in the guides. Never insert the power supply upside down. 4. For the four-slot chassis, follow these steps while referring to Figure 11 on page 21, then continue with step 6. a. Slide the power supply along the card guide until the ejectors on either side of the module move close to the module front panel. b. After the power supply is fully inserted, push the power supply front panel toward the back of the chassis. This action causes the power supply connector to seat into the backplane connector. c. Push the ejectors in until they are flush with the face of the power supply. This action will fully latch the power supply in the backplane. d. Tighten the two screws at either end of the power supply front panel by pushing them in and turning them clockwise. If desired, tighten the screws further using the flat-head screwdriver. 20 PowerConnect B-RX Series Getting Started Guide 53-1001682-03
-
 1
1 -
2
-
3
-
4
-
5
-
6
-
7
-
8
-
9
-
10
-
11
-
12
-
13
-
14
-
 15
15 -
 16
16 -
 17
17 -
 18
18 -
 19
19 -
 20
20 -
 21
21 -
 22
22 -
 23
23 -
 24
24 -
 25
25 -
26
-
27
-
28
-
29
-
30
-
31
-
32
 |
 |
