Dell PowerEdge 7250 Information Update (.pdf) - Page 1
Dell PowerEdge 7250 Manual
 |
View all Dell PowerEdge 7250 manuals
Add to My Manuals
Save this manual to your list of manuals |
Page 1 highlights
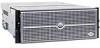
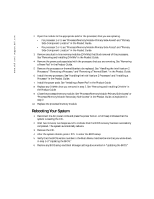
www.dell.com | support.dell.com About Cautions CAUTION: A CAUTION indicates a potential for property damage, personal injury, or death. Upgrading to Intel® Itanium® 2 9-MB Core Processors This document provides instructions for installing Intel Itanium 2 9-MB core processors with a minimum speed of 1.5 GHz in your Dell™ PowerEdge™ 7250 system. You must follow a special process to ensure the correct installation of the processors and their unique BIOS version. NOTE: See the Product Guide for detailed instructions on removing or installing components. NOTICE: All microprocessors must be of the same type and have the same L2 and L3 cache sizes. Updating the BIOS NOTE: Before starting, Dell recommends that you record any modifications made to the default settings of the BIOS setup and EFI Boot Manager. This process restores all default settings and deletes any Boot Manager options that have been added (including operating system boot options). 1 Download the latest 9M processor BIOS update from the Dell Support website at support.dell.com. Write down the BIOS version number for later reference. 2 Using the instructions in the Readme.txt file in the BIOS update, create a BIOS recovery CD. 3 Insert the CD into the CD drive. 4 Power down the system by pressing and holding the power button on the front panel for several seconds. 5 Unplug both AC power connectors. Installing the New Processors CAUTION: Many repairs may only be done by a certified service technician. You should only perform troubleshooting and simple repairs as authorized in your product documentation, or as directed by the online or telephone service and support team. Damage due to servicing that is not authorized by Dell is not covered by your warranty. Read and follow the safety instructions that came with the product. 1 Remove the processor/memory module. See "Removing the Processor/Memory Module" in the Product Guide. August 2004
-
 1
1 -
 2
2 -
 3
3
 |
 |
