Dell PowerEdge M1000e 8/4 Gbps FC SAN Module Getting Started Guide - Page 8
Using the CMC CLI to set the IP address, Enter, Ctrl-C, Task 2: Changing the IP address, ipAddrSet - blade enclosure user s guide
 |
View all Dell PowerEdge M1000e manuals
Add to My Manuals
Save this manual to your list of manuals |
Page 8 highlights
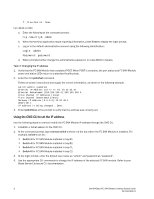
• Flow Control: None For LINUX or UNIX a. Enter the following at the command prompt: tip /dev/ttyb -9600 b. When the terminal application stops reporting information, press Enter to display the login prompt. c. Log in to the default administrative account using the following identification: Login: admin Password: password d. When prompted either change the administrative password, or press Ctrl-C to bypass. Task 2: Changing the IP address 1. Verify that the FC SAN Module has completed POST. When POST is complete, the port status and FC SAN Module power and status LEDs return to a standard healthy state. 2. Enter the CLI ipAddrSet command. Follow on-screen instructions and supply the correct information, as shown in the following example. switch:admin> ipaddrset Ethernet IP Address [10.77.77.77]:10.32.53.47 Ethernet Subnetmask [255.255.255.0]:255.255.240.0 Fibre Channel IP Addresss [none]: Fibre Channel Subnetmask [none]: Gateway IP Address [0.0.0.0]:10.32.48.1 DHCP [Off]: IP address is being changed...Done. 3. Enter ipAddrShow at the prompt to verify that the address was correctly set. Using the CMC CLI to set the IP address Use the following steps to connect modify the FC SAN Module IP address through the CMC CLI. 1. Establish a Telnet session to the CMC CLI. 2. At the command prompt, type connect switch-x where x is the bay where the FC SAN Module is installed. For example, switch-x can be: • Switch-3 for FC SAN Module installed in bay B1. • Switch-4 for FC SAN Module installed in bay B2. • Switch-5 for FC SAN Module installed in bay C1. • Switch-6 for FC SAN Module installed in bay C2. 3. At the login prompt, enter the default user name as "admin" and password as "password". 4. Use the appropriate CLI commands to change the IP address of the selected FC SAN module. Refer to your Blade Server Enclosure CLI documentation. 6 Dell 8/4Gbps FC SAN Module Getting Started Guide 53-1001963-01
-
 1
1 -
2
-
 3
3 -
 4
4 -
 5
5 -
 6
6 -
 7
7 -
 8
8 -
 9
9 -
 10
10 -
 11
11 -
 12
12 -
 13
13 -
14
-
15
-
16
-
17
-
18
-
19
-
20
-
21
-
22
-
23
-
24
-
25
-
26
-
27
-
28
-
29
-
30
-
31
-
32
-
33
-
34
-
35
-
36
-
37
-
38
-
39
-
40
-
41
-
42
-
43
-
44
-
45
-
46
-
47
-
48
-
49
-
50
-
51
-
52
-
53
-
54
-
55
-
56
-
57
-
58
-
59
-
60
-
61
-
62
-
63
-
64
-
65
-
66
-
67
-
68
-
69
-
70
-
71
-
72
-
73
-
74
-
75
-
76
-
77
-
78
-
79
-
80
-
81
-
82
-
83
-
84
-
85
-
86
-
87
-
88
-
89
-
90
-
91
-
92
-
93
-
94
-
95
-
96
-
97
-
98
-
99
-
100
-
101
-
102
-
103
-
104
-
105
-
106
-
107
-
108
-
109
-
110
-
111
-
112
-
113
-
114
-
115
-
116
-
117
-
118
-
119
-
120
-
121
-
122
-
123
-
124
-
125
-
126
-
127
-
128
-
129
-
130
-
131
-
132
-
133
-
134
-
135
-
136
-
137
-
138
 |
 |
