Dell PowerEdge M710HD Web Tools Administrator’s Guide - Page 231
Configuring dynamic load sharing, Lossless dynamic load sharing
 |
View all Dell PowerEdge M710HD manuals
Add to My Manuals
Save this manual to your list of manuals |
Page 231 highlights
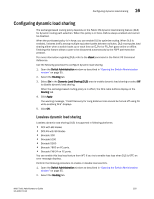
DRAFT: BROCADE CONFIDENTIAL Configuring dynamic load sharing 16 Configuring dynamic load sharing The exchange-based routing policy depends on the Fabric OS dynamic load sharing feature (DLS) for dynamic routing path selection. When this policy is in force, DLS is always enabled and cannot be disabled. When the port-based policy is in force, you can enable DLS to optimize routing. When DLS is enabled, it shares traffic among multiple equivalent paths between switches. DLS recomputes load sharing either when a switch boots up or each time an E_Port or FX_Port goes online or offline. Enabling this feature allows a path to be discovered automatically by the FSPF path-selection protocol. For more information regarding DLS, refer to the dlsset command in the Fabric OS Command Reference. Use the following procedure to configure dynamic load sharing. 1. Open the Switch Administration window as described in "Opening the Switch Administration window" on page 35. 2. Select the Routing tab. 3. Select On in the Dynamic Load Sharing (DLS) area to enable dynamic load sharing or select Off to disable dynamic load sharing. When the exchange-based routing policy is in effect, the DLS radio buttons display on the Routing tab 4. Click Apply. The warning message, "Credit Recovery for Long distance links should be turned off using CLI while enabling DLS" displays. 5. Click OK. Lossless dynamic load sharing Lossless dynamic load sharing (DLS) is supported in following platforms: • DCX with 8G blades • DCX-4S with 8G blades • Brocade 300 • Brocade 5100 • Brocade 5300 • Brocade 7800 on FC ports. • Brocade FX8-24 on FC ports. You can enable this loss less feature from WT. If you try to enable loss less when DLS is OFF, an error message displays. Perform the following procedure to enable or disable loss less DLS. 1. Open the Switch Administration window as described in "Opening the Switch Administration window" on page 35. 2. Select the Routing tab. Web Tools Administrator's Guide 203 53-1001772-01
-
 1
1 -
2
-
3
-
4
-
5
-
6
-
7
-
8
-
9
-
10
-
11
-
12
-
13
-
14
-
15
-
16
-
17
-
18
-
19
-
20
-
21
-
22
-
23
-
24
-
25
-
26
-
27
-
28
-
29
-
30
-
31
-
32
-
33
-
34
-
35
-
36
-
37
-
38
-
39
-
40
-
41
-
42
-
43
-
44
-
45
-
46
-
47
-
48
-
49
-
50
-
51
-
52
-
53
-
54
-
55
-
56
-
57
-
58
-
59
-
60
-
61
-
62
-
63
-
64
-
65
-
66
-
67
-
68
-
69
-
70
-
71
-
72
-
73
-
74
-
75
-
76
-
77
-
78
-
79
-
80
-
81
-
82
-
83
-
84
-
85
-
86
-
87
-
88
-
89
-
90
-
91
-
92
-
93
-
94
-
95
-
96
-
97
-
98
-
99
-
100
-
101
-
102
-
103
-
104
-
105
-
106
-
107
-
108
-
109
-
110
-
111
-
112
-
113
-
114
-
115
-
116
-
117
-
118
-
119
-
120
-
121
-
122
-
123
-
124
-
125
-
126
-
127
-
128
-
129
-
130
-
131
-
132
-
133
-
134
-
135
-
136
-
137
-
138
-
139
-
140
-
141
-
142
-
143
-
144
-
145
-
146
-
147
-
148
-
149
-
150
-
151
-
152
-
153
-
154
-
155
-
156
-
157
-
158
-
159
-
160
-
161
-
162
-
163
-
164
-
165
-
166
-
167
-
168
-
169
-
170
-
171
-
172
-
173
-
174
-
175
-
176
-
177
-
178
-
179
-
180
-
181
-
182
-
183
-
184
-
185
-
186
-
187
-
188
-
189
-
190
-
191
-
192
-
193
-
194
-
195
-
196
-
197
-
198
-
199
-
200
-
201
-
202
-
203
-
204
-
205
-
206
-
207
-
208
-
209
-
210
-
211
-
212
-
213
-
214
-
215
-
216
-
217
-
218
-
219
-
220
-
221
-
222
-
223
-
224
-
225
-
 226
226 -
 227
227 -
 228
228 -
 229
229 -
 230
230 -
 231
231 -
 232
232 -
 233
233 -
 234
234 -
 235
235 -
 236
236 -
237
-
238
-
239
-
240
-
241
-
242
-
243
-
244
-
245
-
246
-
247
-
248
-
249
-
250
-
251
-
252
-
253
-
254
-
255
-
256
-
257
-
258
-
259
-
260
-
261
-
262
-
263
-
264
-
265
-
266
-
267
-
268
-
269
-
270
-
271
-
272
-
273
-
274
-
275
-
276
-
277
-
278
-
279
-
280
-
281
-
282
-
283
-
284
-
285
-
286
-
287
-
288
-
289
-
290
-
291
-
292
-
293
-
294
-
295
-
296
-
297
-
298
-
299
-
300
-
301
-
302
-
303
-
304
-
305
-
306
-
307
-
308
-
309
-
310
 |
 |