Dell PowerEdge T610 Information Update - Processor Installation - Page 8
otate the socket-release lever down until it snaps into place., See CAUTION - specifications
 |
View all Dell PowerEdge T610 manuals
Add to My Manuals
Save this manual to your list of manuals |
Page 8 highlights
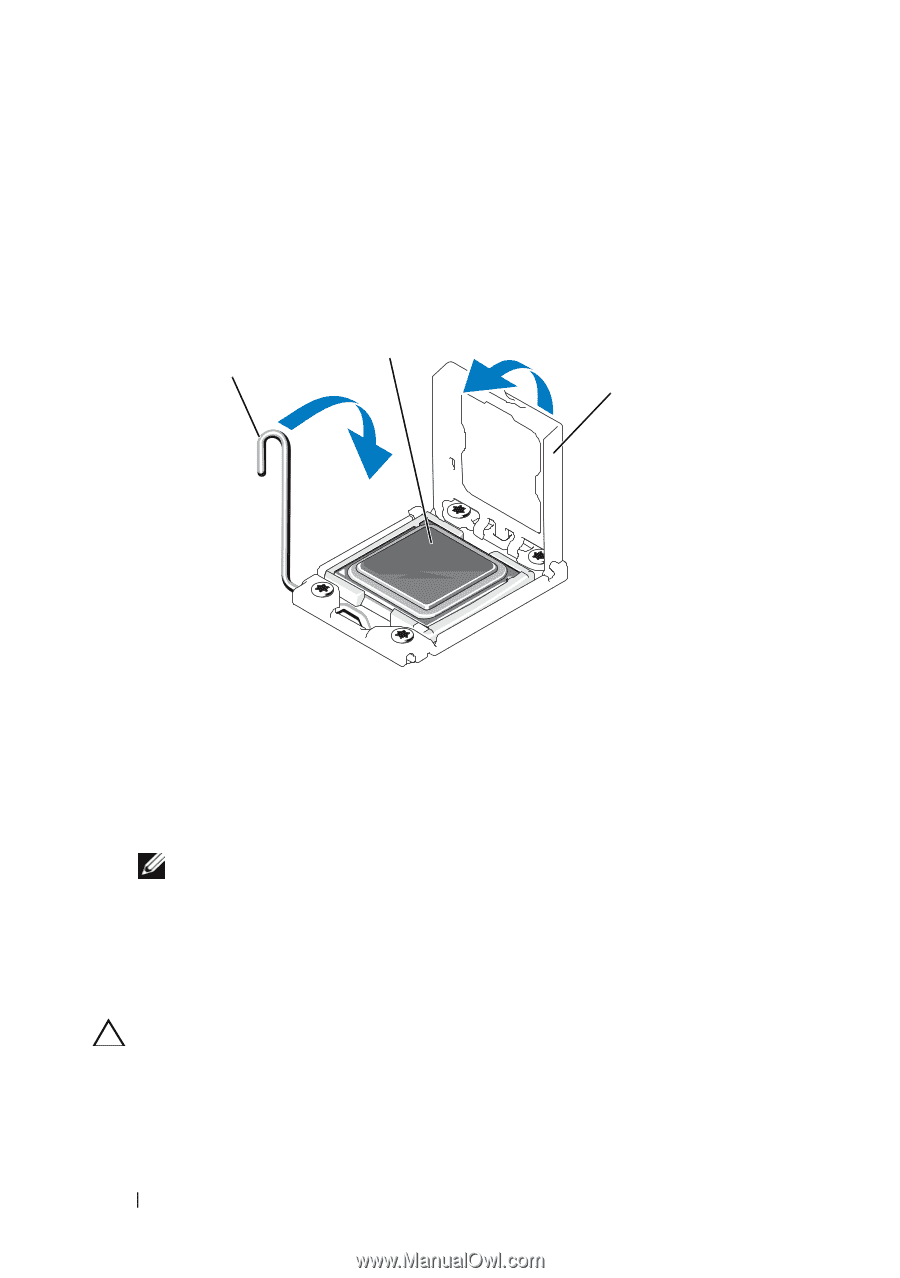
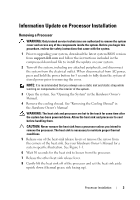
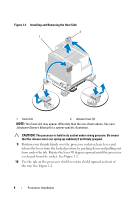
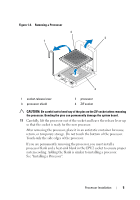
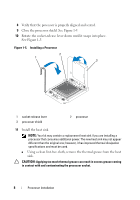
8 Verify that the processor is properly aligned and seated. 9 Close the processor shield. See Figure 1-5. 10 Rotate the socket-release lever down until it snaps into place. See Figure 1-5. Figure 1-5. Installing a Processor 2 1 3 1 socket-release lever 3 processor shield 2 processor 11 Install the heat sink. NOTE: Your kit may contain a replacement heat sink if you are installing a processor that consumes additional power. The new heat sink may not appear different than the original one; however, it has improved thermal dissipation specifications and must be used. a Using a clean lint-free cloth, remove the thermal grease from the heat sink. CAUTION: Applying too much thermal grease can result in excess grease coming in contact with and contaminating the processor socket. 8 Processor Installation
-
 1
1 -
2
-
 3
3 -
 4
4 -
 5
5 -
 6
6 -
 7
7 -
 8
8 -
 9
9 -
 10
10 -
 11
11 -
 12
12 -
 13
13 -
14
-
15
-
16
-
17
-
18
-
19
-
20
-
21
-
22
-
23
-
24
-
25
-
26
-
27
-
28
-
29
-
30
-
31
-
32
-
33
-
34
-
35
-
36
-
37
-
38
-
39
-
40
-
41
-
42
-
43
-
44
-
45
-
46
-
47
-
48
-
49
-
50
-
51
-
52
-
53
-
54
-
55
-
56
-
57
-
58
-
59
-
60
-
61
-
62
-
63
-
64
-
65
-
66
-
67
-
68
-
69
-
70
 |
 |