Dell PowerVault 210S Dell PowerVault 2xxS Storage Systems SCSI Backplane Board - Page 13
Install the Hard-Disk Drives - configuration
 |
View all Dell PowerVault 210S manuals
Add to My Manuals
Save this manual to your list of manuals |
Page 13 highlights
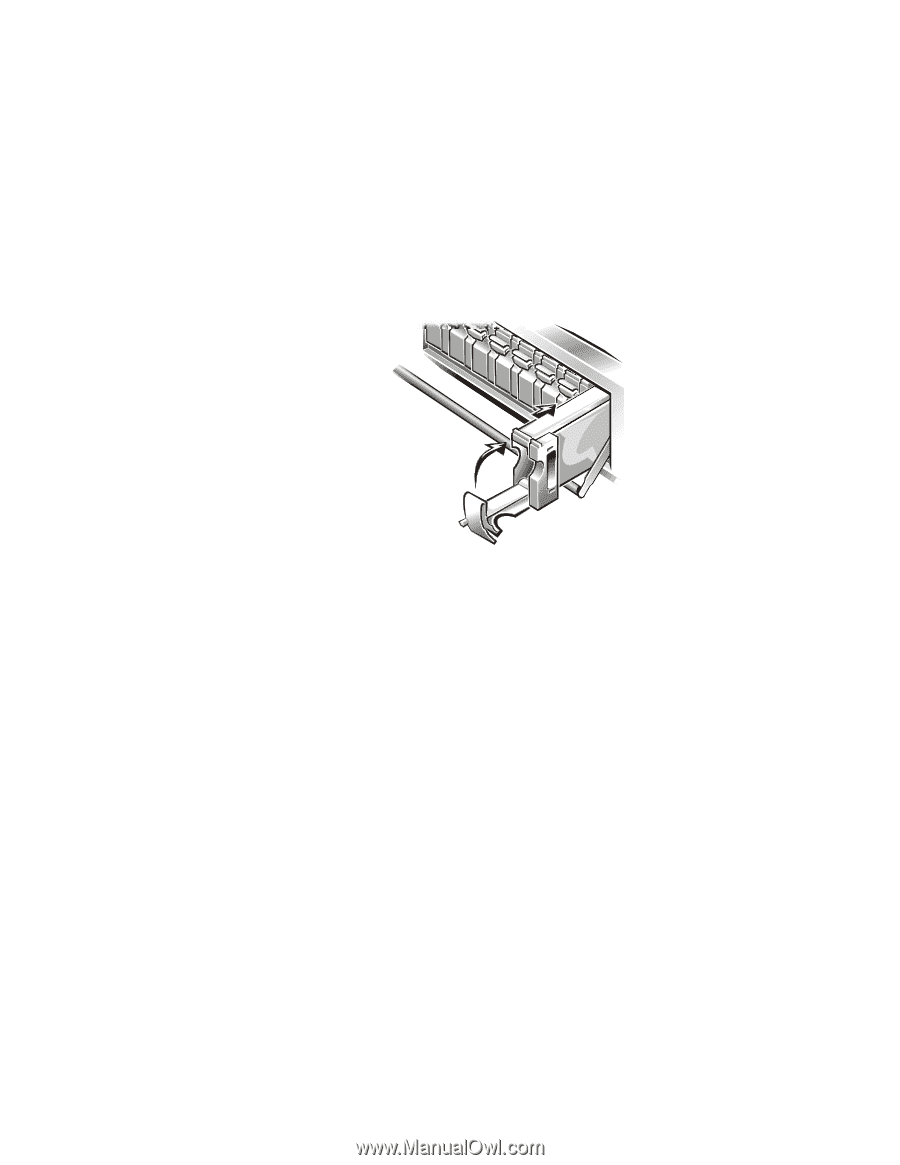
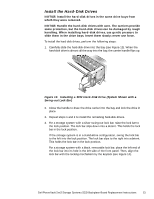
Install the Hard-Disk Drives NOTICE: Install the hard-disk drives in the same drive bays from which they were removed. NOTICE: Handle the hard-disk drives with care. The carriers provide some protection, but the hard-disk drives can be damaged by rough handling. When installing hard-disk drives, use gentle pressure to slide them in the drive bays. Insert them slowly; never use force. To install the hard-disk drives, perform the following steps: 1. Carefully slide the hard-disk drive into the bay (see Figure 13). When the hard-disk drive is almost all the way into the bay, the carrier handle flips up. Figure 13. Installing a SCSI Hard-Disk Drive (System Shown with a Swing-out Lock Bar) 2. Close the handle to draw the drive carrier into the bay and lock the drive in place. 3. Repeat steps 1 and 2 to install the remaining hard-disk drives. 4. For a storage system with a silver swing-out lock bar, raise the lock bar to the lock position. The lock bar slips down into a detent. This holds the lock bar in the lock position. If the storage system is in a stand-alone configuration, swing the lock bar to the left into the lock position. The lock bar slips to the right into a detent. This holds the lock bar in the lock position. For a storage system with a black, removable lock bar, place the left end of the lock bar into its hole in the left side of the front panel. Then, align the lock bar with the locking mechanism by the keylock (see Figure 14). Dell PowerVault 2xxS Storage Systems SCSI Backplane Board Replacement Instructions 13
-
 1
1 -
2
-
3
-
4
-
5
-
6
-
7
-
 8
8 -
 9
9 -
 10
10 -
 11
11 -
 12
12 -
 13
13 -
 14
14
 |
 |