Dell PowerVault 775N Installing the Storage Manager for Server Appliances Soft - Page 2
Sharing and Security, Share this folder, Share name, Tools, Map Network Drive, Drive, Folder, Finish - documentation
 |
View all Dell PowerVault 775N manuals
Add to My Manuals
Save this manual to your list of manuals |
Page 2 highlights
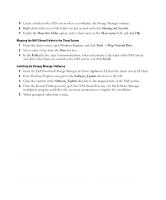
5 Create a folder on the NAS system where you will place the Storage Manager software. 6 Right-click on the icon of the folder you just created and select Sharing and Security. 7 Enable the Share this folder option, enter a share name in the Share name field, and click OK. Mapping the NAS Shared Folder to the Client System 1 From the client system, open Windows Explorer, and click Tools → Map Network Drive. 2 Select a drive letter from the Drive list box. 3 In the Folder list box, type \\systemname\share, where systemname is the name of the NAS system and share is the share you created on the NAS system, and click Finish. Installing the Storage Manager Software 1 Insert the Dell PowerVault Storage Manager for Server Appliances CD into the client system CD drive. 2 From Windows Explorer, navigate to the Software_Update directory on the CD. 3 Copy the contents of the Software_Update directory to the mapped share of the NAS system. 4 From the Remote Desktop session, go to the NAS shared directory, run the Software Manager installation program, and follow the on-screen instructions to complete the installation. 5 When prompted, reboot the system. Information in this document is subject to change without notice. © 2005 Dell Inc. All rights reserved. Printed in the U.S.A. Reproduction in any manner whatsoever without the written permission of Dell Inc. is strictly forbidden. Trademarks used in this text: Dell, PowerVault, and the DELL logo are trademarks of Dell Inc.; Microsoft, Windows, and Windows NT are registered trademarks of Microsoft Corporation. Other trademarks and trade names may be used in this document to refer to either the entities claiming the marks and names or their products. Dell Inc. disclaims any proprietary interest in trademarks and trade names other than its own.
-
 1
1 -
 2
2 -
 3
3 -
 4
4
 |
 |
