Dell Powerconnect W-ClearPass Hardware Appliances W-ClearPass Policy Manager 6
Dell Powerconnect W-ClearPass Hardware Appliances Manual
 |
View all Dell Powerconnect W-ClearPass Hardware Appliances manuals
Add to My Manuals
Save this manual to your list of manuals |
Dell Powerconnect W-ClearPass Hardware Appliances manual content summary:
- Dell Powerconnect W-ClearPass Hardware Appliances | W-ClearPass Policy Manager 6 - Page 1
Dell Networking W-ClearPass Policy Manager 6.0 Quick Start Guide - Dell Powerconnect W-ClearPass Hardware Appliances | W-ClearPass Policy Manager 6 - Page 2
DELL™ logo, and PowerConnect™ are trademarks of Dell Inc. All rights reserved. Specifications in this manual are subject to change without notice. Originated in the USA. All other trademarks are the property of Mar 2013 | 0511278-01 Dell Networking W-ClearPass Policy Manager 6.0 | Quick Start Guide - Dell Powerconnect W-ClearPass Hardware Appliances | W-ClearPass Policy Manager 6 - Page 3
Help 10 Checking Basic Services 11 802.1x Wireless Use Case 13 Configuring the Service 13 Web Based Authentication Use Case 19 Configuring the Service 19 MAC Authentication Use Case 25 Configuring the Service 26 Dell Networking W-ClearPass Policy Manager 6.0 | Quick Start Guide 3 - Dell Powerconnect W-ClearPass Hardware Appliances | W-ClearPass Policy Manager 6 - Page 4
4 Dell Networking W-ClearPass Policy Manager 6.0 | Quick Start Guide - Dell Powerconnect W-ClearPass Hardware Appliances | W-ClearPass Policy Manager 6 - Page 5
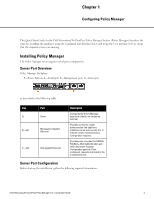
Manager This Quick Start Guide for the Dell Networking W-ClearPass Policy Manager System (Policy Manager) describes the steps for installing the appliance using the Command Line Interface (CLI) and using the User Interface (UI) to ensure that the required services are running. Installing Policy - Dell Powerconnect W-ClearPass Hardware Appliances | W-ClearPass Policy Manager 6 - Page 6
Manager appliance: 1. Connect and power on. Using the null modem cable provided, connect a serial port on the appliance to a terminal, then connect power and switch on. The appliance immediately Enter Primary DNS: 198.168.5.3 6 Dell Networking W-ClearPass Policy Manager 6.0 | Quick Start Guide - Dell Powerconnect W-ClearPass Hardware Appliances | W-ClearPass Policy Manager 6 - Page 7
cluster administration and management of the appliance. 5. Change system date/time. the date time configuration options. 1) Set date time manually 2) Set date time by configuring NTP servers Enter the Appendix A: Command Line Interface in the User Guide for more detailed information on the CLI. The - Dell Powerconnect W-ClearPass Hardware Appliances | W-ClearPass Policy Manager 6 - Page 8
If you are using Active Directory to authenticate users, be sure to join the Policy Manager appliance to that domain as well. ad netjoin [domain NETBIOS name] . [domain NETBIOS name] Optional. 8 Dell Networking W-ClearPass Policy Manager 6.0 | Quick Start Guide - Dell Powerconnect W-ClearPass Hardware Appliances | W-ClearPass Policy Manager 6 - Page 9
hostname you configured during the initial configuration). 2. Enter License Key. 3. Click on the Activate Now link. 4. Activate the product. If the appliance is connected to the Internet, click on the Activate Now button. If not, click on the Download button to download the Activation Request Token - Dell Powerconnect W-ClearPass Hardware Appliances | W-ClearPass Policy Manager 6 - Page 10
use the Edit Admin User popup to change the administration password. Accessing Help The Policy Manager User Guide (in PDF format) is built within the help system here: https:///tipshelp/html/en/ ( of any screen. 10 Dell Networking W-ClearPass Policy Manager 6.0 | Quick Start Guide - Dell Powerconnect W-ClearPass Hardware Appliances | W-ClearPass Policy Manager 6 - Page 11
and connection parameters. l The Service Control tab displays all services and their current status. If a service is service from the command line, service start or all services from the command line, service 802.1x, WebAuth, and MAC Bypass Services: 802.1x Wireless Use Case on page - Dell Powerconnect W-ClearPass Hardware Appliances | W-ClearPass Policy Manager 6 - Page 12
12 Dell Networking W-ClearPass Policy Manager 6.0 | Quick Start Guide - Dell Powerconnect W-ClearPass Hardware Appliances | W-ClearPass Policy Manager 6 - Page 13
the steps below to configure this basic 802.1X service: 1. Create the Service The following table provides the model for information presented in Use Cases, which assume the reader's ability to extrapolate from a sequence of navigational instructions (left column) and settings (in summary form in - Dell Powerconnect W-ClearPass Hardware Appliances | W-ClearPass Policy Manager 6 - Page 14
Case, you select a Service that supports 802.1X wireless requests. Table 1: 802.1X - Create Service Navigation and Settings Navigation Settings Create a new Service: l Services > l Add Service (link) > Name the Service and select a pre-configured Service Type: l Service (tab) > l Type (selector - Dell Powerconnect W-ClearPass Hardware Appliances | W-ClearPass Policy Manager 6 - Page 15
the same. Table 3: 802.1X - Configure Authorization Navigation and Settings Navigation Settings l Configure Service level authorization source. In this use case there is nothing to configure. Click the Next to which it maps: Dell Networking W-ClearPass Policy Manager 6.0 | Quick Start Guide 15 - Dell Powerconnect W-ClearPass Hardware Appliances | W-ClearPass Policy Manager 6 - Page 16
working in the Mapping Rules tab, click the Save button (in the Mapping Rules tab) Add the new Role Mapping Policy to the Service: l Back in Roles (tab) > l Role Mapping Policy (selector): RMP_ DEPARTMENT > l Upon completion, click Next (to Posture) 5. Configure a Posture Server 16 Dell Networking - Dell Powerconnect W-ClearPass Hardware Appliances | W-ClearPass Policy Manager 6 - Page 17
policies). Currently, Policy Manager supports the following posture server interface: connection information for the RADIUS posture server. l Next (button): from Primary Server to Backup Server. l To complete your work in these tabs, click the Save button. Add the new Posture Server to the Service - Dell Powerconnect W-ClearPass Hardware Appliances | W-ClearPass Policy Manager 6 - Page 18
Role_ Based_Allow_Access_ Policy For instructions about how to build such an Enforcement Policy, refer to Configuring Enforcement Policies"Configuring Enforcement Policies" in the Dell Networking W-ClearPass Policy Manager User Guide. 7. Save the Service. Click Save. The Service now appears at the - Dell Powerconnect W-ClearPass Hardware Appliances | W-ClearPass Policy Manager 6 - Page 19
Use Case This Service supports known Guests with inadequate 802.1X supplicants or posture agents. The following figure illustrates the overall flow of control for this Policy Manager Service. Figure 2: that returns posture data. Dell Networking W-ClearPass Policy Manager 6.0 | Quick Start Guide 19 - Dell Powerconnect W-ClearPass Hardware Appliances | W-ClearPass Policy Manager 6 - Page 20
it in this Use Case, checks any Windows XP clients to verify the most current Service Pack). Table 8: Local Policy Manager Database Navigation and Settings Navigation Settings Select the local you reach Enforcement Policy). 20 Dell Networking W-ClearPass Policy Manager 6.0 | Quick Start Guide - Dell Powerconnect W-ClearPass Hardware Appliances | W-ClearPass Policy Manager 6 - Page 21
Validator > l Configure (button) > Configure the Validator: l Windows System Health Validator (popup) > l Enable all Windows operating systems (check box) > l Enable Service Pack levels for Windows 7, Vista, XP Server 2008, Server 2008 R2, and Server 2003 (check boxes) > l Save (button) > Dell - Dell Powerconnect W-ClearPass Hardware Appliances | W-ClearPass Policy Manager 6 - Page 22
finished working in the Rules tab, click the Next button. Add the new Posture Policy to the Service: Back in Posture (tab) > Internal Policies (selector): IPP_ UNIVERSAL_XP, then click the Add button and limited guest access. 22 Dell Networking W-ClearPass Policy Manager 6.0 | Quick Start Guide - Dell Powerconnect W-ClearPass Hardware Appliances | W-ClearPass Policy Manager 6 - Page 23
Setting Add a new Enforcement Policy: l Enforcement (tab) > l Enforcement Policy (selector): SNMP_POLICY l Upon completion, click Save. 6. Save the Service. Click Save. The Service now appears at the bottom of the Services list. Dell Networking W-ClearPass Policy Manager 6.0 | Quick Start - Dell Powerconnect W-ClearPass Hardware Appliances | W-ClearPass Policy Manager 6 - Page 24
24 Dell Networking W-ClearPass Policy Manager 6.0 | Quick Start Guide - Dell Powerconnect W-ClearPass Hardware Appliances | W-ClearPass Policy Manager 6 - Page 25
Case This Service supports Network Devices, such as printers or handhelds. The following image illustrates the overall flow of control for this Policy Manager Service. In this service, an audit Authentication for Network Devices Dell Networking W-ClearPass Policy Manager 6.0 | Quick Start Guide 25 - Dell Powerconnect W-ClearPass Hardware Appliances | W-ClearPass Policy Manager 6 - Page 26
can select any type of authentication/authorization source for a MAC Authentication service. Only a Static Host list of type MAC Address List or MAC Networking W-ClearPass Policy Manager User Guide for more information. You can also select any other supported type of authentication source. Table 12 - Dell Powerconnect W-ClearPass Hardware Appliances | W-ClearPass Policy Manager 6 - Page 27
NESSUS) and Posture (NESSUS), then resets the connection (or the switch reauthenticates after a short session tab, click Save. Unlike the 802.1X Service, which uses the same Enforcement Policy (but uses Save the Service. Click Save. The Service now appears at the bottom of the Services list. Dell - Dell Powerconnect W-ClearPass Hardware Appliances | W-ClearPass Policy Manager 6 - Page 28
28 Dell Networking W-ClearPass Policy Manager 6.0 | Quick Start Guide
-
 1
1 -
 2
2 -
 3
3 -
 4
4 -
 5
5 -
 6
6 -
 7
7 -
8
-
9
-
10
-
11
-
12
-
13
-
14
-
15
-
16
-
17
-
18
-
19
-
20
-
21
-
22
-
23
-
24
-
25
-
26
-
27
-
28
 |
 |

Dell Networking
W-ClearPass
Policy Manager 6.0
Quick Start Guide