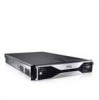
Dell Precision R5400 Setup and Quick Reference Guide - Page 38
Troubleshooting Software and Hardware Problems, Windows Vista, Windows XP
 |
View all Dell Precision R5400 manuals
Add to My Manuals
Save this manual to your list of manuals |
Page 38 highlights
• If the hard drive is your boot device, ensure that the cables are connected and that the drive is installed properly and partitioned as a boot device. • Enter the system setup program and ensure that the boot sequence information is correct (see your Service Manual on the Dell Support website at support.dell.com). N O T I M E R TICK I N T E R R U P T - A chip on the system board might be malfunctioning or system board failure (see "Contacting Dell" on page 71 for assistance). NOTICE - HARD DRIVE SELF MONITORING SYSTEM HAS REPORTED THAT A PARAMETER HAS EXCEEDED ITS NORMAL OPERATING RANGE. DELL RECOMMENDS THAT YOU BACK UP YOUR DATA REGULARLY. A PARAMETER OUT OF RANGE MAY OR M A Y N O T I N D I C A T E A P O T E N T I A L H A R D D R I V E P R O B L E M . - S.M.A.R.T error, possible hard drive failure. This feature can be enabled or disabled in BIOS setup. Troubleshooting Software and Hardware Problems If a device is either not detected during the operating system setup or is detected, but incorrectly configured, you can use the Hardware Troubleshooter to resolve the incompatibility. Windows Vista: 1 Click the Windows Vista start button , and click Help and Support. 2 Type hardware troubleshooter in the search field and press to start the search. 3 In the search results, select the option that best describes the problem and follow the remaining troubleshooting steps. Windows XP: 1 Click Start→ Help and Support. 2 Type hardware troubleshooter in the search field and press to start the search. 3 In the Fix a Problem section, click Hardware Troubleshooter. 4 In the Hardware Troubleshooter list, select the option that best describes the problem and click Next to follow the remaining troubleshooting steps. 38 Troubleshooting
-
 1
1 -
2
-
3
-
4
-
5
-
6
-
7
-
8
-
9
-
10
-
11
-
12
-
13
-
14
-
15
-
16
-
17
-
18
-
19
-
20
-
21
-
22
-
23
-
24
-
25
-
26
-
27
-
28
-
29
-
30
-
31
-
32
-
 33
33 -
 34
34 -
 35
35 -
 36
36 -
 37
37 -
 38
38 -
 39
39 -
 40
40 -
 41
41 -
 42
42 -
 43
43 -
44
-
45
-
46
-
47
-
48
-
49
-
50
-
51
-
52
-
53
-
54
-
55
-
56
-
57
-
58
-
59
-
60
-
61
-
62
-
63
-
64
-
65
-
66
-
67
-
68
-
69
-
70
-
71
-
72
-
73
-
74
-
75
-
76
 |
 |
